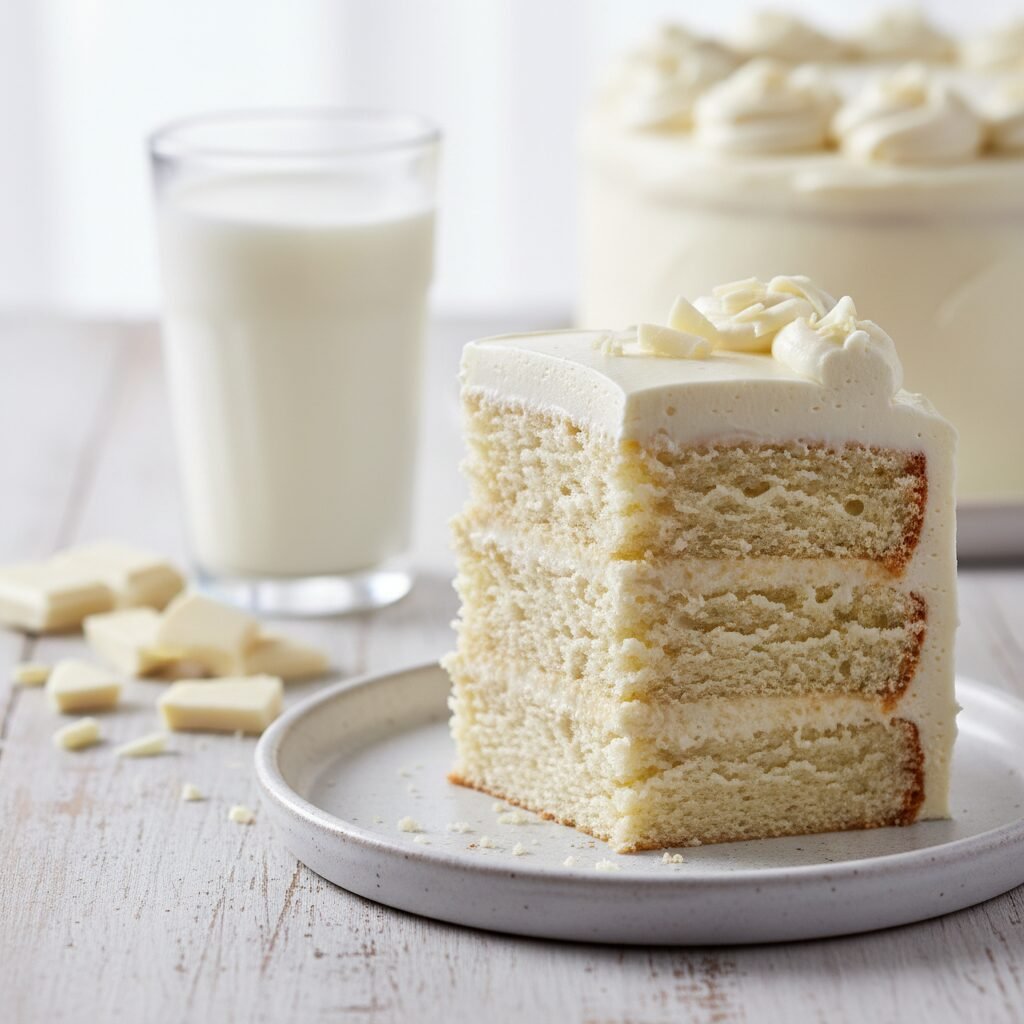
White Chocolate Cake Gluten Free Recipe
Say goodbye to dry, crumbly gluten-free bakes! This white chocolate cake is velvety soft, incredibly moist, and tastes just like a high-end wedding cake. It is the perfect centerpiece for your next celebration.
30 minutes
35 minutes
1 hour 30 minutes
12 servings (Two 8-inch round cakes)
Dessert
Baking
American
Gluten Free
Let’s be real for a second: finding a gluten-free cake that doesn’t taste like cardboard or crumble the moment you look at it can feel like searching for a unicorn. But today, my friends, we have found that unicorn. This Gluten-Free White Chocolate Cake is everything you have been dreaming of and more. It is lush, it is velvety, and it has that distinct, milky sweetness that only real white chocolate can provide.
I created this recipe because I was tired of missing out on the elegant, bakery-style cakes at parties. You know the ones—tall, white, and pristine. I wanted to recreate that magic in my own kitchen, but without the gluten. The secret here isn’t just swapping flour; it is incorporating melted white chocolate directly into the batter. This adds a richness and a density that mimics the structure usually provided by gluten, resulting in a crumb that is tender yet sturdy enough to stack.
Whether you are baking for a little one’s birthday, a bridal shower, or just because you survived the week (you go, mama!), this cake is going to impress. The best part? No one will even guess it is gluten-free. It is just that good. So, grab your apron and let’s bake something beautiful!
History & Origins
While cake itself has been around for centuries, white chocolate is a relatively modern invention. It was actually created in Switzerland in the 1930s by Nestlé. The story goes that they were looking for a way to use up excess cocoa butter from their chocolate production. They mixed it with milk powder and sugar, and voilà—white chocolate was born! It was originally known as ‘Galak’ and was marketed as a vitamin-enriched supplement for children.
As for gluten-free baking, it has come a long, long way from the dense health food store bricks of the 1990s. With the rise of celiac disease awareness and gluten sensitivity, pastry chefs began experimenting with rice flours, starches, and gums to replicate the texture of wheat. This recipe marries that modern culinary science with the Swiss tradition of creamy white chocolate, resulting in a dessert that feels timeless yet innovative.
Why This Recipe Works
The biggest challenge with gluten-free baking is moisture retention and structure. Wheat flour provides a stretchy protein network (gluten) that holds gas bubbles and keeps cakes tall and fluffy. Without it, we need backup. This is where the melted white chocolate plays a hero role. White chocolate is high in cocoa butter, a fat that is solid at room temperature. When mixed into the batter, it provides a unique richness that oil or butter alone cannot achieve.
Furthermore, we use a combination of sour cream and whole milk. The acidity in the sour cream tenderizes the protein in the eggs and flour blend, ensuring a soft crumb, while the fat content adds moisture. We also rely on a high-quality 1:1 gluten-free flour blend that contains xanthan gum. The gum acts as the binder, mimicking the elasticity of gluten. By beating the butter and sugar until pale and fluffy (a process called creaming), we mechanically trap air into the batter, which expands in the oven to give the cake lift.
Why You’ll Love This Recipe
- ✓Incredibly moist texture that stays fresh for days
- ✓Rich, milky white chocolate flavor in every bite
- ✓Sturdy enough for layer cakes and decorating
- ✓100% Gluten-Free and Celiac friendly
- ✓Perfect for weddings, birthdays, and showers
- ✓Topped with a silky, pipeable buttercream
Equipment You’ll Need
- ✓Two 8-inch round cake pans
- ✓Stand mixer with paddle attachment or electric hand mixer
- ✓Large mixing bowls
- ✓Heat-proof bowl (for melting chocolate)
- ✓Parchment paper
- ✓Wire cooling rack
- ✓Rubber spatula
- ✓Offset spatula for frosting
Ingredients
- ✓For the Cake:
- ✓6 oz high-quality white chocolate, chopped (do not use chips)
- ✓1/2 cup boiling water
- ✓1 cup unsalted butter, softened to room temperature
- ✓1 1/2 cups granulated white sugar
- ✓4 large eggs, room temperature
- ✓1 tablespoon pure vanilla extract
- ✓2 1/2 cups Gluten-Free Measure-for-Measure Flour (ensure it contains xanthan gum)
- ✓1 teaspoon baking powder
- ✓1/2 teaspoon baking soda
- ✓1/2 teaspoon salt
- ✓1 cup buttermilk or sour cream, room temperature
- ✓For the White Chocolate Buttercream:
- ✓6 oz high-quality white chocolate, melted and cooled slightly
- ✓1 1/2 cups unsalted butter, softened
- ✓4 cups powdered sugar (confectioners’ sugar)
- ✓2-3 tablespoons heavy cream
- ✓1 teaspoon vanilla extract
- ✓Pinch of salt
Instructions
- Preheat your oven to 350°F (175°C). Grease two 8-inch round cake pans generously with butter and line the bottoms with parchment paper. This step is crucial for gluten-free cakes to prevent sticking!
- Place the chopped white chocolate (6 oz) in a heat-proof bowl. Pour the 1/2 cup of boiling water over it. Let it sit for 2 minutes, then whisk gently until completely smooth and melted. Set this aside to cool to room temperature. It needs to be liquid but not hot.
- In a medium bowl, whisk together the gluten-free flour, baking powder, baking soda, and salt. Set aside.
- In the bowl of your stand mixer fitted with the paddle attachment, cream the softened butter and granulated sugar together on medium-high speed for about 3-5 minutes. You want it pale, fluffy, and aerated.
- Add the eggs one at a time, beating well after each addition. Scrape down the sides of the bowl with a rubber spatula. Mix in the vanilla extract.
- Turn the mixer to low speed. Add the cooled white chocolate and water mixture to the butter/sugar mixture. Mix until combined.
- With the mixer still on low, add the dry ingredients in three parts, alternating with the buttermilk (or sour cream). Start with flour, then buttermilk, then flour, then buttermilk, ending with flour. Mix only until just combined. Do not overmix, or the cake can become gummy.
- Divide the batter evenly between the two prepared cake pans. Smooth the tops with a spatula.
- Bake for 30-35 minutes, or until a toothpick inserted into the center comes out clean or with just a few moist crumbs. The tops should be golden but not browned.
- Remove from the oven and let the cakes cool in the pans for about 10-15 minutes. Then, carefully invert them onto a wire rack to cool completely before frosting. If you frost a warm cake, the buttercream will melt!
- To make the Frosting: Beat the softened butter on medium-high speed until creamy (about 3 minutes). Add the melted (and cooled!) white chocolate and beat until combined.
- Gradually add the powdered sugar, one cup at a time, mixing on low speed. Once all sugar is added, increase speed to high and whip for 2 minutes.
- Add the vanilla, salt, and 1 tablespoon of heavy cream. Beat again. If the frosting is too stiff, add more cream one tablespoon at a time until you reach a spreadable consistency.
- Frost the cooled cakes, stacking one on top of the other. Garnish with white chocolate shavings or fresh berries if desired.
Expert Cooking Tips
- ✓Use Bars, Not Chips: White chocolate chips contain stabilizers that prevent them from melting smoothly. Always use high-quality baking bars (like Lindt or Ghirardelli) for the batter and frosting.
- ✓Room Temperature Ingredients: Ensure your butter, eggs, and buttermilk are at room temperature. Cold ingredients will cause the melted white chocolate to seize up and create lumps in your batter.
- ✓Weigh Your Flour: If possible, use a kitchen scale. Gluten-free flour can be easily packed down, leading to a dry cake. If using a cup, spoon the flour in and level it off.
- ✓Cool the Chocolate: When making the frosting, the melted white chocolate must be cool to the touch (but still fluid). If it is hot, it will melt your butter and ruin the frosting structure.
- ✓Parchment is Key: Gluten-free cakes are more delicate than wheat cakes. Parchment paper on the bottom of the pan ensures a perfect release every time.
Substitutions and Variations
If you need to make this recipe dairy-free, it is tricky but possible! Swap the butter for a high-quality vegan butter block (not tub margarine). Use dairy-free white chocolate (brands like Pascha or Enjoy Life make these). Replace the buttermilk with a mix of almond milk and a teaspoon of lemon juice. Note that the texture might be slightly less fluffy.
If you cannot find buttermilk, you can easily make your own sour milk: add 1 tablespoon of white vinegar or lemon juice to a measuring cup, then fill to the 1-cup line with regular milk. Let it sit for 5 minutes until it curdles slightly.
Common Mistakes to Avoid
The most common mistake is overheating the white chocolate. White chocolate burns very easily. When melting it for the frosting, do it in short 20-second bursts in the microwave, stirring in between. Another mistake is overmixing the batter once the flour is added. Even though there is no gluten, overmixing can knock out the air bubbles you created during the creaming process, leading to a dense, rubbery cake.
Serving Suggestions
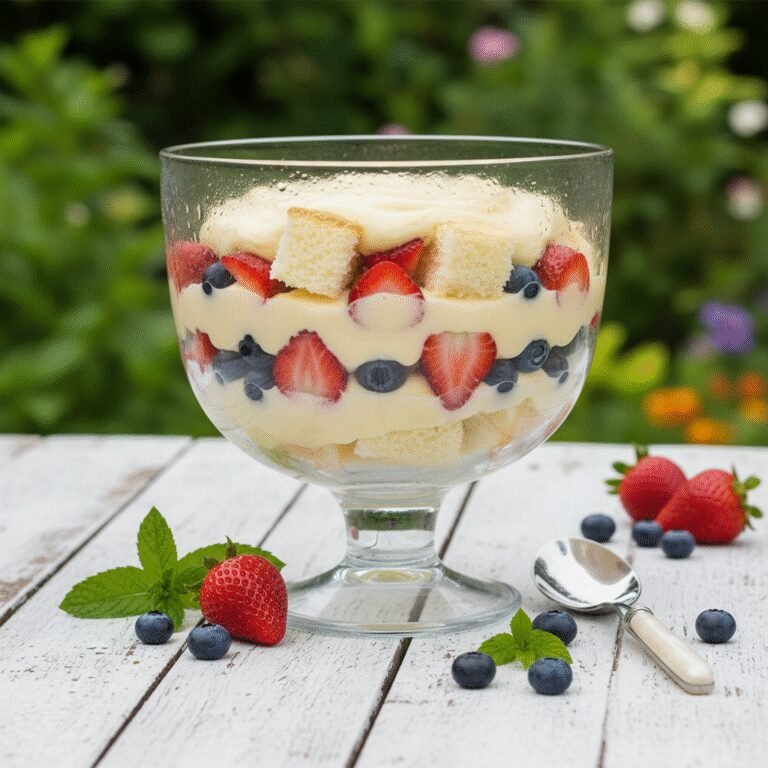
This cake is stunning on its own, but it pairs beautifully with tart flavors to cut through the sweetness of the white chocolate. Serve slices with a side of fresh raspberries or a dollop of tart lemon curd. For a winter vibe, sprinkle crushed peppermint candy on top or serve with a warm cup of espresso. It is also the perfect base for a coconut cake—just add shredded coconut to the outside!
Storage and Reheating Tips
Store the frosted cake at room temperature in an airtight cake carrier for up to 3 days. If your kitchen is very warm, you may want to refrigerate it, but let it come to room temperature before serving for the best texture. You can also freeze the unfrosted cake layers. Wrap them tightly in plastic wrap, then foil, and freeze for up to 2 months. Thaw in the fridge overnight before frosting.
Nutrition Facts (Estimated)
| Serving Size | 1 slice |
| Calories | 580 kcal |
| Fat | 32g |
| Saturated Fat | 19g |
| Unsaturated Fat | 11g |
| Trans Fat | 0.5g |
| Cholesterol | 95mg |
| Sodium | 280mg |
| Carbohydrates | 68g |
| Fiber | 1g |
| Sugar | 45g |
| Protein | 5g |
Frequently Asked Questions
Why did my white chocolate seize up?
This usually happens if a small amount of water gets into the melting chocolate (if melting for frosting) or if the chocolate was too hot when added to cold ingredients. Ensure all tools are dry and ingredients are at room temperature.
Can I make this into cupcakes?
Absolutely! This recipe will make about 24 cupcakes. Bake them at 350°F for 18-22 minutes. Watch them closely so they don’t dry out.
Is white chocolate actually gluten-free?
Most pure white chocolate is gluten-free, but some cheaper brands may use fillers or be processed on shared equipment. Always check the label to ensure it is certified GF.
Can I use almond flour instead of a GF blend?
No, this recipe relies on a measure-for-measure blend that includes rice flour, starches, and xanthan gum. Almond flour behaves very differently and will result in a heavy, oily cake.
My cake sank in the middle, what happened?
This is often due to underbaking or opening the oven door too early. Gluten-free cakes need a strong structure set before they are moved. It could also mean your baking powder is expired.
Is this cake overly sweet?
White chocolate is naturally sweet, so this is definitely a sweet cake! However, the buttermilk or sour cream adds a nice tang that balances it out perfectly.
Can I use this recipe for a wedding cake?
Yes! It is sturdy enough to stack if you use dowels for support. The crumb is tight and velvety, making it easy to cut clean slices.
Do I really need xanthan gum?
Yes. If your flour blend does not already contain it, you must add 1/2 teaspoon. Without it, the cake will likely crumble and fall apart.
Conclusion
There you have it, the white chocolate cake of your dreams! I hope this recipe proves that living a gluten-free lifestyle doesn’t mean sacrificing flavor or texture. This cake is pure love on a plate—rich, creamy, and totally indulgent. Whether you are a seasoned baker or just starting your GF journey, this recipe is forgiving and fun.
Don’t forget to snap a picture of your masterpiece and tag me on social media—I love seeing your creations! Happy baking, friends!