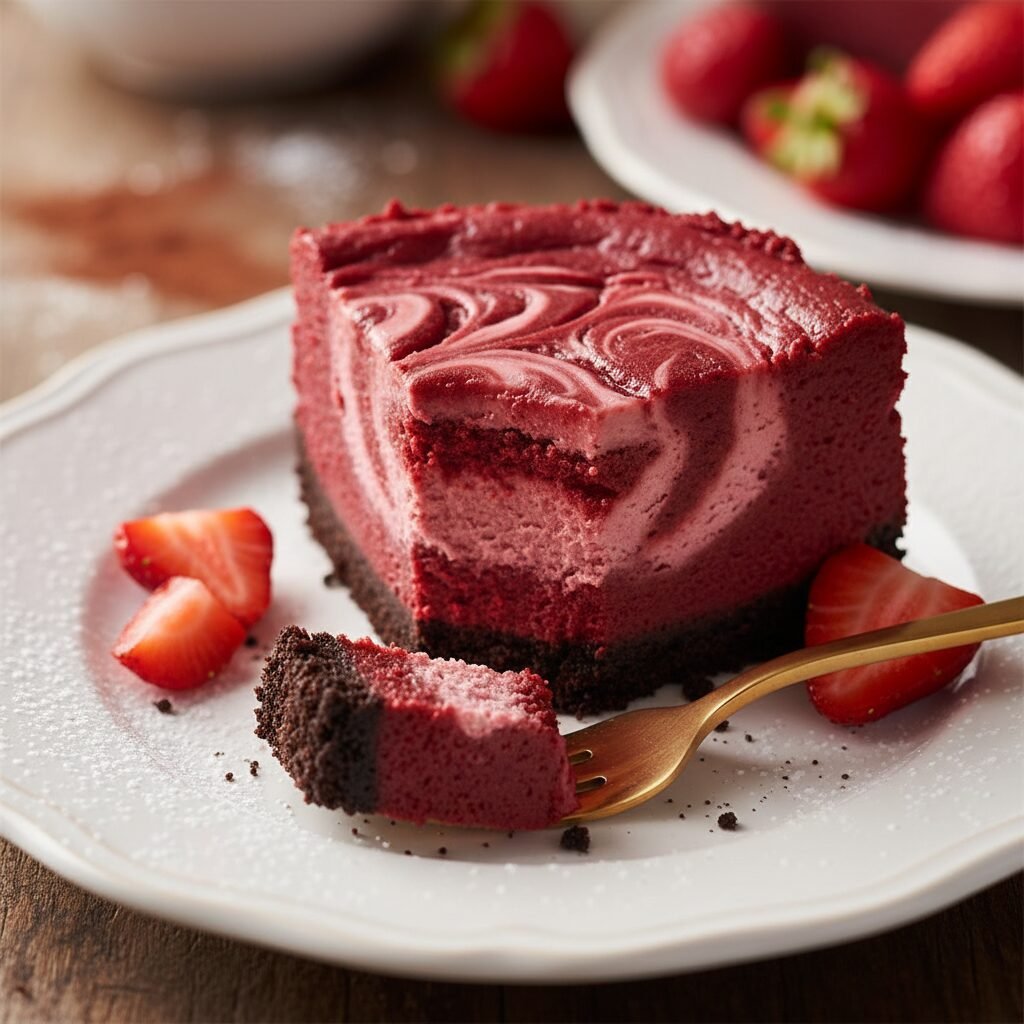
Strawberry Red Velvet Cheesecake
If you can’t decide between a slice of rich red velvet cake and a creamy cheesecake, this recipe is your dream come true! We’ve combined the subtle cocoa tang of classic red velvet with a luscious, strawberry-infused cheesecake batter for a dessert that looks as stunning as it tastes.
30 minutes
1 hour 15 minutes
8 hours (includes chilling time)
12 Slices
Dessert
Baking
American
Vegetarian
Hey there, friends! If there is one dessert that screams ‘I love you’ (or just ‘I really, really love dessert’), it is this Strawberry Red Velvet Cheesecake. We are talking about the collision of two absolute titans of the dessert world. On one hand, you have the mysterious, cocoa-kissed allure of red velvet, and on the other, the tangy, melt-in-your-mouth luxury of a New York-style cheesecake. Add a swirl of fresh, sweet strawberries, and you have got a masterpiece that is destined to be the star of your Pinterest board and your dining table.
I know what you might be thinking: ‘Cheesecake? Is that not complicated?’ Trust me, I have been there! The idea of water baths and cracks can be intimidating, but I promise you, this recipe is designed to be foolproof. We are going to walk through every single step together. Whether you are baking this for a romantic Valentine’s date, a special Mother’s Day brunch, or just because you survived a long week of mom-life and deserve a serious treat, this cheesecake is the answer.
The vibrant red color makes it visually popping, while the flavor profile—tangy cream cheese, sweet strawberries, and that hint of chocolate—is balanced to perfection. It is rich, it is creamy, and it is unapologetically decadent. So, grab your apron and let’s make something beautiful!
History & Origins
Food history is always a fun rabbit hole to go down, especially with fusion desserts like this. The concept of Red Velvet cake dates back to the Victorian era, where ‘velvet’ cakes were known for their soft texture. The distinct red hue became iconic in the United States, famously associated with the Waldorf-Astoria Hotel in New York and later popularized by the Adams Extract company during the Great Depression to sell food coloring and vanilla. It is a Southern staple that has conquered the world.
Cheesecake, believe it or not, traces its roots all the way back to ancient Greece (served to athletes at the first Olympic Games in 776 B.C.!), but the cream cheese version we know and love is a distinctly American innovation from the late 19th century. Combining these two—the cocoa-buttermilk profile of red velvet and the dense richness of cheesecake—is a modern culinary trend born out of our collective desire to have our cake and eat it too. Adding strawberries is the cherry (or berry) on top, providing a fresh, fruity contrast to the deep richness of the cocoa and cheese.
Why This Recipe Works
This recipe works because it balances acidity, sweetness, and texture. Red velvet is not just chocolate cake with red dye; it traditionally relies on the reaction between cocoa powder and acid (like vinegar or buttermilk) to create a tender crumb and distinct tangy flavor. Cheesecake is also acid-driven thanks to the cream cheese and sour cream.
By marrying these two, we amplify that delightful tanginess, which cuts through the heavy sugar and fat content, preventing the dessert from becoming cloying. The addition of the strawberry reduction is the secret weapon here. Simply adding raw strawberries would release too much water, ruining the cheesecake’s texture. By reducing the strawberries into a thick puree first, we concentrate the flavor and eliminate excess moisture, ensuring your cheesecake remains creamy and sets perfectly.
Why You’ll Love This Recipe
- ✓Stunning visual presentation with vibrant red and pink swirls
- ✓Perfect balance of tangy cream cheese and sweet strawberry
- ✓Rich, chocolatey Oreo crust for added texture
- ✓Creamy, crack-free texture using the water bath method
- ✓Ideal for special occasions like Valentine’s Day or Christmas
Equipment You’ll Need
- ✓9-inch Springform Pan
- ✓Electric Hand Mixer or Stand Mixer
- ✓Large Roasting Pan (for water bath)
- ✓Aluminum Foil (heavy duty)
- ✓Food Processor
- ✓Rubber Spatula
- ✓Saucepan
Ingredients
- ✓For the Crust:
- ✓24 Chocolate Sandwich Cookies (like Oreos), whole with filling
- ✓5 tbsp Unsalted Butter, melted
- ✓For the Strawberry Swirl:
- ✓1 cup Fresh Strawberries, hulled and chopped
- ✓1 tbsp Granulated Sugar
- ✓1 tsp Cornstarch
- ✓For the Red Velvet Cheesecake Filling:
- ✓32 oz (4 blocks) Full-Fat Cream Cheese, strictly room temperature
- ✓1 1/3 cups Granulated Sugar
- ✓1/4 cup Sour Cream, room temperature
- ✓1/4 cup Heavy Cream, room temperature
- ✓3 tbsp Unsweetened Cocoa Powder
- ✓2 tsp Vanilla Extract
- ✓1 tbsp Red Gel Food Coloring (adjust for desired intensity)
- ✓4 Large Eggs, strictly room temperature
Instructions
- Step 1: Prepare the Strawberry Reduction. In a small saucepan or blender, puree the strawberries until smooth. Pour into a saucepan (if not already there) and mix in 1 tbsp sugar and cornstarch. Simmer over medium-low heat for about 5-8 minutes until thickened into a jam-like consistency. Remove from heat and let it cool completely.
- Step 2: Prep the Oven and Pan. Preheat your oven to 325°F (163°C). Generously grease your 9-inch springform pan. Wrap the bottom and outside of the pan in 2-3 layers of heavy-duty aluminum foil to ensure no water seeps in during the water bath.
- Step 3: Make the Crust. Pulse the chocolate cookies in a food processor until they are fine crumbs. Pour in the melted butter and pulse until the mixture resembles wet sand. Press this mixture firmly into the bottom of your prepared springform pan. Bake for 10 minutes, then set aside to cool.
- Step 4: Beat the Cream Cheese. In a large bowl using a hand mixer or stand mixer fitted with a paddle attachment, beat the softened cream cheese and sugar on medium-low speed until completely smooth and creamy. Scrape down the sides of the bowl. Tip: Do not rush this step, lumps are the enemy!
- Step 5: Add Flavors. Mix in the sour cream, heavy cream, cocoa powder, vanilla extract, and red food coloring. Mix until combined and the color is an even, vibrant red. Scrape the bowl again.
- Step 6: Add Eggs. Add the eggs one at a time, mixing on low speed just until combined after each addition. Stop mixing as soon as the last egg is incorporated. Overmixing introduces air which causes cracks.
- Step 7: Assemble. Pour about 2/3 of the red velvet batter over the crust. Dollop spoonfuls of the cooled strawberry reduction over the batter. Pour the remaining red velvet batter on top. Use a knife or skewer to gently swirl the strawberry and batter together for a marbled effect.
- Step 8: The Water Bath. Place the foil-wrapped springform pan inside a large roasting pan. Place the roasting pan in the oven, and carefully pour boiling water into the roasting pan until it comes about halfway up the sides of the springform pan.
- Step 9: Bake. Bake for 1 hour and 10 minutes to 1 hour and 20 minutes. The center should still have a slight ‘jiggle’ like Jell-O, but the edges should be set. Turn off the oven and crack the door open slightly. Let the cheesecake cool inside the oven for 1 hour.
- Step 10: Chill. Remove from the oven and water bath. Run a thin knife around the edge to release it from the pan (this helps prevent cracking as it shrinks). Cool completely on a wire rack, then refrigerate for at least 6 hours, preferably overnight.
Expert Cooking Tips
- ✓Room Temperature is Key: Ensure your cream cheese, eggs, sour cream, and heavy cream are truly at room temperature. Cold ingredients lead to lumpy batter and overmixing.
- ✓Don’t Skip the Water Bath: It creates a gentle, humid heat that cooks the cheesecake evenly and prevents the top from drying out and cracking.
- ✓Use Gel Coloring: Gel food coloring is much more concentrated than liquid. You get a vibrant red color without adding too much extra liquid to the batter.
- ✓Cool Gradually: Drastic temperature changes cause cracks. Letting the cheesecake cool in the turned-off oven allows it to finish cooking gently and settle slowly.
Substitutions and Variations
If you are looking to switch things up, here are a few ideas! For a Gluten-Free version, simply use gluten-free chocolate sandwich cookies for the crust; the filling is naturally gluten-free (check your baking powder/cornstarch labels just in case). If you prefer a Graham Cracker Crust, swap the Oreos for graham crackers, though you will lose that chocolatey contrast. No Sour Cream? You can substitute full-fat Greek yogurt in a pinch. If you want to avoid Red Food Dye, you can use beet powder, though be aware it may slightly alter the earthy flavor profile and the color will be more of a rusty maroon than a bright red.
Common Mistakes to Avoid
The biggest heartbreaker in cheesecake baking is the dreaded crack. This usually happens for two reasons: overmixing the batter (especially after adding eggs) or cooling it too fast. Treat your batter gently! Another common mistake is under-baking. If the whole cake jiggles like a wave, it needs more time. Only the very center 2 inches should wobble. Lastly, do not slice it too soon! Cheesecake needs that long chill in the fridge to set its structure. Cutting it warm will result in a runny mess.
Serving Suggestions
This cheesecake is a stunner on its own, but we eat with our eyes first! I love serving this with a generous dollop of fresh whipped cream and extra fresh strawberries on top. For pure decadence, a drizzle of dark chocolate ganache or white chocolate sauce looks incredible against the red cake. Serve with a hot cup of coffee or a glass of prosecco for the ultimate adult treat.
Storage and Reheating Tips
Store any leftovers in the refrigerator, loosely covered with plastic wrap or in an airtight container, for up to 5 days. This cheesecake also freezes beautifully! Slice the chilled cheesecake, wrap each slice tightly in plastic wrap, then a layer of foil. Freeze for up to 2 months. Thaw overnight in the fridge before serving.
Nutrition Facts (Estimated)
| Serving Size | 1 Slice |
| Calories | 580 |
| Fat | 42g |
| Saturated Fat | 24g |
| Unsaturated Fat | 15g |
| Trans Fat | 0.5g |
| Cholesterol | 145mg |
| Sodium | 340mg |
| Carbohydrates | 48g |
| Fiber | 2g |
| Sugar | 38g |
| Protein | 8g |
Frequently Asked Questions
Do I really need a water bath?
Yes, I highly recommend it! While you technically can bake without one, the texture will be denser, the edges might overcook, and you have a 90% higher chance of cracks forming on top. It is worth the extra step.
Why did my cheesecake crack?
Cracks are usually caused by overmixing the eggs (trapping air) or cooling the cheesecake too quickly. Sudden temperature drops cause the cake to shrink faster than the pan allows, pulling it apart.
Can I use frozen strawberries?
Absolutely! Since we are cooking them down into a reduction anyway, frozen strawberries work perfectly. Just make sure to simmer them long enough to evaporate the extra water content.
How do I know when it is done?
Give the pan a gentle nudge. The outer ring (about 2-3 inches) should look firm and matte, while the center (about 2 inches) should wobble slightly, like set gelatin. If it is liquidy, keep baking.
Can I make this ahead of time?
Yes, cheesecake is actually better the next day! I recommend making it 24 hours before you plan to serve it to allow the flavors to meld and the texture to set completely.
Can I leave out the cocoa powder?
You can, but then it won’t technically be ‘Red Velvet.’ The cocoa powder provides that subtle chocolate flavor and acidity that defines the cake. Without it, you just have a red-colored vanilla cheesecake.
What if water leaks into my springform pan?
This is a nightmare! To prevent this, use extra-wide heavy-duty foil and wrap multiple layers. Alternatively, place your springform pan inside a slightly larger cake pan, and place that inside the water bath.
Can I use low-fat cream cheese?
I do not recommend it. Low-fat cream cheese has a higher water content and fillers that can prevent the cheesecake from setting properly. Go for full-fat bricks for the best texture.
Conclusion
There you have it, the secret to the most luscious, vibrant, and delicious Strawberry Red Velvet Cheesecake! I hope this recipe brings a little extra sweetness to your kitchen. It is a labor of love, but that first bite of creamy, cocoa-infused goodness is worth every minute. Don’t forget to snap a picture before you dig in (if you can wait that long!) and tag me on social media. I love seeing your beautiful creations. Happy baking, mamas!