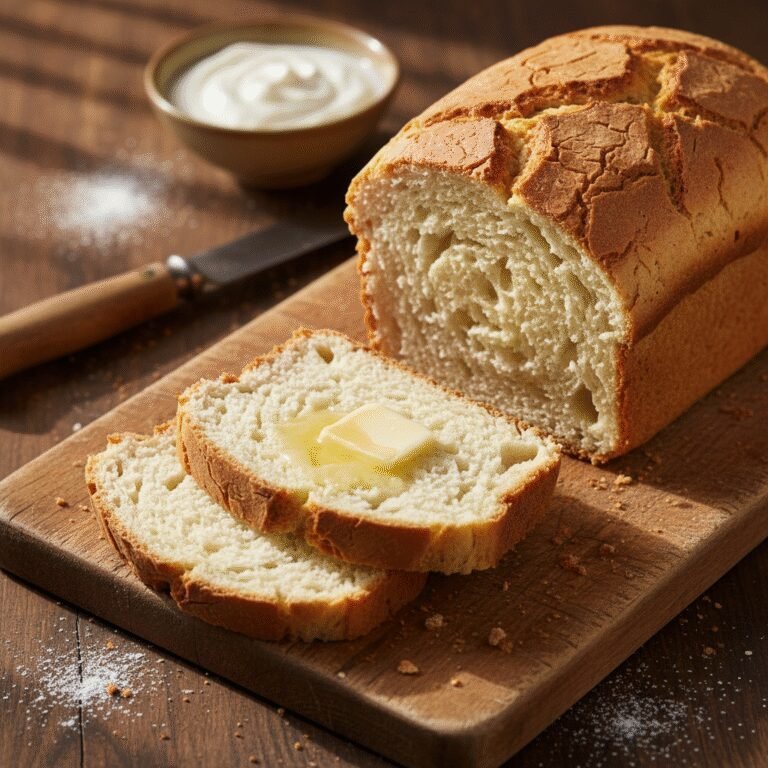
Pear Bread Recipe
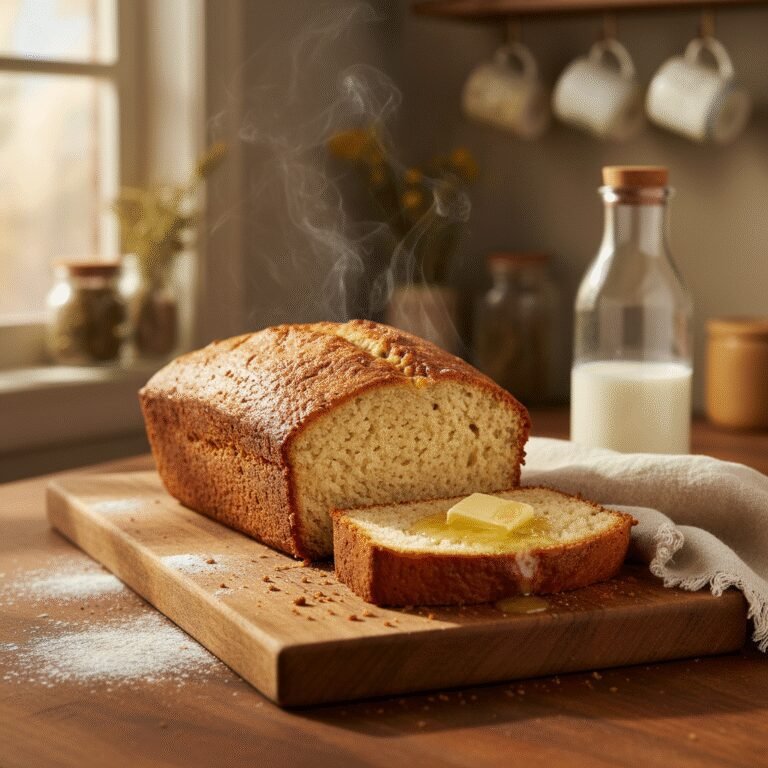
Move over banana bread, there is a new favorite in town! This spiced pear bread is incredibly moist, loaded with tender chunks of fresh pear, and fills your kitchen with the most amazing autumn aroma. It is the perfect way to use up those ripe pears sitting on your counter.
15 minutes
55 minutes
1 hour 10 minutes
1 Loaf (10-12 Slices)
Breakfast / Snack
Baking
American
Vegetarian
If there is one thing that signals the arrival of cozy season, it is the smell of warm spices wafting through the kitchen. While we all love a classic banana bread or a pumpkin loaf, I firmly believe that pears are the unsung heroes of fall baking. This Pear Bread recipe is my absolute go-to when I want something that feels a little more elegant than banana bread but is just as easy to throw together for a busy weekday breakfast or a lazy Sunday brunch.
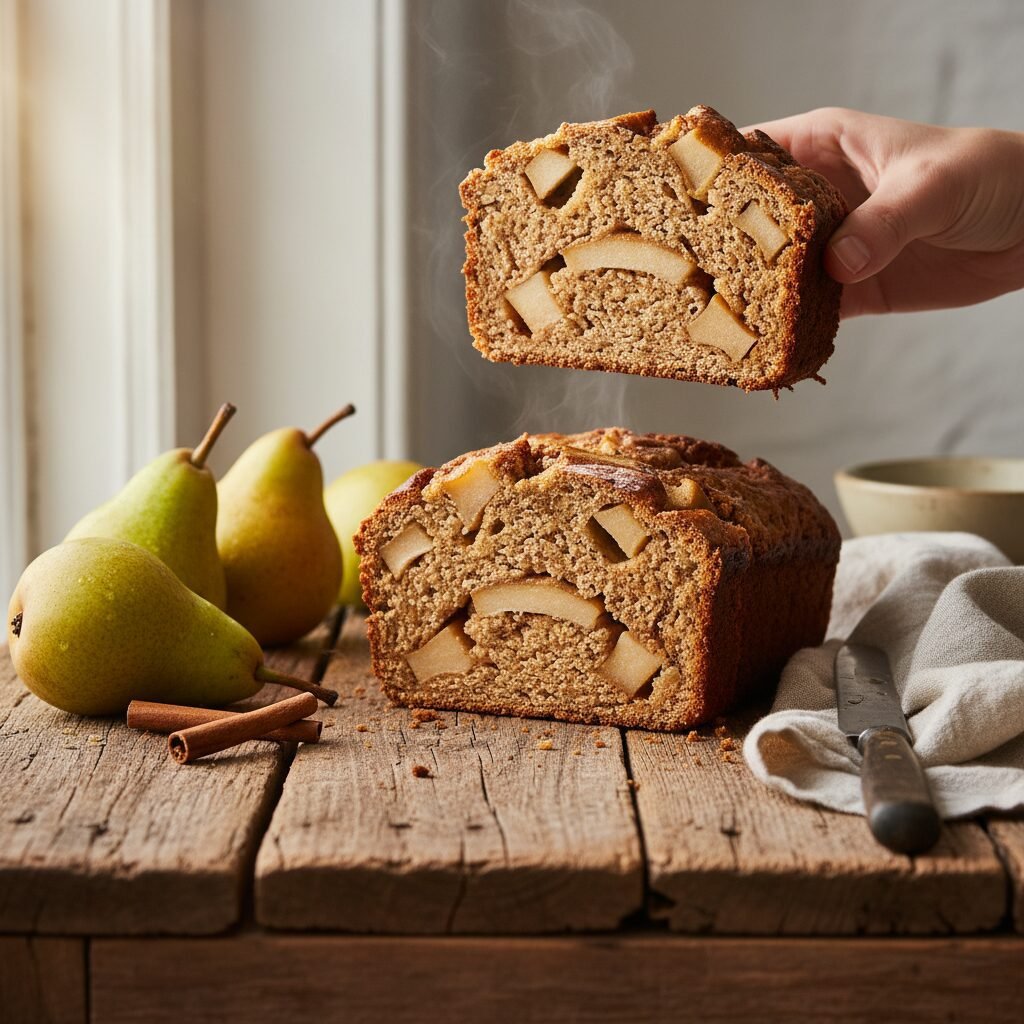
Imagine a loaf that is golden and slightly crisp on the outside, but tender, buttery, and incredibly moist on the inside. Every bite is studded with soft, sweet pockets of fresh pear that almost melt into the batter as they bake. We boost the flavor profile with a generous amount of cinnamon, a hint of nutmeg, and a splash of vanilla, making it taste like a warm hug in food form. It is one of those recipes that makes you want to curl up with a hot cup of coffee and a thick slice slathered in salted butter.
What I love most about this recipe is its versatility. It is sweet enough to be a dessert (especially if you add a simple vanilla glaze), but wholesome enough to serve to the kiddos before school. Plus, it is a fantastic way to use up those pears that ripened way faster than you expected! Whether you are an experienced baker or just looking for a simple, foolproof recipe to impress your friends and family, this pear bread is guaranteed to become a seasonal staple in your home.
History & Origins
Quick breads—loaves that are leavened with baking soda or baking powder rather than yeast—became a staple in American households during the late 18th and early 19th centuries with the discovery of chemical leaveners. Before that, making bread was a labor-intensive, day-long process involving yeast starters and long rise times.
Fruit-based quick breads gained massive popularity during the Great Depression and later in the mid-20th century as home cooks looked for ways to minimize food waste. Overripe fruit, which was too soft to eat fresh, was mashed or chopped and folded into batters to add moisture, sweetness, and bulk to the bread without requiring expensive ingredients. While banana bread became the poster child for this movement, pear bread has always been a beloved variation in regions where pear orchards thrive, particularly in the Pacific Northwest. It combines the dense, cake-like texture of a tea loaf with the rustic, farmhouse appeal of using seasonal orchard fruit.
Why This Recipe Works
This recipe succeeds because it strikes the perfect balance between moisture and structure. Pears have a high water content, similar to apples or zucchini. However, unlike bananas which are mashed into the batter, we chop the pears for this recipe. This means the batter itself needs a reliable source of moisture to stay tender. To achieve this, we use a combination of butter and sour cream (or Greek yogurt).
The butter provides that rich, classic flavor and a tender crumb, while the acidity in the sour cream activates the baking soda, ensuring a good rise, and tenderizes the gluten strands in the flour so the bread doesn’t become tough. The spices—cinnamon and nutmeg—are fat-soluble, meaning their flavor blooms and intensifies when mixed with the butter and eggs. Finally, by tossing the chopped pears in a tiny bit of flour before folding them in, we ensure they stay suspended throughout the loaf rather than sinking to the bottom, giving you a perfect distribution of fruit in every slice.
Why You’ll Love This Recipe
- ✓Incredibly moist texture thanks to sour cream and fresh fruit
- ✓Warm, cozy spices including cinnamon and nutmeg
- ✓A great way to reduce food waste by using ripe pears
- ✓Freezes beautifully for meal prep breakfasts
- ✓Simple one-bowl method (mostly!)
- ✓Kid-friendly and perfect for lunchboxes
Equipment You’ll Need
- ✓9×5 inch Loaf Pan
- ✓Large Mixing Bowl
- ✓Medium Mixing Bowl
- ✓Whisk
- ✓Rubber Spatula
- ✓Vegetable Peeler
- ✓Cooling Rack
Ingredients
- ✓2 cups all-purpose flour (spooned and leveled)
- ✓1 teaspoon baking soda
- ✓1/2 teaspoon baking powder
- ✓1/2 teaspoon salt
- ✓1 1/2 teaspoons ground cinnamon
- ✓1/4 teaspoon ground nutmeg
- ✓1/2 cup unsalted butter, softened to room temperature
- ✓3/4 cup granulated sugar (or half brown sugar for more depth)
- ✓2 large eggs, room temperature
- ✓1 teaspoon pure vanilla extract
- ✓1/4 cup sour cream or plain Greek yogurt
- ✓2 cups fresh pears, peeled, cored, and diced (about 2 medium pears)
Instructions
- Preheat and Prep: Preheat your oven to 350°F (175°C). Grease a 9×5 inch loaf pan generously with butter or non-stick spray. For extra security, you can line it with parchment paper leaving an overhang on the sides for easy removal.
- Mix Dry Ingredients: In a medium bowl, whisk together the flour, baking soda, baking powder, salt, cinnamon, and nutmeg until well combined. Set this aside.
- Cream Butter and Sugar: In a large mixing bowl (or using a stand mixer), beat the softened butter and granulated sugar together until the mixture is light, fluffy, and pale yellow. This usually takes about 2-3 minutes.
- Add Wet Ingredients: Beat in the eggs one at a time, mixing well after each addition. Scrape down the sides of the bowl. Add the vanilla extract and the sour cream (or Greek yogurt) and mix until smooth.
- Combine: Gradually add the dry flour mixture into the wet ingredients. Use a spatula or wooden spoon to mix just until the flour begins to disappear. Do not overmix—a few streaks of flour are okay at this stage.
- Fold in Pears: Gently fold in the diced pears. The batter will be thick, which is exactly what we want to hold the fruit in place.
- Bake: Pour the batter into the prepared loaf pan and smooth the top with your spatula. Bake for 50 to 60 minutes. Test for doneness by inserting a toothpick into the center; it should come out clean or with just a few moist crumbs attached (no wet batter).
- Cool: Let the bread cool in the pan for about 10-15 minutes. Then, run a knife around the edges and lift it out onto a wire rack to cool completely before slicing. Slicing while hot may cause the bread to crumble.
Expert Cooking Tips
- ✓Measure Flour Correctly: Don’t scoop the flour directly with the measuring cup, as this packs it down and leads to dry bread. Spoon the flour into the cup and level it off with a knife.
- ✓Room Temperature Ingredients: Ensure your butter, eggs, and sour cream are at room temperature. This helps them emulsify properly, creating a smoother batter and a better rise.
- ✓Don’t Overmix: Once the flour hits the wet ingredients, stop mixing as soon as combined. Overmixing develops gluten which makes quick breads tough and rubbery instead of soft and tender.
- ✓Tent with Foil: If the top of the bread is browning too quickly but the center is still raw, loosely cover the pan with aluminum foil for the last 15 minutes of baking.
- ✓Choosing Pears: Bartlett or Bosc pears work best. You want them ripe enough to be sweet, but firm enough to hold their shape when diced. If they are mushy, they will disappear into the batter.
Substitutions and Variations
Baking is a science, but there is room for flexibility here! If you want to make this dairy-free, swap the butter for melted coconut oil or a vegan butter stick, and use a dairy-free yogurt or applesauce instead of sour cream. For a healthier twist, you can substitute half of the all-purpose flour with whole wheat flour, though the texture will be slightly denser. If you are out of sour cream, plain Greek yogurt or even buttermilk works as a fantastic substitute. You can also swap the granulated sugar for brown sugar if you want a deeper, caramel-like flavor that pairs beautifully with the pears.
Common Mistakes to Avoid
The most common mistake with fruit breads is underbaking. Because pears release moisture as they cook, it can be tricky to tell when the center is done. If you pull it out too early, the middle will sink and be gummy. Always do the toothpick test! Another mistake is using unripe pears. Crunchy, hard pears won’t soften enough during baking and lack flavor. On the flip side, over-mixing the batter is a surefire way to lose that tender, cake-like crumb. Treat the batter gently!
Serving Suggestions
This pear bread is heavenly on its own, but here is how I like to elevate it:
- Toasted with Butter: Slice it thick, toast it until the edges are crisp, and slather with salted butter.
- Cream Cheese: A smear of plain or honey-pecan cream cheese turns this into a decadent snack.
- French Toast: Use day-old slices to make the most incredible autumn French toast you’ve ever tasted.
- Dessert Mode: Serve a warm slice with a scoop of vanilla bean ice cream and a drizzle of caramel sauce.
Storage and Reheating Tips
Room Temperature: Store the cooled bread in an airtight container or wrapped tightly in plastic wrap on the counter for up to 3 days. The moisture from the pears actually makes it taste even better on day two!
Fridge: If you live in a hot or humid climate, store it in the fridge for up to 1 week.
Freezer: This bread freezes amazingly well. Wrap the whole loaf (or individual slices) in plastic wrap, then a layer of foil. Place in a freezer bag and freeze for up to 3 months. Thaw on the counter or pop a slice in the toaster.
Nutrition Facts (Estimated)
| Serving Size | 1 slice |
| Calories | 245 kcal |
| Fat | 10g |
| Saturated Fat | 6g |
| Unsaturated Fat | 3g |
| Trans Fat | 0g |
| Cholesterol | 45mg |
| Sodium | 180mg |
| Carbohydrates | 36g |
| Fiber | 2g |
| Sugar | 18g |
| Protein | 4g |
Frequently Asked Questions
Can I use canned pears instead of fresh?
Yes, you can! Just make sure to drain them very thoroughly and pat them dry with a paper towel before dicing. Canned pears are softer, so fold them in very gently.
Do I have to peel the pears?
I recommend peeling them for the best texture. Pear skin can become a bit tough or stringy when baked inside a bread. However, if you don’t mind a rustic texture, you can leave the skin on.
Can I add nuts to this recipe?
Absolutely! 1/2 cup of chopped walnuts or pecans adds a wonderful crunch that contrasts perfectly with the soft pears.
Why did my bread sink in the middle?
This usually happens if the bread was underbaked. The structure wasn’t set enough to hold its weight. It can also happen if you used too much leavening (baking soda/powder) or opened the oven door too frequently.
Can I make this into muffins?
Yes! This batter makes fantastic muffins. Line a muffin tin and fill cups 2/3 full. Bake at 350°F for about 20-25 minutes.
My batter seems very thick, is that normal?
Yes, quick bread batter should be thick, almost like a very soft cookie dough, rather than a runny cake batter. This thickness helps suspend the fruit chunks.
Can I use gluten-free flour?
Yes, a high-quality 1:1 gluten-free all-purpose flour blend (like King Arthur or Bob’s Red Mill) works very well in this recipe.
What spices can I use besides cinnamon?
Cardamom, ginger, and allspice are all beautiful compliments to pear. A pinch of ground ginger gives it a nice zing!
Conclusion
There is something truly special about baking with the seasons, and this Spiced Pear Bread captures the essence of autumn in every bite. It is simple, humble, yet utterly delicious. Whether you are baking it for a holiday morning, a gift for a neighbor, or just a Tuesday treat for yourself, I hope this recipe brings a little extra warmth to your kitchen. Don’t forget to save a slice for yourself before the family devours it all!