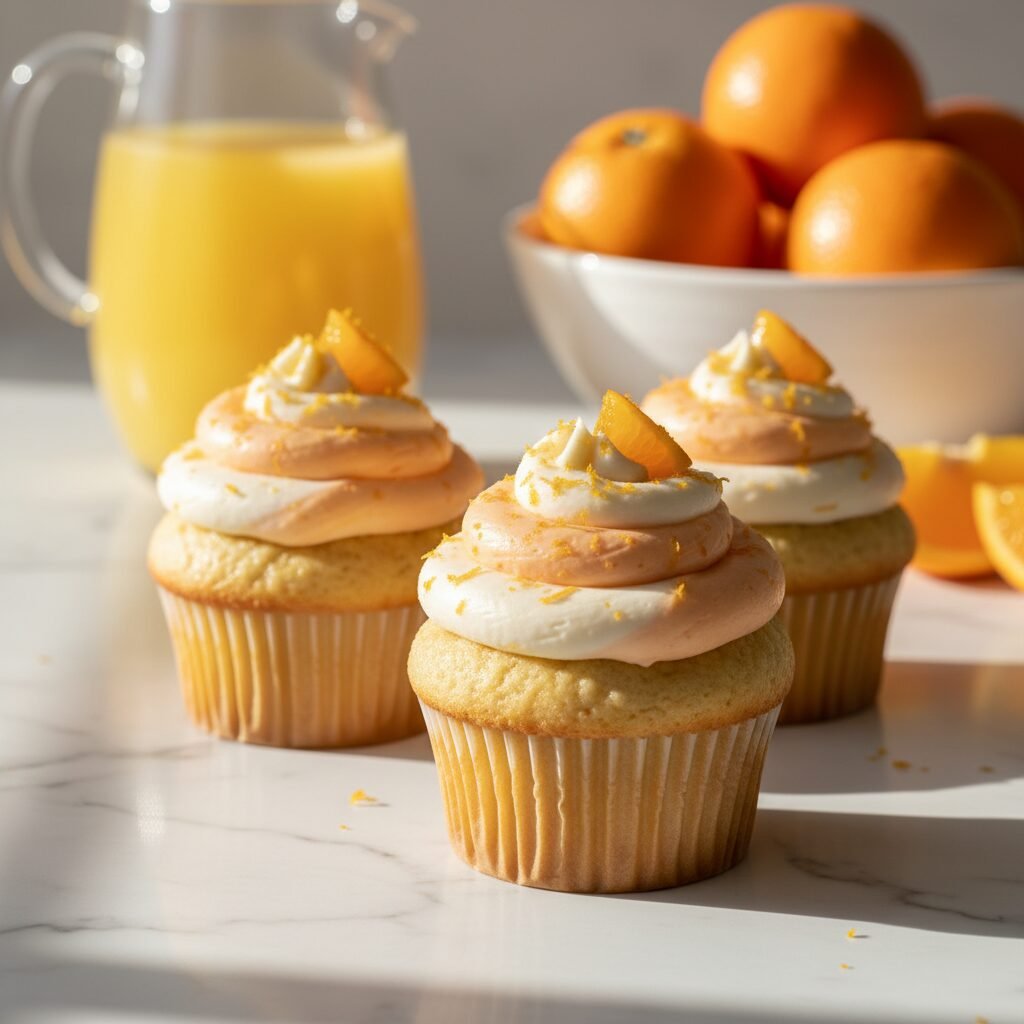
Orange Creamsicle Cupcakes
Remember chasing the ice cream truck down the street for that classic orange and vanilla treat? These cupcakes capture that exact magic in a fluffy, melt-in-your-mouth bite that your family will obsess over.
20 minutes
18 minutes
1 hour (includes cooling)
12-14 Cupcakes
Dessert
Baking
American
Vegetarian
Hey there, friends! Is there anything more quintessentially summer than the flavor of an Orange Creamsicle? Just the mention of it takes me right back to being eight years old, knees scraped from the pavement, sticky orange juice running down my hand as I tried to eat my ice cream treat before the sun melted it away. It is pure, unadulterated nostalgia wrapped in a bright orange package.
Today, we are taking that beloved childhood memory and turning it into something a little more sophisticated (but just as fun) for our kitchens: Orange Creamsicle Cupcakes. If you have been looking for the perfect dessert to bring to a neighborhood potluck, a baby shower, or just to brighten up a rainy Tuesday, this is it. We are talking about a cupcake base that is incredibly tender, bursting with fresh orange zest and juice, paired with a buttercream that tastes exactly like the creamy vanilla center of the popsicle.
I have tested this recipe dozens of times to get that balance just right. You know how sometimes orange desserts can taste a little artificial or like cleaning supplies? We are avoiding that entirely by using real, fresh ingredients. The result is a cupcake that smells like a Florida grove and tastes like a hug. My kids absolutely go crazy for these, and I admit, I usually save one (or two) for myself to enjoy with my evening tea. Let’s get baking!
History & Origins
The story of the Creamsicle is actually quite fascinating and starts with a happy accident! It all began back in 1905 with an 11-year-old boy named Frank Epperson in San Francisco. The legend goes that young Frank mixed some sugary soda powder with water and a stirring stick, but he accidentally left it out on his porch overnight. The temperature dropped, the mixture froze, and the next morning, he pulled on the stick and found he had invented a frozen treat. He originally called it the "Epsicle."
Fast forward a few years, and Frank patented his invention, eventually renaming it the "Popsicle" at the urging of his children who called it "Pop’s ‘Sicle." But the genius combination of orange sherbet and vanilla ice cream—the Creamsicle—came later as an evolution of this frozen revolution. It was the brilliant idea to coat a core of creamy vanilla ice cream with a layer of icy fruit juice. This texture and flavor contrast became an instant hit across America.
Over the decades, this flavor profile has transcended the freezer aisle. We have seen Creamsicle sodas, cocktails, cheesecakes, and now, cupcakes. It represents a specific era of Americana, evoking memories of 1950s diners and endless summer vacations. By baking these cupcakes, we are participating in over a century of culinary history that celebrates the simple joy of sweet, citrusy refreshment.
Why This Recipe Works
You might be wondering, what makes this specific recipe work so well compared to a standard vanilla cupcake with orange extract? It comes down to the science of acidity and fat balance. Oranges are naturally acidic, and when we introduce fresh orange juice into the batter, that acid interacts with the baking agents (baking powder and baking soda) to create extra lift. This is why these cupcakes have such a light, airy crumb.
However, citrus can sometimes dry out a cake. To combat this, we use a combination of butter and sour cream (or Greek yogurt). The butter provides that rich, classic cake flavor and structure, while the sour cream adds density and moisture that doesn’t evaporate during baking. The thick, tangy nature of sour cream also helps to tenderize the gluten strands in the flour, ensuring the cupcake is soft rather than chewy.
Finally, the flavor perception relies heavily on aromatics. Most of the "orange" flavor we perceive actually comes from the oils in the zest, not the juice. By rubbing the orange zest into the sugar before creaming it with the butter (a technique called maceration), we release those essential oils directly into the sweetener. This ensures that every single grain of sugar carries that bright citrus punch, distributing the flavor more evenly than if we just stirred the zest in at the end. It is a small step that makes a massive difference!
Why You’ll Love This Recipe
- ✓Bursting with fresh orange zest for natural flavor
- ✓Incredibly moist crumb thanks to sour cream
- ✓Nostalgic flavor profile that kids and adults love
- ✓Silky smooth vanilla bean buttercream
- ✓Perfect for summer BBQs and birthday parties
- ✓Can be made ahead of time
Equipment You’ll Need
- ✓12-cup Muffin Tin
- ✓Cupcake Liners
- ✓Stand Mixer or Hand Mixer
- ✓Microplane or Zester
- ✓Rubber Spatula
- ✓Wire Cooling Rack
- ✓Piping Bag and Star Tip (optional)
Ingredients
- ✓For the Cupcakes:
- ✓1 1/2 cups all-purpose flour
- ✓1 1/2 tsp baking powder
- ✓1/4 tsp salt
- ✓1/2 cup unsalted butter, softened to room temperature
- ✓1 cup granulated sugar
- ✓2 large eggs, room temperature
- ✓2 tsp pure vanilla extract
- ✓1 tbsp fresh orange zest (about 1 medium orange)
- ✓1/4 cup fresh orange juice
- ✓1/2 cup sour cream (full fat is best)
- ✓For the Vanilla Orange Buttercream:
- ✓1 cup unsalted butter, softened
- ✓3-4 cups powdered sugar
- ✓2 tbsp heavy cream
- ✓1 tsp vanilla bean paste (or vanilla extract)
- ✓1 tsp fresh orange zest
- ✓Pinch of salt
- ✓Orange slices or sprinkles for garnish
Instructions
- Preheat and Prep: Preheat your oven to 350°F (175°C). Line a standard muffin tin with paper liners. Set aside.
- Whisk Dry Ingredients: In a medium bowl, whisk together the flour, baking powder, and salt until well combined to ensure the leavening is evenly distributed.
- Infuse the Sugar: In the bowl of your stand mixer, add the granulated sugar and the fresh orange zest. Use your fingers to rub the zest into the sugar until it resembles wet sand and is very fragrant. This releases the oils!
- Cream Butter and Sugar: Add the softened butter to the sugar mixture. Beat on medium-high speed for about 3-4 minutes until the mixture is pale, light, and fluffy. Scrape down the sides of the bowl.
- Add Wet Ingredients: Add the eggs one at a time, beating well after each addition. Stir in the vanilla extract.
- Combine Milk and Juice: In a small cup or bowl, whisk together the sour cream and fresh orange juice.
- Mix the Batter: With the mixer on low speed, add half of the dry ingredients to the butter mixture. Mix just until combined. Add the sour cream/orange juice mixture and mix. Finally, add the remaining flour mixture. Stop mixing as soon as the flour streaks disappear. Do not overmix!
- Bake: Fill the cupcake liners about 2/3 full. Bake for 16-19 minutes, or until a toothpick inserted into the center comes out clean or with just a few moist crumbs.
- Cool: Allow the cupcakes to cool in the pan for 5 minutes, then transfer them to a wire rack to cool completely before frosting.
- Make the Frosting: While cupcakes cool, beat the softened butter for the frosting for 5 minutes until incredibly pale and creamy. Gradually add powdered sugar, one cup at a time.
- Flavor and Whip: Add the heavy cream, vanilla bean paste, orange zest, and salt. Whip on high speed for another 3 minutes until light and airy.
- Assemble: Pipe a generous swirl of frosting onto each cooled cupcake. Top with a small orange slice or festive sprinkles.
Expert Cooking Tips
- ✓Room Temperature is Key: Ensure your butter, eggs, and sour cream are at room temperature. This creates an emulsion that traps air, resulting in a fluffier cupcake.
- ✓Don’t Overfill: Filling the liners past the 2/3 mark will cause the cupcakes to spill over and flatten out, creating a ‘muffin top’ that is hard to frost prettily.
- ✓Zest Before Juicing: It is nearly impossible to zest a squishy, juiced orange. Always zest first!
- ✓Fresh vs. Bottled: Use fresh orange juice for the best flavor. Bottled juice often contains added sugars and lacks the bright acidity we need.
- ✓The Toothpick Test: Every oven is different. Start checking at 16 minutes. You want the toothpick to be clean, but not bone dry.
Substitutions and Variations
We all have those moments where we are missing one ingredient! Here is how to swap things out safely:
- Sour Cream: You can easily substitute plain Greek yogurt or buttermilk. If using buttermilk, the batter will be slightly thinner, which is fine.
- Flour: To make these gluten-free, swap the all-purpose flour for a high-quality 1:1 Gluten-Free Baking Flour blend (like King Arthur or Bob’s Red Mill).
- Orange Juice: If you don’t have fresh oranges (though I highly recommend them!), you can use high-quality pulp-free orange juice, but add 1/2 tsp of orange extract to boost the flavor since you won’t have the zest.
- Heavy Cream: In the frosting, you can use whole milk or half-and-half if you don’t have heavy cream, but use slightly less liquid to maintain stiffness.
Common Mistakes to Avoid
Even the best bakers have mishaps! Here are the most common pitfalls to avoid with these cupcakes:
- Overmixing the Batter: Once the flour hits the wet ingredients, gluten starts to form. If you mix too vigorously, your cupcakes will be tough and rubbery instead of soft and tender. Mix on low speed and stop when you see the last streak of flour disappear.
- Butter Too Warm: If your butter is melting or greasy, it won’t hold air bubbles when creamed with sugar. Your cupcakes will end up dense and greasy. The butter should be cool to the touch but leave an indent when pressed.
- Frosting Warm Cupcakes: I know it is tempting, but if you frost the cupcakes before they are 100% cool, the butter in the frosting will melt, and your beautiful swirl will slide right off.
Serving Suggestions
These Orange Creamsicle Cupcakes are a showstopper on their own, but here is how to elevate the experience:
Serve them at a summer backyard BBQ alongside iced tea or lemonade. They are also perfect for a brunch spread; the citrus flavor pairs beautifully with mimosas! For a cute presentation, stick a small paper straw or a mini wooden popsicle stick into the frosting to mimic the look of the original frozen treat. If you are feeling extra indulgent, serve the cupcake in a bowl with a scoop of vanilla bean ice cream on the side.
Storage and Reheating Tips
Room Temperature: These cupcakes can be stored in an airtight container at room temperature for up to 2 days. The sugar acts as a preservative.
Refrigerator: If your kitchen is hot or you want to keep them longer, store them in the fridge for up to 5 days. However, let them come to room temperature before eating, as cold butter frosting can be hard and waxy.
Freezing: You can freeze the unfrosted cupcakes for up to 3 months. Wrap them individually in plastic wrap. Thaw on the counter before frosting.
Nutrition Facts (Estimated)
| Serving Size | 1 Cupcake |
| Calories | 340 kcal |
| Fat | 16g |
| Saturated Fat | 10g |
| Unsaturated Fat | 5g |
| Trans Fat | 0g |
| Cholesterol | 65mg |
| Sodium | 180mg |
| Carbohydrates | 46g |
| Fiber | 1g |
| Sugar | 28g |
| Protein | 3g |
Frequently Asked Questions
Can I use store-bought orange juice?
Yes, but fresh is best! If using store-bought, try to get ‘not from concentrate’ and pulp-free. You will definitely need to add orange extract to compensate for the lack of zest.
Why did my cupcakes sink in the middle?
This usually happens if the oven door was opened too early (releasing heat) or if the batter was overmixed, incorporating too much air that collapsed during cooling.
Can I make this into a cake instead?
Absolutely! This recipe fits perfectly into an 8-inch or 9-inch round cake pan. You will need to increase the baking time to about 25-30 minutes.
My frosting is too runny, what do I do?
Don’t panic! Add more powdered sugar, 1/4 cup at a time, until it stiffens up. Alternatively, chill the frosting in the fridge for 20 minutes and re-whip.
Can I use blood oranges?
Yes! Blood oranges will give a beautiful pinkish hue and a slightly more berry-like citrus flavor. It’s a fancy twist!
How do I get that high bakery-style swirl?
Use a large piping tip (like a Wilton 1M or 2D) and a piping bag. Start from the outside edge and spiral inward and upward.
Is this recipe kid-friendly?
100%. There is no alcohol, and the flavor is very similar to the ice cream treats kids love. It’s always a hit at birthday parties.
Can I use salted butter?
You can. If you use salted butter, just omit the 1/4 tsp of added salt in the recipe to keep the flavor balanced.
Conclusion
And there you have it—a little slice of sunshine right in your kitchen! I truly hope these Orange Creamsicle Cupcakes bring as much joy to your home as they do to mine. There is something so special about taking a classic flavor from our childhoods and sharing it with the next generation (or just enjoying it ourselves, because we deserve it!).
If you make these, please, please snap a photo! I love seeing your creations. Tag me on Instagram or Pinterest so I can share your beautiful baking. And don’t forget to leave a comment below letting me know if you added any fun twists to the recipe. Happy baking, friends!