Mini Chocolate Cakes Recipe
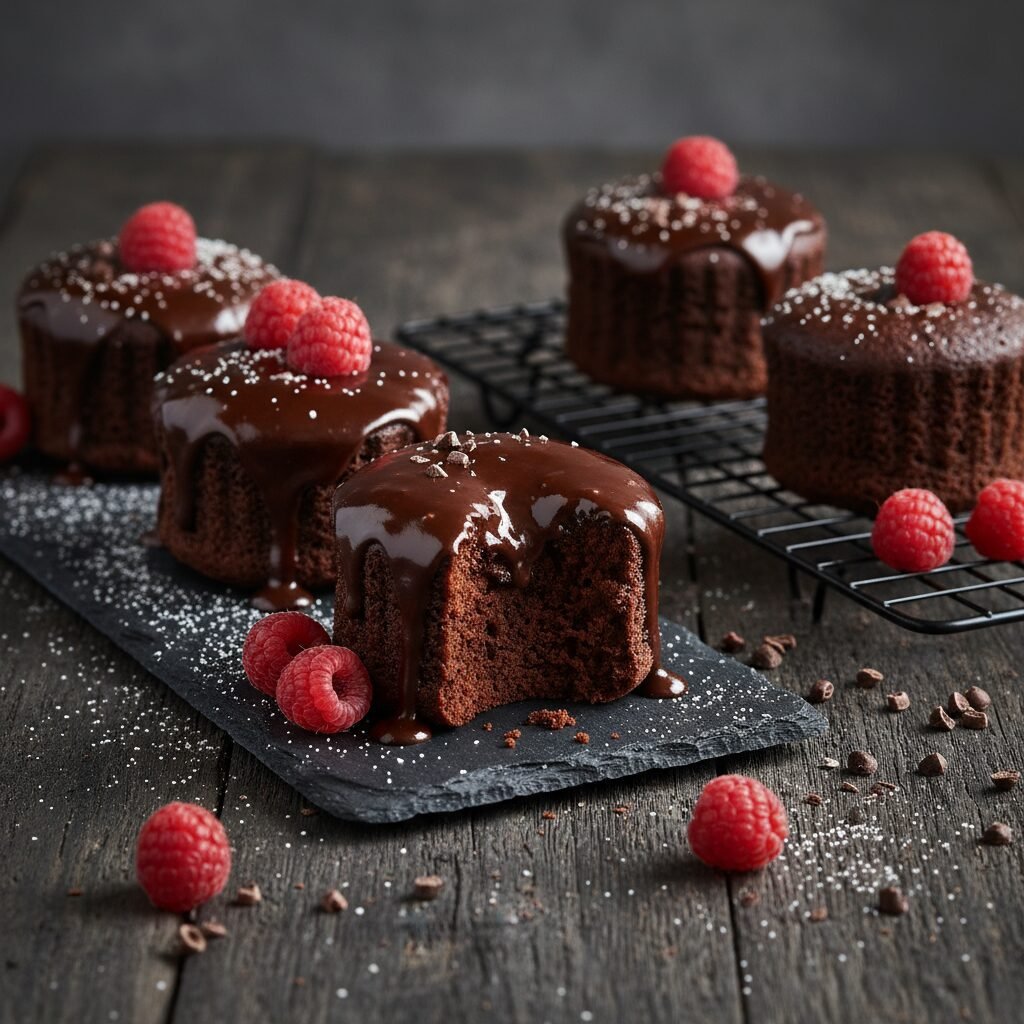
Imagine the richest, fudgiest chocolate cake you have ever tasted, but perfectly portioned just for you. These mini chocolate cakes are incredibly moist, topped with a silky ganache, and are surprisingly simple to whip up for a crowd or a cozy night in.
20 minutes
25 minutes
45 minutes
12 mini cakes
Dessert
Baking
American
Vegetarian
Let’s be real for a second: is there anything more comforting than chocolate cake? I don’t think so. But sometimes, baking a massive three-tier cake feels like a huge commitment, both in time and in the inevitable struggle of having leftover cake staring at you from the counter for days. Enter the hero we all need: Mini Chocolate Cakes.
These little beauties are the answer to every chocolate craving. They are sophisticated enough for a dinner party or a bridal shower, yet simple enough to whip up on a random Tuesday when you just need a little pick-me-up. I absolutely love making these for my kids’ school events because they are easy to serve—no slicing required! plus, there is something undeniably cute about miniature food.
What makes this specific recipe a keeper is the texture. We are talking about a crumb that is tender, dark, and moist, paired with a glossy chocolate ganache that literally melts in your mouth. It is the kind of dessert that makes people stop talking and just close their eyes to savor the bite. Whether you are a busy mom looking for a win or just a chocolate lover, this recipe is going to become your new best friend.
History & Origins
The history of chocolate cake is actually quite fascinating and a bit of a journey! While chocolate has been consumed as a beverage for centuries (dating back to the Aztecs and Mayans), it wasn’t until the mid-19th century that we figured out how to extract cocoa butter and create a powder suitable for baking. Before then, chocolate cakes were actually yellow or white cakes served with a chocolate drink.
It wasn’t until around 1886 that cooks in the United States began adding chocolate directly into the cake batter, creating the ancestors of the dessert we love today. The concept of “mini” cakes or petits fours hails from French baking traditions, where small, bite-sized confectioneries were baked in the residual heat of brick ovens. Today, combining the rich, American-style chocolate cake with the delicate, individual portioning of European patisserie gives us the best of both worlds: robust flavor in an elegant package.
Why This Recipe Works
You might wonder why this recipe produces such a moist cake compared to others. The secret lies in two key components: oil instead of butter and hot coffee. While butter provides flavor, it contains water that evaporates, sometimes drying out the crumb. Oil is 100% fat and remains liquid at room temperature, ensuring the sensation of moistness lasts for days.
Secondly, the hot coffee is a game-changer. We add boiling hot coffee to the batter at the very end. This does two things: it “blooms” the cocoa powder, releasing its full flavor potential (making it taste more chocolatey, not like coffee), and the heat helps to dissolve the sugar completely before baking begins. This results in a texture that is velvety and uniform rather than gritty or dry.
Why You’ll Love This Recipe
- ✓Perfectly portioned for individual servings
- ✓Uses pantry staples you likely have right now
- ✓Insanely moist texture thanks to the hot coffee method
- ✓Freezer-friendly for emergency cravings
- ✓Versatile decoration options for any holiday
Equipment You’ll Need
- ✓Standard 12-cup muffin tin or mini cake pans
- ✓Large mixing bowl
- ✓Medium mixing bowl
- ✓Whisk
- ✓Wire cooling rack
- ✓Measuring cups and spoons
- ✓Small saucepan (for ganache)
Ingredients
- ✓1 3/4 cups All-purpose flour
- ✓2 cups Granulated sugar
- ✓3/4 cup Unsweetened cocoa powder (Dutch-process preferred)
- ✓1 1/2 tsp Baking powder
- ✓1 1/2 tsp Baking soda
- ✓1 tsp Salt
- ✓2 large Eggs, room temperature
- ✓1 cup Whole milk (or buttermilk for extra tang)
- ✓1/2 cup Vegetable oil or canola oil
- ✓2 tsp Pure vanilla extract
- ✓1 cup Boiling hot coffee (or boiling water)
- ✓For the Ganache: 1 cup semi-sweet chocolate chips
- ✓For the Ganache: 1/2 cup heavy cream
Instructions
- Preheat and Prep: Preheat your oven to 350°F (175°C). Grease and flour a standard muffin tin or mini cake pan thoroughly. You can also use cupcake liners if you prefer easier cleanup, but greasing the pan gives a nicer edge.
- Mix Dry Ingredients: In a large bowl, whisk together the flour, sugar, cocoa powder, baking powder, baking soda, and salt. Make sure to break up any clumps of cocoa powder.
- Mix Wet Ingredients: In a separate medium bowl, whisk the eggs, milk, oil, and vanilla extract until well combined.
- Combine: Pour the wet ingredients into the dry ingredients. Mix with a whisk or electric mixer on low speed just until combined. Do not overmix at this stage.
- The Magic Step: Carefully pour in the boiling hot coffee. Whisk gently until the batter is smooth. Note: The batter will be very thin and liquidy—this is completely normal!
- Fill the Pans: Pour the batter into the prepared muffin cups, filling them about 2/3 full. Do not overfill, or they will spill over while rising.
- Bake: Bake for 20-25 minutes, or until a toothpick inserted into the center comes out clean or with just a few moist crumbs.
- Cool: Let the cakes cool in the pan for about 10 minutes, then carefully remove them and transfer to a wire rack to cool completely.
- Make the Ganache: While cakes cool, place chocolate chips in a small heat-proof bowl. Heat the heavy cream in a saucepan until it just begins to simmer (do not boil over). Pour the hot cream over the chocolate chips. Let it sit for 5 minutes, then whisk until smooth and glossy.
- Assemble: Once the cakes are cool, spoon the ganache over the top, letting it drip down the sides. Top with sprinkles, berries, or sea salt if desired.
Expert Cooking Tips
- ✓Room Temperature Eggs: Ensure your eggs and milk are at room temperature. This helps the batter emulsify properly, leading to a lighter cake.
- ✓Quality Cocoa: Since chocolate is the main flavor, splurge a little on high-quality cocoa powder. Dutch-process cocoa gives a darker color and mellower flavor.
- ✓Don’t Overbake: Small cakes bake faster than large ones. Start checking at the 20-minute mark to ensure they stay moist.
- ✓Greasing is Key: If you aren’t using paper liners, use a baking spray that contains flour, or grease with butter and dust with cocoa powder (instead of flour) so you don’t have white streaks on your dark cakes.
Substitutions and Variations
Gluten-Free: You can easily swap the all-purpose flour for a high-quality 1:1 Gluten-Free Baking Flour blend. The texture remains surprisingly similar.
Coffee Alternative: If you are baking for kids or sensitive to caffeine, you can use boiling water instead of coffee. The cake will still be delicious, though the chocolate flavor might be slightly less intense.
Dairy-Free: Swap the milk for almond or oat milk, and use a dairy-free heavy cream alternative or coconut cream for the ganache.
Egg Substitute: For an egg-free version, you can use 1/2 cup of unsweetened applesauce or a flax egg mixture (2 tbsp flax meal + 6 tbsp water).
Common Mistakes to Avoid
The most common mistake is overmixing the batter once the flour is added. This develops the gluten and makes the cakes tough instead of tender. Mix only until the flour streaks disappear.
Another issue is using cold ingredients. If your milk and eggs are cold, they can cause the batter to curdle slightly and affect the rise. Lastly, don’t skip the boiling liquid step—it is essential for blooming the cocoa!
Serving Suggestions
These mini cakes are stunning on their own, but you can dress them up! Serve them with a dollop of fresh whipped cream and a raspberry on top for a classic look. For a birthday party, use colorful sprinkles or a maraschino cherry. If you want to get really fancy, serve them warm in a bowl with a scoop of vanilla bean ice cream and warm caramel sauce drizzled over everything.
Storage and Reheating Tips
Room Temperature: Store the frosted cakes in an airtight container at room temperature for up to 3 days. The oil in the recipe helps them stay moist.
Refrigerator: You can refrigerate them for up to 5 days, but let them come to room temperature before eating for the best texture.
Freezing: These freeze beautifully! Wrap unfrosted cakes individually in plastic wrap and store in a freezer bag for up to 3 months. Thaw on the counter and glaze fresh before serving.
Nutrition Facts (Estimated)
| Serving Size | 1 mini cake |
| Calories | 320 kcal |
| Fat | 16g |
| Saturated Fat | 5g |
| Unsaturated Fat | 10g |
| Trans Fat | 0g |
| Cholesterol | 35mg |
| Sodium | 180mg |
| Carbohydrates | 42g |
| Fiber | 3g |
| Sugar | 28g |
| Protein | 4g |
Frequently Asked Questions
Can I use a regular cupcake pan?
Yes! A standard muffin/cupcake tin is perfect for this recipe. It yields about 12-15 standard-sized mini cakes.
Will these taste like coffee?
No, they won’t taste like a latte. The coffee simply enhances the richness of the chocolate. If you hate coffee, you can use hot water, but I promise you can’t taste the coffee flavor in the final product.
Why did my mini cakes sink in the middle?
This usually happens if the oven door was opened too early during baking, causing the temperature to drop, or if there was too much leavening (baking powder/soda). Ensure you measure precisely!
Can I make the batter ahead of time?
Because this recipe uses baking soda which activates immediately upon contact with acid and liquid, it is best to bake the batter right after mixing. Do not let it sit out.
My batter is very runny, did I do something wrong?
Not at all! This specific recipe produces a very thin, liquid batter. This is intentional and is what creates that super moist, fudgy crumb.
Can I use melted butter instead of oil?
You can, but the texture will be slightly different. Butter cakes tend to dry out faster than oil cakes. If you want that classic dense fudge texture, stick with oil.
How do I get the cakes out of the pan without breaking them?
Let them cool for at least 10 minutes in the pan to set. If you didn’t use liners, run a small offset spatula or thin knife around the edge before gently lifting them out.
Can I use frosting instead of ganache?
Absolutely. A buttercream, cream cheese frosting, or even a simple dusting of powdered sugar works great if you prefer that over ganache.
Conclusion
There you have it—the only recipe you will ever need for the perfect Mini Chocolate Cakes. Whether you are treating yourself after a long week of mom-duty or hosting a festive gathering, these little delights are guaranteed to bring a smile to everyone’s face. They are dark, dreamy, and dangerously easy to make.
I can’t wait for you to try this recipe in your own kitchen. Don’t forget to snap a picture and tag me on Pinterest or Instagram so I can see your beautiful creations! Happy baking!