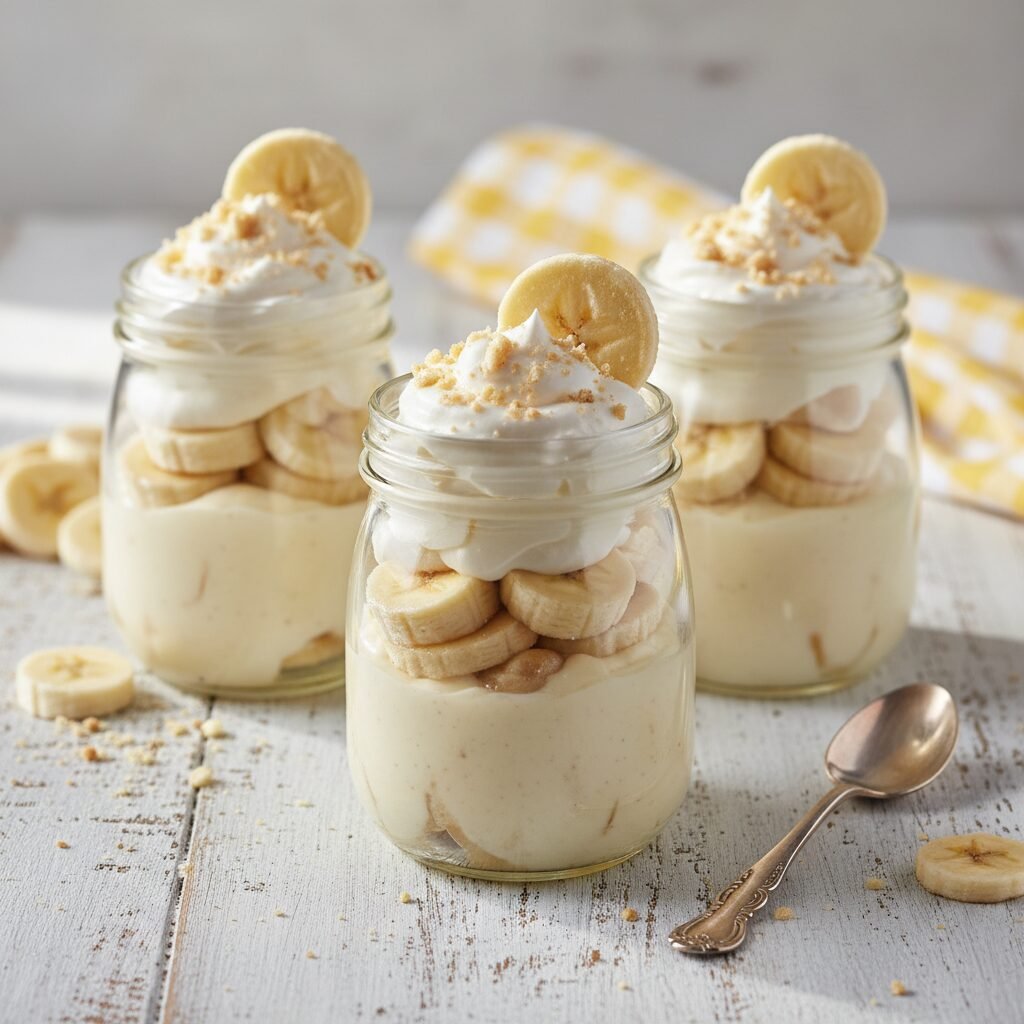
Mason Jar Banana Pudding Cups
Looking for a dessert that is as cute as it is delicious? These individual banana pudding cups are a total crowd-pleaser and take just minutes to assemble. Perfect for portion control and mess-free serving!
20 mins
0 mins
20 mins
6-8 Jars (8oz)
Dessert
No-Bake / Assembly
American
Vegetarian
Hey there, friends! If you have been hanging around my blog for a while, you know that I absolutely live for desserts that look fancy but are secretly incredibly easy to throw together. Enter the Mason Jar Banana Pudding Cup. This is not just a dessert; it is a total vibe. Whether you are hosting a baby shower, planning a summer picnic, or just need a sweet treat to get you through a chaotic Tuesday with the kids, these little jars of joy are your new best friend.
There is something so nostalgic about banana pudding. It screams Southern comfort, family gatherings, and sunny afternoons. But let’s be real—serving a giant trifle bowl of pudding can get messy fast. By the time the third person digs in, it looks less like a masterpiece and more like a delicious disaster. That is why I am obsessed with the mason jar method. Not only does it make serving a breeze (no plates required!), but everyone gets the perfect ratio of pudding to banana to cookie in every single bite.
Plus, can we talk about how Instagram-mable these are? The visible layers of golden wafers, creamy white pudding, and yellow bananas look stunning through the glass. It is the kind of dessert that makes you look like a domestic goddess with minimal effort. So, grab your apron and your favorite cute jars, because we are about to make the best no-bake treat ever!
History & Origins
Banana pudding has a surprisingly rich history that dates back to the late 19th century in the United States. While we often associate it with the South, early recipes actually appeared in cookbooks from Massachusetts and Illinois. However, the dessert didn’t truly find its identity until the widespread availability of two key ingredients: bananas and vanilla wafers.
In the late 1800s, improved steamship technology allowed bananas to be imported from the Caribbean to the US much faster, making them cheaper and more accessible to home cooks. Then came the game-changer: the National Biscuit Company (now known as Nabisco) introduced Nilla Wafers. In the 1920s, Nabisco started printing a recipe for banana pudding on the back of their vanilla wafer boxes, cementing the marriage of these ingredients forever.
Over the decades, the recipe evolved from a baked custard or meringue-topped dish to the creamy, cold, refrigerator-style dessert we know and love today. The shift to using instant pudding mixes and whipped toppings in the mid-20th century made it a staple for busy homemakers. Serving them in mason jars is a modern twist that nods to the rustic, farmhouse aesthetic that has taken over Pinterest feeds everywhere, combining vintage charm with modern convenience.
Why This Recipe Works
You might be wondering, what makes this specific version of banana pudding so good? It comes down to the science of texture and flavor balance. First, we are ditching the plain instant pudding instructions. By folding in homemade whipped cream (or whipped topping if you are in a pinch) and sweetened condensed milk, we transform a basic pudding mix into a luxurious, mousse-like custard. The condensed milk adds a dense, milky sweetness that mimics a slow-cooked custard without the stove time.
Secondly, the jar format actually improves the eating experience. In a large bowl, the wafers at the bottom can turn to complete mush under the weight of the pudding before you even serve it. In a jar, the structural integrity of the layers is preserved better. The wafers absorb moisture from the pudding and the bananas, softening into a cake-like texture, but they retain just enough bite to provide contrast.
Finally, we tackle the enemy of all banana desserts: oxidation. Bananas turn brown when exposed to air because of an enzyme called polyphenol oxidase. By tossing our banana slices in a tiny bit of lemon juice and sealing them quickly within the airtight layers of pudding, we slow down this reaction, keeping your dessert looking fresh and bright for longer.
Why You’ll Love This Recipe
- ✓Completely No-Bake recipe perfect for hot days
- ✓Individual servings mean no messy scooping
- ✓Kid-friendly assembly—let the little ones help layer!
- ✓Portable and perfect for picnics or lunchboxes
- ✓Uses simple, accessible pantry ingredients
- ✓Can be made ahead of time for stress-free hosting
Equipment You’ll Need
- ✓6 to 8 Mason Jars (8oz or half-pint size)
- ✓Electric Hand Mixer or Stand Mixer
- ✓Large Mixing Bowl
- ✓Medium Mixing Bowl
- ✓Rubber Spatula
- ✓Knife and Cutting Board
- ✓Piping Bag (optional, for neat layers)
Ingredients
- ✓1 box (5 oz) Instant Vanilla Pudding Mix
- ✓1.5 cups Cold Whole Milk
- ✓1 can (14 oz) Sweetened Condensed Milk
- ✓1 tsp Pure Vanilla Extract
- ✓2 cups Heavy Whipping Cream (very cold)
- ✓3-4 Ripe Bananas
- ✓1 tbsp Lemon Juice
- ✓1 box (11 oz) Nilla Wafers (or similar vanilla cookies)
Instructions
- Prep the Pudding Base: In a large mixing bowl, whisk together the instant vanilla pudding mix and the cold whole milk. Whisk vigorously for about 2 minutes until it starts to thicken. Stir in the sweetened condensed milk and vanilla extract until smooth. Set this bowl aside in the fridge for a few minutes to set up slightly.
- Whip the Cream: In a separate chilled bowl, use your electric mixer to beat the heavy whipping cream until stiff peaks form. This usually takes about 3-5 minutes. Be careful not to overbeat, or you’ll make butter! (Note: You can substitute an 8oz tub of whipped topping here if you prefer).
- Combine: Gently fold the whipped cream into the pudding mixture using a rubber spatula. Use a ‘cut and fold’ motion to keep the mixture light and airy. Do not stir aggressively, or you will deflate the cream.
- Prepare Bananas: Slice your bananas into coins, about 1/4 inch thick. Place them in a small bowl and gently toss with the lemon juice. This helps prevent them from browning too quickly.
- Assemble the Jars: Now for the fun part! Start by placing a layer of Nilla Wafers at the bottom of each mason jar. You can crush them slightly if the jar is narrow.
- Layering: Add a layer of banana slices on top of the wafers. Spoon (or pipe) a generous amount of the pudding mixture over the bananas. Repeat the layers: wafers, bananas, pudding. Fill the jar almost to the rim.
- Top and Chill: Finish with a final dollop of pudding or whipped cream. Garnish with a whole Nilla Wafer or some crushed cookie crumbs on top. Screw the lids on the jars.
- Rest: Refrigerate the jars for at least 2 to 4 hours before serving. This rest time is crucial as it allows the cookies to soften and become cake-like.
- Serve: Serve cold directly from the fridge. Enjoy your beautiful masterpiece!
Expert Cooking Tips
- ✓Cold Ingredients: Ensure your heavy cream and milk are ice cold before starting. This helps the pudding set and the cream whip to volume faster.
- ✓Banana Ripeness: Use bananas that are yellow with just a few brown spots. If they are too green, they won’t be sweet enough. If they are fully brown, they will be too mushy for the layers.
- ✓Piping for Precision: If you want your jars to look Pinterest-perfect with clean layers, put your pudding mixture into a large Ziploc bag, snip the corner, and pipe it into the jars rather than spooning it.
- ✓Cookie Crunch: If you prefer your wafers to stay crunchy, assemble the jars immediately before serving. If you like the traditional soft, cakey texture, let them sit in the fridge for at least 4 hours.
Substitutions and Variations
This recipe is super flexible! If you are Gluten-Free, simply swap the Nilla Wafers for your favorite gluten-free vanilla cookie or even gluten-free shortbread. For a Lighter Version, you can use skim milk, sugar-free pudding mix, and a light whipped topping, though the texture won’t be quite as rich.
Not a fan of vanilla? Try using Banana Cream or Cheesecake flavored pudding mix for a different twist. You can also swap the fruit! This method works beautifully with strawberries (Strawberry Shortcake Jars!) or layers of chocolate pudding and Oreos for a dirt cake variation.
Common Mistakes to Avoid
The biggest mistake people make is not letting it chill long enough. I know it is tempting to dive in right away, but the magic happens when the moisture from the pudding seeps into the cookies. If you eat it immediately, it’s just dry cookies and pudding. Give it time!
Another common issue is over-mixing the whipped cream. When you fold the cream into the pudding, go slow. If you stir it like you’re mixing batter, you knock all the air out, and your filling will be runny instead of fluffy and mousse-like.
Serving Suggestions
These jars are perfect for outdoor gatherings because the lids keep the bugs away! Serve them in a galvanized metal tub filled with ice to keep them cool at a picnic. For a party, tie a cute wooden spoon to the neck of the jar with some twine or ribbon. If you want to get really fancy, drizzle a little caramel sauce or salted caramel on top right before serving.
Storage and Reheating Tips
These jars need to be stored in the refrigerator. They are best eaten within 24 to 48 hours. After 48 hours, the bananas may start to get a bit too brown and the wafers might disintegrate too much. Do not freeze these jars; bananas release a lot of water when thawed, and the texture of the pudding will separate and become grainy.
Nutrition Facts (Estimated)
| Serving Size | 1 Jar (8oz) |
| Calories | 450 |
| Fat | 22g |
| Saturated Fat | 12g |
| Unsaturated Fat | 8g |
| Trans Fat | 0g |
| Cholesterol | 65mg |
| Sodium | 210mg |
| Carbohydrates | 58g |
| Fiber | 2g |
| Sugar | 38g |
| Protein | 6g |
Frequently Asked Questions
Can I make these ahead of time?
Yes! In fact, they are better made ahead. I recommend making them the morning of your event or the night before. Just don’t go beyond 24 hours prior for the best banana freshness.
How do I stop the bananas from turning brown?
The lemon juice toss in the instructions is the secret weapon. Also, ensure the banana layers are completely covered by the pudding mixture to seal them off from the air.
What size mason jars should I use?
I prefer 8oz (half-pint) jars for individual servings. It is a generous portion without being overwhelming. You can use 4oz jars for smaller ‘taster’ portions at a party.
Can I use cook-and-serve pudding instead of instant?
Technically yes, but you must let it cool completely to room temperature before folding in the whipped cream. If it’s warm, it will melt your cream. Instant is much easier and yields a fluffier result here.
Can I use Cool Whip instead of real cream?
Absolutely. Substitute the 2 cups of heavy cream and the whipping step with one 8oz tub of thawed Cool Whip. It makes the recipe even faster!
Can I freeze these for later?
No, I wouldn’t recommend it. Bananas turn black and mushy when frozen and thawed, and the pudding emulsion can break. These are strictly a fridge dessert.
What if I don’t have mason jars?
You can use clear plastic disposable cups, wine glasses, or even small ramekins. Anything clear works best so you can see the pretty layers.
Can I reduce the sugar?
Yes, you can use sugar-free pudding mix and a sugar-free whipped topping. The sweetened condensed milk is high in sugar, so you might swap that for evaporated milk mixed with a sugar substitute, though the texture will change.
Conclusion
There you have it, mamas! The easiest, cutest, and most delicious Mason Jar Banana Pudding Cups. This recipe is a total lifesaver when you need a dessert that impresses without requiring you to turn on the oven. The creamy, fluffy texture combined with the softened wafers and fresh fruit is just pure happiness in a jar.
I promise, once you make these, you will be asked to bring them to every potluck and family gathering. Don’t forget to pin this recipe to your favorite dessert board so you can find it whenever the craving strikes. Happy layering!