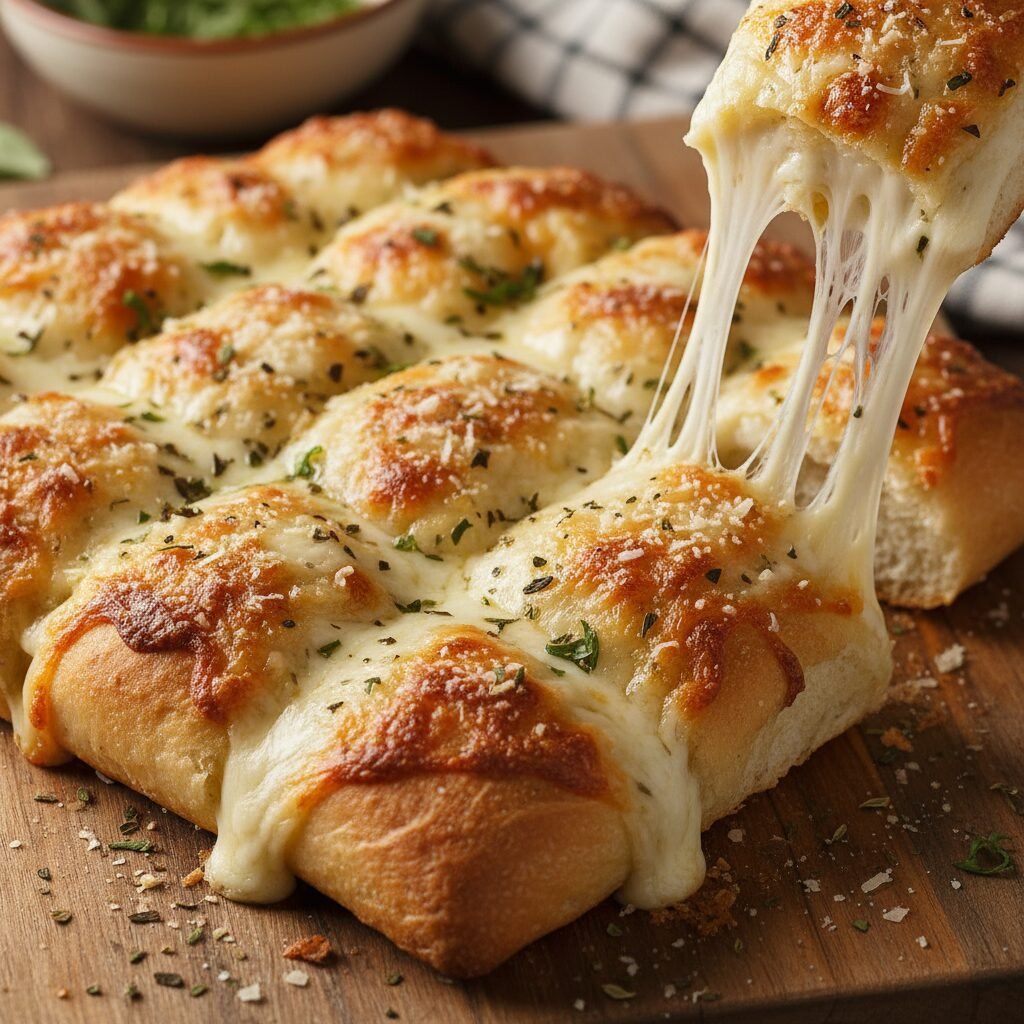
Little Caesars Cheese Bread
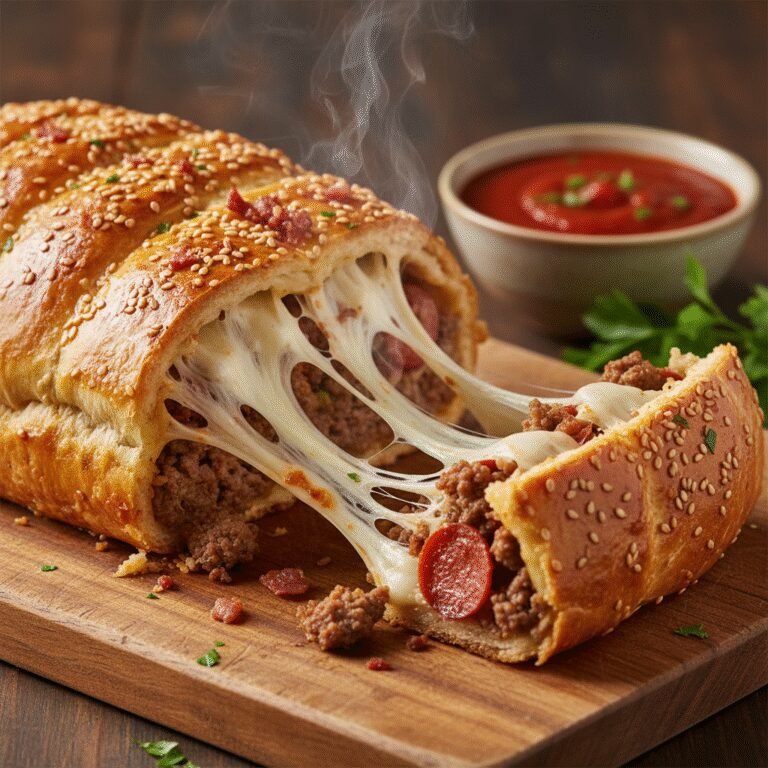
If there is one guilty pleasure my family absolutely cannot resist, it is the gooey, garlic-loaded goodness of Little Caesars Italian Cheese Bread. This copycat recipe recreates that iconic soft-on-the-inside, crispy-on-the-edges texture right in your own oven, and I promise it tastes even better than the Hot-N-Ready version!
20 mins
15 mins
1 hr 35 mins
10-12 Sticks
Appetizer
Baking
American-Italian
Vegetarian
Let’s be real for a second: is there anything more nostalgic than a Friday night with a cardboard box of pizza and that intoxicating smell of garlic butter wafting through the kitchen? For many of us moms, Little Caesars was the unsung hero of birthday parties, sleepovers, and those hectic evenings when cooking just wasn’t on the agenda. But the real star of the show wasn’t always the pizza—it was that incredible Italian Cheese Bread.
There is just something magical about how the cheese stretches for miles and how the garlic butter soaks into the fluffy dough. But as much as we love the convenience of the drive-thru, making this at home is a total game-changer. Not only is it budget-friendly (which we love!), but you also get full control over the ingredients. No mystery additives, just pure, wholesome flour, yeast, and an obscene amount of cheese.
In this post, I am going to teach you exactly how to replicate that famous texture. We are talking about a high-hydration dough that gets pressed into a pan—no rolling pin required!—and topped with a secret blend of cheeses that mimics the original perfectly. Grab your apron, friends, because your kitchen is about to smell like an Italian bakery, and your family is going to think you are a culinary wizard!
History & Origins
Little Caesars has been a staple in American fast food since 1959, founded by Mike and Marian Ilitch in Garden City, Michigan. While they started with a simple pizza menu, the brand exploded in popularity thanks to their catchy "Pizza! Pizza!" slogan and their focus on value. However, the introduction of their side dishes, specifically the Crazy Bread and the Italian Cheese Bread, created a cult following that rivals their actual pizzas.
The Italian Cheese Bread was designed to be a heavier, more substantial side than the Crazy Bread. It utilizes a deep-dish style pan method, similar to Detroit-style pizza (a nod to the company’s Michigan roots), which creates those delightful caramelized cheesy edges. Over the decades, it has become a comfort food icon. By recreating this recipe at home, we are tapping into over 60 years of pizza history, but elevating it with the love and care that only a home kitchen can provide.
Why This Recipe Works
You might be wondering, "Why can’t I just put cheese on regular pizza dough?" You can, but it won’t taste like Little Caesars. The secret to this copycat recipe lies in two specific elements: the cheese blend and the baking vessel.
First, the cheese. Most people default to just Mozzarella, but the distinct flavor and melt of the original comes from Muenster cheese. Muenster has a higher fat content and a phenomenal melting point that gives you that buttery, stringy pull without browning too quickly. When mixed with Mozzarella, it creates the perfect balance of flavor and stretch.
Second, the pan. We bake this in a buttered 9×13 baking dish or a quarter sheet pan. This effectively "fries" the bottom of the dough in the oven, creating a golden, crispy bottom crust while the inside stays pillowy and soft. It is the same principle used in focaccia or Detroit-style pizza. Finally, applying the garlic butter after baking ensures the garlic flavor remains punchy and fresh, rather than burnt and bitter.
Why You’ll Love This Recipe
- ✓Uses a secret blend of Muenster and Mozzarella for the authentic taste.
- ✓No rolling pin needed—just press the dough into the pan!
- ✓Ready in under an hour if using quick-rise yeast.
- ✓Much cheaper than ordering delivery.
- ✓The garlic butter topping is completely addictive.
- ✓Perfect appetizer for game days or movie nights.
Equipment You’ll Need
- ✓Stand mixer with dough hook (or a large bowl)
- ✓9×13 inch baking pan or quarter sheet pan
- ✓Pastry brush
- ✓Pizza cutter or sharp knife
- ✓Cheese grater
- ✓Small microwave-safe bowl
Ingredients
- ✓For the Dough:
- ✓1 cup warm water (110°F)
- ✓1 packet (2 1/4 tsp) instant yeast
- ✓1 tablespoon granulated sugar
- ✓2 1/2 cups bread flour (all-purpose works in a pinch)
- ✓1 teaspoon salt
- ✓2 tablespoons olive oil
- ✓For the Cheesy Topping:
- ✓8 oz Muenster cheese, block style (do not buy pre-shredded)
- ✓8 oz Mozzarella cheese, block style
- ✓For the Garlic Butter:
- ✓3 tablespoons salted butter, melted
- ✓1 teaspoon garlic powder
- ✓1/2 teaspoon dried parsley
- ✓1/2 teaspoon Italian seasoning
- ✓2 tablespoons grated Parmesan cheese
Instructions
- Step 1: Activate the Yeast. In the bowl of your stand mixer, combine the warm water and sugar. Sprinkle the yeast on top and give it a quick stir. Let it sit for about 5-10 minutes until it gets nice and foamy. If it doesn’t foam, your yeast might be dead, so start over!
- Step 2: Mix the Dough. Add the olive oil, salt, and bread flour to the yeast mixture. Using the dough hook attachment, mix on low speed until combined. Increase speed to medium-low and knead for 5-7 minutes. The dough should be soft and slightly tacky, but not sticking to the sides of the bowl.
- Step 3: First Rise. Lightly oil a large bowl. Place the dough inside, turning it once to coat it in oil. Cover with plastic wrap or a warm damp towel. Place in a warm, draft-free spot and let it rise for about 1 hour, or until doubled in size.
- Step 4: Prep the Pan. Grease your 9×13 baking pan generously with butter or non-stick spray. This is crucial for that crispy bottom!
- Step 5: Press the Dough. Punch down the risen dough and transfer it to your prepared pan. Using your fingertips, gently press and stretch the dough towards the corners. If it keeps shrinking back, let it rest for 10 minutes to relax the gluten, then try again. Dimple the dough with your fingers like you are making focaccia.
- Step 6: The Cheese Layer. This is the fun part! Shred your Muenster and Mozzarella cheeses. Mix them together and pile them high all over the dough, ensuring you get coverage right to the edges (crispy cheese edges are the best part).
- Step 7: Bake. Preheat your oven to 475°F (245°C). Bake the cheese bread for 12-15 minutes. You want the cheese bubbling and slightly golden spots appearing, and the crust should be golden brown.
- Step 8: Garlic Butter Finish. While the bread bakes, whisk together the melted butter, garlic powder, dried parsley, Italian seasoning, and Parmesan cheese. As soon as you pull the bread out of the oven, brush this mixture generously over the hot cheese and crust.
- Step 9: Serve. Let it cool for just 2-3 minutes so the cheese sets slightly, then use a pizza cutter to slice into sticks. Serve immediately with marinara sauce for dipping!
Expert Cooking Tips
- ✓Grate Your Own Cheese: Please, I beg you, do not use pre-shredded bagged cheese. It is coated in potato starch to prevent clumping, which stops it from melting into that gooey, cohesive layer we want.
- ✓Don’t Skip the Muenster: If you only use Mozzarella, it will taste like regular pizza. The Muenster adds that distinct salty, buttery flavor profile that Little Caesars is famous for.
- ✓Bread Flour vs. All-Purpose: Bread flour has a higher protein content, which creates more gluten. This results in a chewier, fluffier texture that mimics restaurant dough. All-purpose flour yields a softer, more biscuit-like texture.
- ✓Oven Temperature: High heat is your friend. 475°F ensures the dough puffs up quickly and the bottom gets crispy before the cheese burns.
- ✓Let the Dough Relax: If you are fighting with the dough and it snaps back like a rubber band when you try to stretch it into the pan, walk away. Let it sit for 10 minutes. The gluten needs to relax.
Substitutions and Variations
We all have those moments where we are missing one ingredient! If you can’t find Muenster cheese, Monterey Jack is a decent runner-up, though slightly milder. For the dough, if you are short on time, you can absolutely use a store-bought fresh pizza dough ball (usually found in the bakery section of the grocery store). Just bring it to room temperature before pressing it into the pan. If you need a gluten-free version, swap the bread flour for a high-quality 1:1 gluten-free baking flour blend, but be aware the texture will be less chewy.
Common Mistakes to Avoid
The biggest mistake people make is under-baking. Because there is so much cheese on top, it can look done before the dough is fully cooked through. Make sure you check the bottom of the crust; it should be a sturdy golden brown. Another common error is adding the garlic butter too early. If you put the garlic butter on before baking, the garlic will likely burn at 475°F and taste bitter. Always brush it on fresh after baking!
Serving Suggestions
This cheese bread is practically begging for a dip! A classic Crazy Sauce (marinara) is the traditional route. You can make a quick one by mixing tomato sauce with a pinch of sugar, oregano, and garlic powder. For a creamy twist, try dipping it in ranch dressing—don’t judge it until you try it! Serve this alongside a fresh antipasto salad to balance out the heaviness, or just enjoy it as the main course for a fun family movie night.
Storage and Reheating Tips
If you somehow have leftovers (which is rare in my house!), store them in an airtight container or wrap them tightly in foil in the fridge for up to 3 days. Do not microwave to reheat unless you want soggy rubbery bread. Instead, pop them in an air fryer at 350°F for 3-4 minutes, or back in the oven/toaster oven until the cheese is bubbly again. You can also freeze the baked sticks for up to a month.
Nutrition Facts (Estimated)
| Serving Size | 1 Stick |
| Calories | 240 kcal |
| Fat | 12g |
| Saturated Fat | 7g |
| Unsaturated Fat | 4g |
| Trans Fat | 0g |
| Cholesterol | 30mg |
| Sodium | 450mg |
| Carbohydrates | 24g |
| Fiber | 1g |
| Sugar | 2g |
| Protein | 9g |
Frequently Asked Questions
Can I make the dough ahead of time?
Absolutely! You can make the dough, let it do its first rise, and then punch it down and store it in the fridge for up to 24 hours. Actually, a cold ferment in the fridge often develops better flavor!
Why is my dough really sticky?
Humidity affects flour. If it’s too sticky to handle, add more flour one tablespoon at a time. However, remember that a slightly wetter dough makes for fluffier bread, so don’t dry it out too much.
Can I use a baking stone?
You can, but this recipe is designed for a pan (deep-dish style). If you use a stone, shape the dough on a peel and slide it on, but you won’t get those specific crispy, buttery edges that the pan provides.
Is Muenster cheese necessary?
For an authentic copycat flavor, yes. Muenster provides the melt and the specific fat content that mimics the original. Using only Mozzarella will result in a standard cheesy bread, which is good, but not accurate.
How do I get the bottom crispy?
Use a metal pan (aluminum is best) and ensure you grease it with butter or oil. Bake on the lowest rack of your oven to get the most heat to the bottom of the pan.
Can I add other toppings?
Sure! Bacon bits, pepperoni, or jalapeños are delicious additions. Just add them on top of the cheese before baking.
My cheese is browning too fast, what do I do?
If the cheese is burning but the dough is raw, tent the pan loosely with aluminum foil and lower the oven rack.
Can I use active dry yeast instead of instant?
Yes! Just make sure you proof it in the warm water with sugar for 5-10 minutes until foamy before adding the flour. Instant yeast can theoretically be mixed straight in, but I like proofing both just to be safe.
Conclusion
And there you have it, friends! The ultimate guide to making Little Caesars Cheese Bread right in your own kitchen. I really hope you give this recipe a try for your next pizza night. There is something so satisfying about pulling that bubbling, golden pan out of the oven and seeing the joy on your family’s faces. It’s cheesy, it’s garlicky, and it’s made with love. If you make this, please snap a photo and tag me on social media—I love seeing your creations! Happy baking!