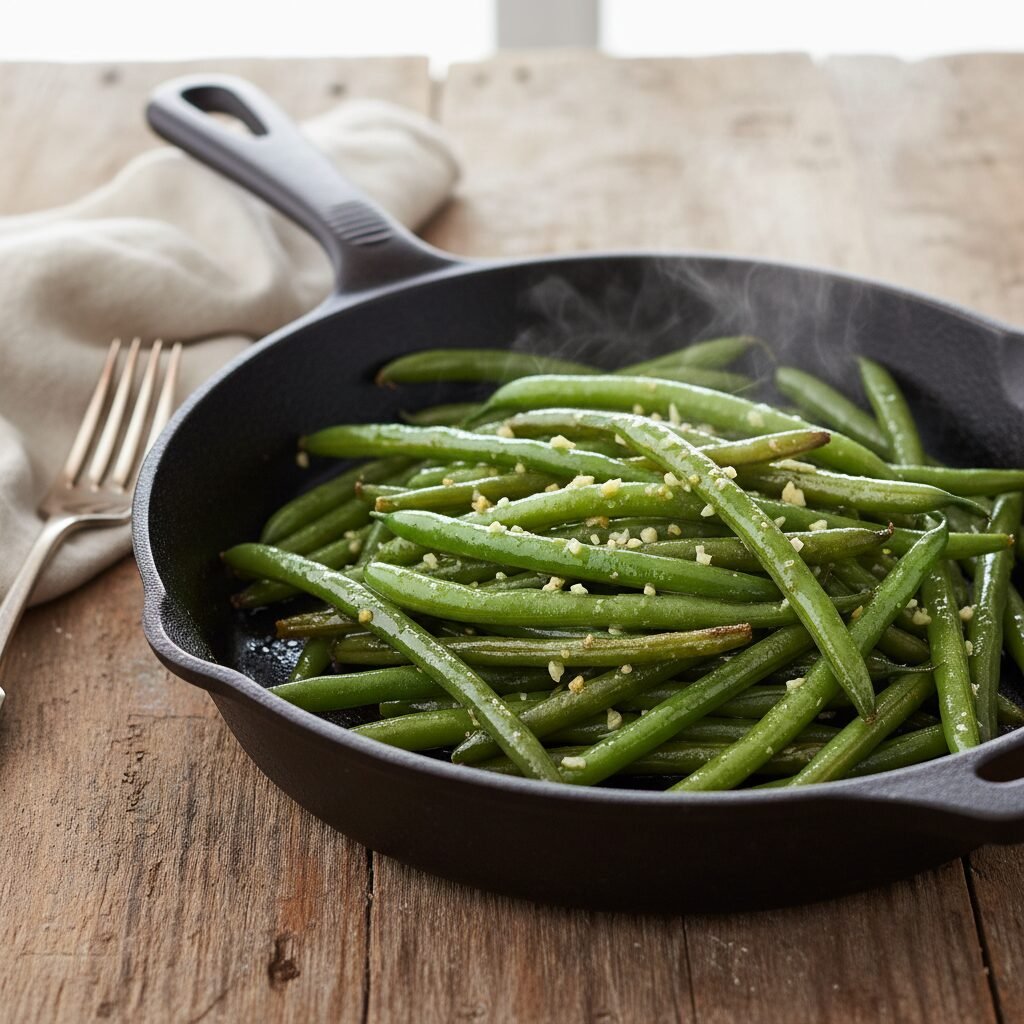
How To Make The Best Frozen Green Beans Stove Top Vegetable Side Dish
Forget everything you know about mushy frozen vegetables. This stove-top method creates blistered, garlic-buttery green beans that taste garden-fresh and are ready in under 15 minutes—no thawing required!
2 minutes
12 minutes
14 minutes
4 Servings
Side Dish
Stove Top / Sauté
American
Vegetarian
Hey there, busy mamas! Let’s have a little heart-to-heart about the 5:00 PM dinner scramble. You know the one: the chicken is in the oven, the kids are asking for snacks, and you suddenly realize you completely forgot a vegetable side dish. We have all been there. Usually, this is when we grab a bag of frozen veggies, toss them in the microwave, and end up with something… well, less than inspiring. Sad, soggy, and flavorless beans are often the result, and it is no wonder the kids push them around their plates.
But what if I told you that that humble bag of frozen green beans sitting in the back of your freezer is actually a diamond in the rough? It is true! With the right technique, you can transform those icy green sticks into a side dish that rivals fresh produce from the farmers market. We are talking crisp-tender textures, caramelized edges, and a garlic-butter flavor that will have your family actually asking for seconds.
This recipe is my absolute go-to for chaotic weeknights. It requires zero chopping (unless you want to), no thawing, and only one pan to wash. It is the kind of low-effort, high-reward cooking that makes you feel like a kitchen wizard. So, put down the microwave-safe bowl, grab your favorite skillet, and let’s make vegetables the star of the show tonight!
History & Origins
Green beans, also known as string beans or snap beans, have been a staple in American diets for centuries, originally cultivated in Central and South America. However, the frozen green bean has a slightly more modern history. Before the 1920s, if you wanted green beans in the winter, you were eating them out of a can. Canned beans, while nostalgic for some, are cooked to death during the canning process, resulting in that distinctively mushy texture and olive-drab color.
Enter Clarence Birdseye. In the 1920s, he developed the quick-freezing method that revolutionized how we eat. Flash freezing vegetables immediately after harvest locks in nutrients, color, and texture far better than canning or slow freezing. For decades, frozen green beans were marketed as a convenience food, often boiled into submission or buried in cream of mushroom soup for the famous Thanksgiving casserole. It wasn’t until the shift towards fresh, farm-to-table cooking in the early 2000s that home cooks started treating frozen vegetables with the same respect as fresh ones, using high-heat sautéing methods to revive their natural crunch and flavor.
Why This Recipe Works
The science behind why this method works so well lies in evaporation and the Maillard reaction. When you boil or steam frozen green beans, you are adding moisture to a vegetable that is already full of ice crystals. This leads to waterlogged, limp beans. By using a wide skillet and a combination of oil and butter, we do the opposite.
First, we cook off the ice and surface moisture rapidly. Once the water evaporates, the temperature in the pan can rise above the boiling point of water (212°F) to the temperature of the fat. This allows the beans to actually fry and sauté, creating little blistered spots of caramelization (the Maillard reaction). This browning creates complex, nutty flavors that boiling simply cannot achieve. Adding the garlic at the very end ensures the aromatic oils coat the beans without burning and becoming bitter. It is a simple technique, but it makes a world of difference.
Why You’ll Love This Recipe
- ✓Ready in under 15 minutes
- ✓No thawing required – cook straight from frozen
- ✓Kid-friendly garlic butter flavor
- ✓Budget-friendly pantry staple meal
- ✓One-pan cleanup
- ✓Gluten-free and Vegetarian
Equipment You’ll Need
- ✓Large Skillet or Cast Iron Pan (12-inch recommended)
- ✓Tongs or Spatula
- ✓Measuring Spoons
Ingredients
- ✓1 lb (16 oz) Frozen Green Beans (standard or extra fine)
- ✓1 tbsp Olive Oil
- ✓2 tbsp Salted Butter
- ✓1/2 tsp Kosher Salt (plus more to taste)
- ✓1/4 tsp Black Pepper (freshly cracked is best)
- ✓1 tsp Garlic Powder (or 2 cloves fresh garlic, minced)
- ✓Optional: Pinch of Red Pepper Flakes for heat
- ✓Optional: Fresh Lemon Juice for finishing
Instructions
- Prep the Pan: Place a large skillet (cast iron or non-stick) over medium-high heat. Add the 1 tablespoon of olive oil and allow it to shimmer. We are not adding the butter yet, as we want to avoid burning it during the initial high-heat phase.
- Add the Beans: Pour the frozen green beans directly into the hot skillet. Do not thaw them first! You will hear a loud sizzle—that is the sound of success. Spread them out into a single layer as much as possible.
- Evaporate the Moisture: Cook the beans for about 5-7 minutes, stirring occasionally. During this phase, the ice crystals are melting and the water is evaporating. Do not cover the pan! Covering it will steam the beans and make them mushy. We want that water to escape.
- Add Butter and Seasoning: Once the water has evaporated and the beans are starting to look dry and slightly blistered, reduce the heat to medium. Add the 2 tablespoons of butter, the salt, pepper, and garlic powder. If using fresh minced garlic, add it now.
- Sauté for Flavor: Toss the beans continuously for another 3-5 minutes. The butter will foam and brown slightly, coating the beans. The beans should develop golden-brown blistered spots. Taste one to check for texture; they should be tender but still have a slight snap.
- Finish and Serve: Remove from heat immediately. If you like a pop of brightness, squeeze a little fresh lemon juice over the top now. Serve hot directly from the pan.
Expert Cooking Tips
- ✓Don’t Overcrowd: Use the largest pan you have. If the beans are piled too high, the ones on top will steam while the ones on the bottom burn.
- ✓Skip the Thaw: Thawing frozen beans beforehand actually makes them soggier because they sit in their own liquid. Cooking from frozen is superior.
- ✓Garlic Timing: If using fresh garlic, be very careful not to add it too early. Burnt garlic tastes bitter. Add it in the last 2 minutes of cooking.
- ✓Cast Iron Wins: A cast iron skillet retains heat beautifully and helps achieve that restaurant-style blistered effect better than non-stick.
- ✓Extra Fine vs. Cut: ‘Extra Fine’ frozen green beans (haricots verts) tend to be more tender and cook faster than the standard ‘cut’ green beans. Both work, but keep an eye on the time.
Substitutions and Variations
This recipe is incredibly versatile. If you are dairy-free or vegan, simply swap the butter for a high-quality vegan butter or just use more olive oil. For a savory, smoky twist, you can fry up some bacon pieces first and use the rendered bacon grease instead of olive oil. If you don’t have garlic powder, onion powder or even a little minced shallot works wonders. For an Asian-inspired twist, swap the salt for a splash of soy sauce and top with sesame seeds.
Common Mistakes to Avoid
The biggest mistake people make is adding water or covering the pan. Instinct tells us to steam veggies to cook them, but frozen veggies have already been blanched (partially cooked) before freezing. They don’t need steam; they need heat! Another mistake is low heat. You need medium-high heat to drive off the moisture quickly. If the heat is too low, the beans will stew in their own juices, resulting in a rubbery texture.
Serving Suggestions
These green beans go with practically everything. They are the perfect sidekick for a classic meatloaf, pan-seared steak, or a rotisserie chicken picked up from the grocery store. For a holiday meal, top them with crispy fried onions or toasted almonds (Green Beans Amandine) to make them feel fancy. They also pair beautifully with creamy mashed potatoes, cutting through the richness with their garlicky snap.
Storage and Reheating Tips
To Store: Place any leftovers in an airtight container in the refrigerator for up to 3 days.
To Reheat: Avoid the microwave if you want to keep the texture! Reheat them in a hot skillet for 2-3 minutes until warmed through. If you must microwave, do it in short 30-second bursts, but know they will soften significantly.
Nutrition Facts (Estimated)
| Serving Size | 1/2 cup |
| Calories | 85 kcal |
| Fat | 6g |
| Saturated Fat | 3g |
| Unsaturated Fat | 3g |
| Trans Fat | 0g |
| Cholesterol | 10mg |
| Sodium | 150mg |
| Carbohydrates | 6g |
| Fiber | 3g |
| Sugar | 2g |
| Protein | 2g |
Frequently Asked Questions
Should I thaw the green beans before cooking?
No! Do not thaw them. Thawing releases moisture and makes the beans limp. Cooking them straight from the freezer allows the water to evaporate quickly in the hot pan.
Can I use canned green beans for this recipe?
I do not recommend it. Canned beans are already fully cooked and very soft. They will disintegrate if you try to sauté them this way. Stick to frozen or fresh.
Why are my beans still rubbery?
Rubbery beans usually mean they were cooked at too low of a temperature for too long. Make sure your pan is hot enough to blister the skin rather than slowly drying out the inside.
Is this recipe Keto-friendly?
Yes, absolutely! Green beans are low in carbs, and the healthy fats from the butter and olive oil make this a perfect side dish for Keto or low-carb diets.
Can I use fresh green beans instead?
Yes, you can! If using fresh beans, you might need to add a splash of water and cover the pan for 2 minutes initially to steam them slightly, then remove the lid to sauté and blister them.
What herbs go well with this?
Aside from garlic, thyme, oregano, and rosemary are wonderful additions. Add dried herbs with the garlic powder, or fresh herbs at the very end.
How do I make them spicy?
Add a generous pinch of red pepper flakes when you add the garlic. You can also drizzle a little chili crisp oil over the finished dish.
My butter burned, what happened?
You likely added the butter too early while the pan was on high heat. Start with oil (which has a higher smoke point) and add the butter later when you reduce the heat to medium.
Conclusion
There you have it—the secret weapon for your weeknight dinner arsenal. Making the best frozen green beans isn’t about fancy equipment or expensive ingredients; it is just about treating them right with high heat and a little love. Once you try this stove-top method, you will never go back to microwaving your veggies again. It is quick, affordable, and delicious enough that the kids might just eat their greens without a bribe. Happy cooking, friends!