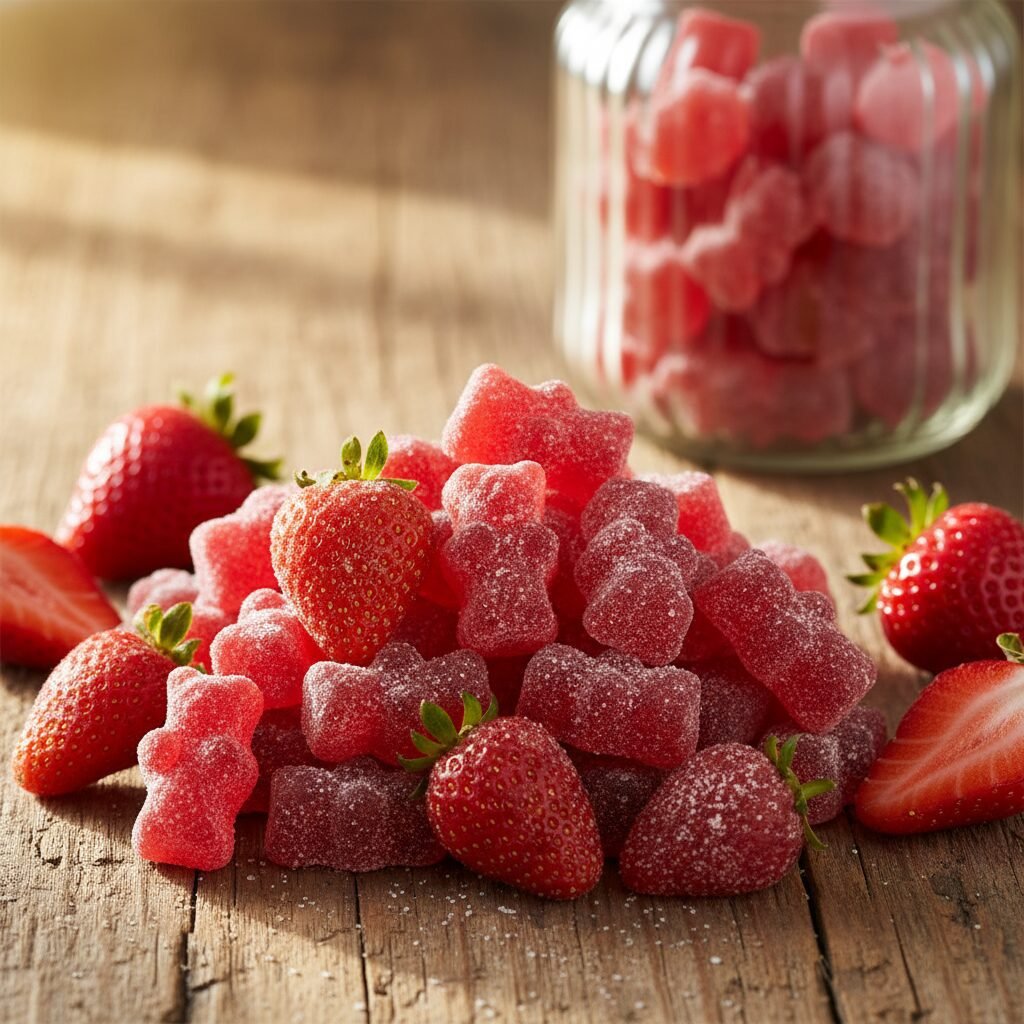
Do you remember the sheer joy of opening a crinkly packet of fruit snacks as a kid? There was something magical about those brightly colored, chewy little gems that made them the highlight of any lunchbox. But as we grow older and start reading nutrition labels, the magic fades a little. Suddenly, we see high fructose corn syrup, Red Dye No. 40, and artificial flavors that have never seen a real fruit in their lives. But what if I told you that you could reclaim that magic right in your own kitchen, using ingredients you can actually pronounce? Welcome to the wonderful world of homemade strawberry gummies.
Making your own gummies isn’t just a fun culinary experiment; it is a complete game-changer for your snacking habits. These aren’t the rubbery, flavorless lumps you might fear coming out of a DIY attempt. We are talking about soft, squishy, and intensely strawberry-flavored bites that burst with the taste of real summer fruit. Whether you are a parent looking to reduce your kids’ sugar intake, a fitness enthusiast looking for a collagen boost, or just someone who loves a good sweet treat, this guide is for you.
In this comprehensive post, we are going to dive deep into everything you need to know. We will cover the science of gelatin, the debate between fresh and frozen berries, and how to achieve that perfect chewiness that rivals the store-bought brands. So, grab your blender and let’s get squishy!
Why You Should Ditch the Store-Bought Snacks
It is easy to grab a box of fruit snacks off the grocery store shelf, but once you understand what goes into them—and what goes into the homemade version—you might never go back. The primary reason to switch is control. When you are the chef, you decide exactly how much sweetener goes in. You can use natural options like raw honey, maple syrup, or even keep them entirely sugar-free with monk fruit if you are following a Keto lifestyle. Commercial brands often rely on glucose syrup and sugar as the first two ingredients, spiking your insulin levels and leaving you crashing an hour later.
Beyond the sugar, let’s talk about the fruit itself. Many commercial gummies contain “fruit juice concentrate” which is often just another form of sugar with the fiber and vitamins stripped away. In our homemade strawberry gummies, we are using the whole fruit. By blending real strawberries, you are retaining some of the natural fiber and a significant amount of Vitamin C. It transforms a candy into a functional food.
Another massive benefit is the gelatin. If you use high-quality, grass-fed beef gelatin, you are essentially making a tasty supplement. Gelatin is cooked collagen, which is fantastic for your gut health, hair, skin, and nails. It contains amino acids like glycine that can help improve sleep quality and reduce inflammation. So, while you are enjoying a chewy strawberry bear, you are actually doing your body a favor. Plus, there is the undeniable fun factor. Customizing shapes, flavors, and textures makes this a fantastic weekend activity to do with friends or kids.
The Science of the Squish: Ingredients and Equipment
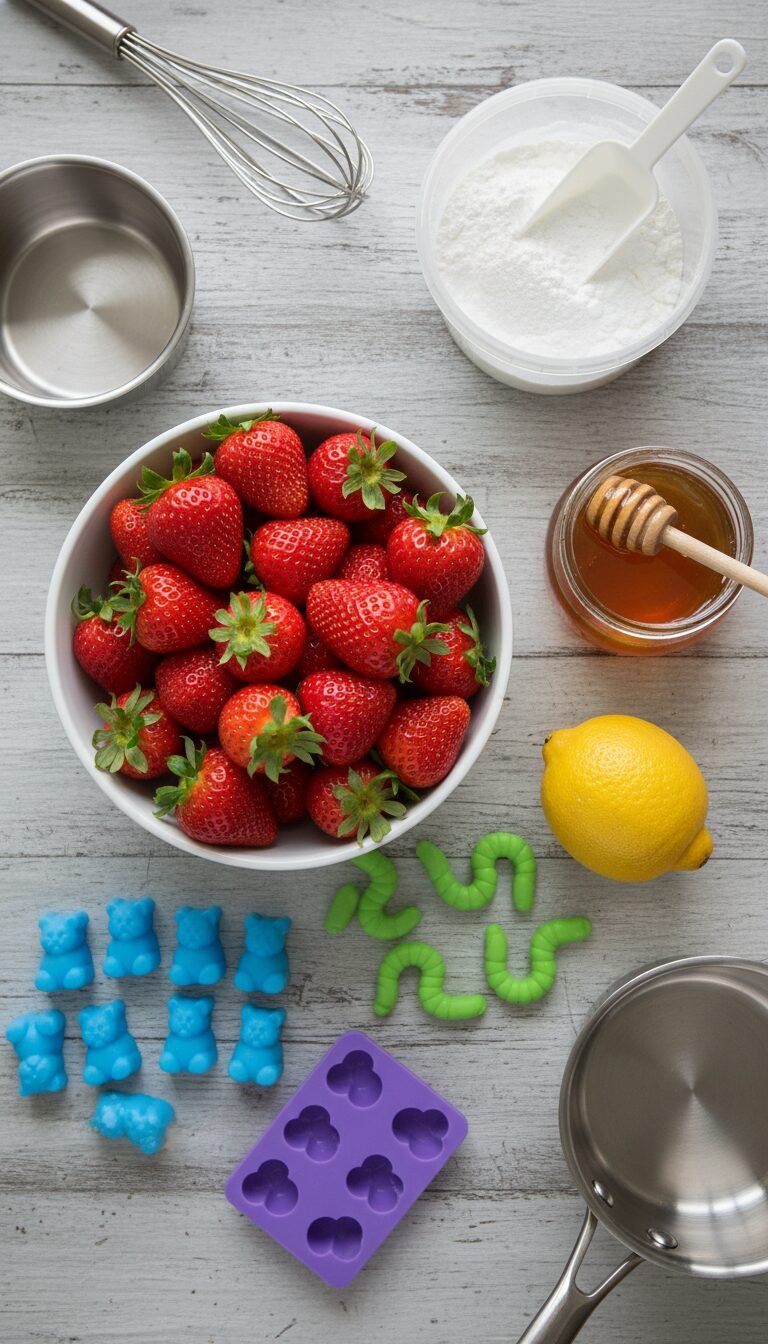
Before we start cooking, we need to understand our toolkit. The success of your gummies relies entirely on the quality of your ingredients and the precision of your ratios. Let’s break down the stars of the show.
The Fruit: Fresh vs. Frozen
You might be wondering if you need to wait for strawberry season to make these. The good news is: absolutely not! Frozen strawberries are actually fantastic for this recipe. They are picked at the peak of ripeness and flash-frozen, locking in that intense sweetness and color. If you use frozen berries, just let them thaw slightly so they blend easily. Fresh strawberries are wonderful too, but make sure they are ripe and fragrant. If you use under-ripe berries, your gummies will taste tart and watery.
The Gelling Agent: Gelatin
This is the non-negotiable structural component. You want unflavored powdered gelatin. For the health benefits mentioned earlier, look for pasture-raised, grass-fed beef gelatin. It is important to distinguish this from collagen peptides. Collagen peptides will dissolve in cold water and will not gel. If you use peptides, you will end up with expensive strawberry juice. You need gelatin that blooms and sets.
The Sweetener
Honey is a favorite for its viscosity and floral notes which pair beautifully with strawberries. Maple syrup gives a darker, richer taste. If you want the color to remain bright pink, stick to light-colored honey or agave. The liquid sweetener also adds to the texture; sugar crystals can sometimes make the gummy grainy if not dissolved properly, whereas liquid sweeteners blend seamlessly.
The Molds
Silicone molds are your best friend here. They come in every shape imaginable, from classic bears to Lego bricks. The beauty of silicone is that once the gummies set, you can pop them out effortlessly without greasing the mold. If you don’t have molds, don’t worry! You can pour the mixture into a glass baking dish and cut them into squares later.
The Ultimate Homemade Strawberry Gummy Recipe
Alright, let’s get to the good part. This process is surprisingly fast, so have all your ingredients measured and ready to go before you turn on the stove.
Ingredients List
- 1 1/2 cups of strawberries (fresh or frozen/thawed)
- 1/2 cup of water (or lemon juice for extra tartness)
- 3 to 4 tablespoons of high-quality gelatin powder (use 3 for softer gummies, 4 for firmer, “Haribo-style” chew)
- 2 to 3 tablespoons of raw honey or maple syrup (adjust to taste)
Step-by-Step Instructions
1. Puree the Berries:
Toss your strawberries into a high-speed blender. Blend until completely smooth. If you dislike seeds, you can pass this puree through a fine-mesh sieve, but leaving them in adds a nice rustic texture and proves they are made with real fruit.
2. Bloom the Gelatin:
This is the most critical step! Pour your 1/2 cup of water (or juice) into a small bowl. Sprinkle the gelatin powder evenly over the top. Do not dump it in a pile, or the center won’t hydrate. Let it sit for about 5 minutes. It will absorb the water and turn into a firm, applesauce-like texture. This is called “blooming,” and it ensures your gummies set smooth, not lumpy.
3. Simmer the Mixture:
Pour your strawberry puree into a small saucepan over low-medium heat. Add your sweetener (honey/maple syrup). Stir gently until the mixture is warm and fluid. You do not want to boil this aggressively, as high heat can weaken the gelatin’s setting power and destroy the Vitamin C.
4. Combine and Dissolve:
Once the strawberry mixture is hot (but not boiling), add the bloomed gelatin blob. Whisk constantly. The gelatin will melt into the liquid. Keep whisking until you are absolutely certain there are no granules left. It should look glossy and smooth.
5. Mold and Set:
Remove from heat. Using a dropper (which usually comes with the molds) or a spouted measuring cup, carefully fill your silicone molds. This requires a steady hand! Once filled, place the molds in the refrigerator. They will need about 20 to 30 minutes to set, but leaving them for an hour is better for a firmer texture.

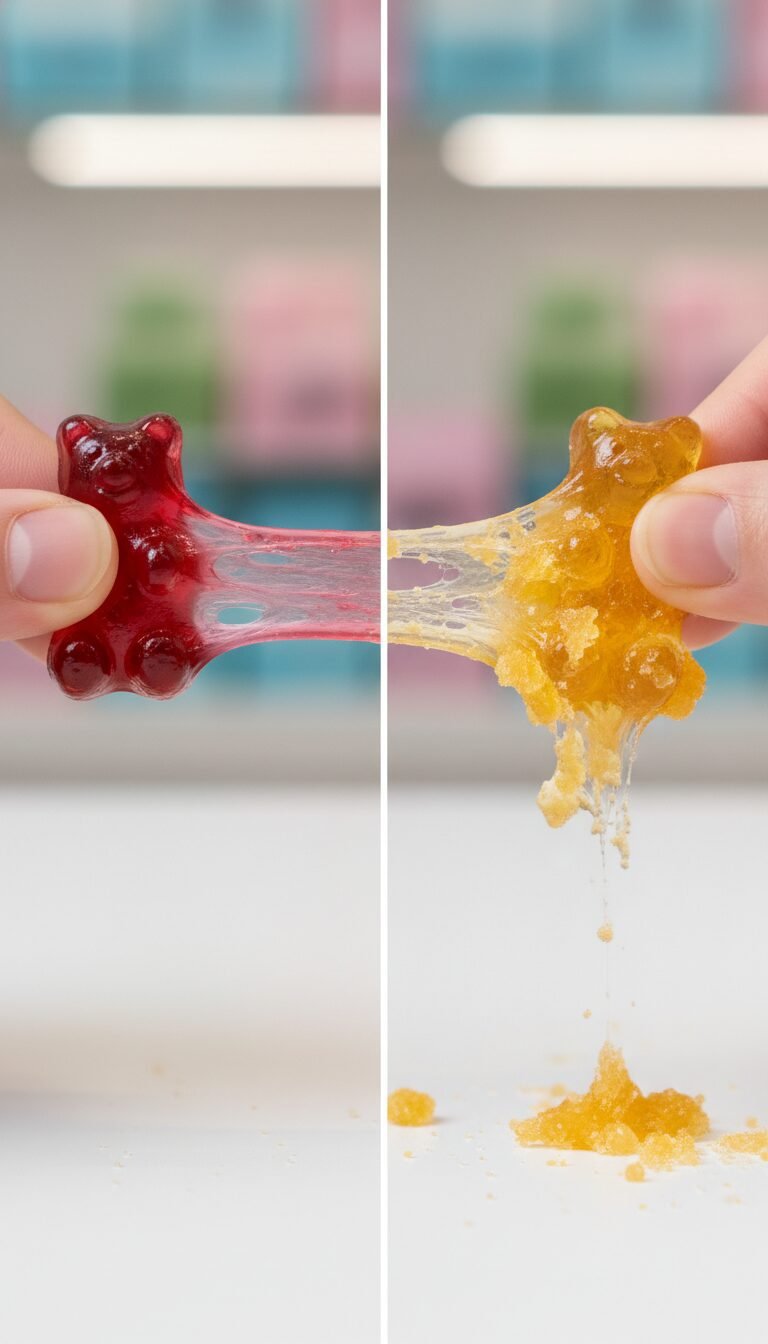
Texture Talk: Troubleshooting and Perfecting the Chew
Even with a simple recipe, things can go slightly awry. The most common complaint with homemade gummies is the texture. Let’s troubleshoot the science of the “chew.”
“My gummies are too soft!”
If your gummies are falling apart or feel more like Jell-O jigglers than fruit snacks, you likely didn’t use enough gelatin relative to the liquid volume. Fruit varies in water content. Fresh strawberries can be very juicy. Next time, add an extra half-tablespoon of gelatin. Also, ensure you let them set in the fridge long enough. Gelatin takes time to form its protein network.
“They are too rubbery and hard.”
Conversely, if you feel like you are chewing on a tire, you went too heavy on the gelatin powder. Another culprit could be overcooking. If you boiled the mixture too long, you might have evaporated too much liquid, concentrating the gelatin density. Try reducing the gelatin amount slightly or adding a splash more water.
“The liquid separated in the mold.”
Sometimes you might see a clear layer at the bottom and a foamy fruit layer at the top. This happens when the mixture isn’t emulsified, or if you whisked too much air into it. To prevent this, whisk the gelatin in gently rather than vigorously beating it. If you see foam on top of your saucepan mixture, skim it off with a spoon before pouring into molds for a crystal-clear look.
“They molded after a few days.”
Because these contain fresh fruit and no artificial preservatives, they are perishable! Unlike store-bought gummies that survive a nuclear winter, yours are real food. If you leave them on the counter in a warm house, they will mold. Always store them in the fridge in an airtight container.
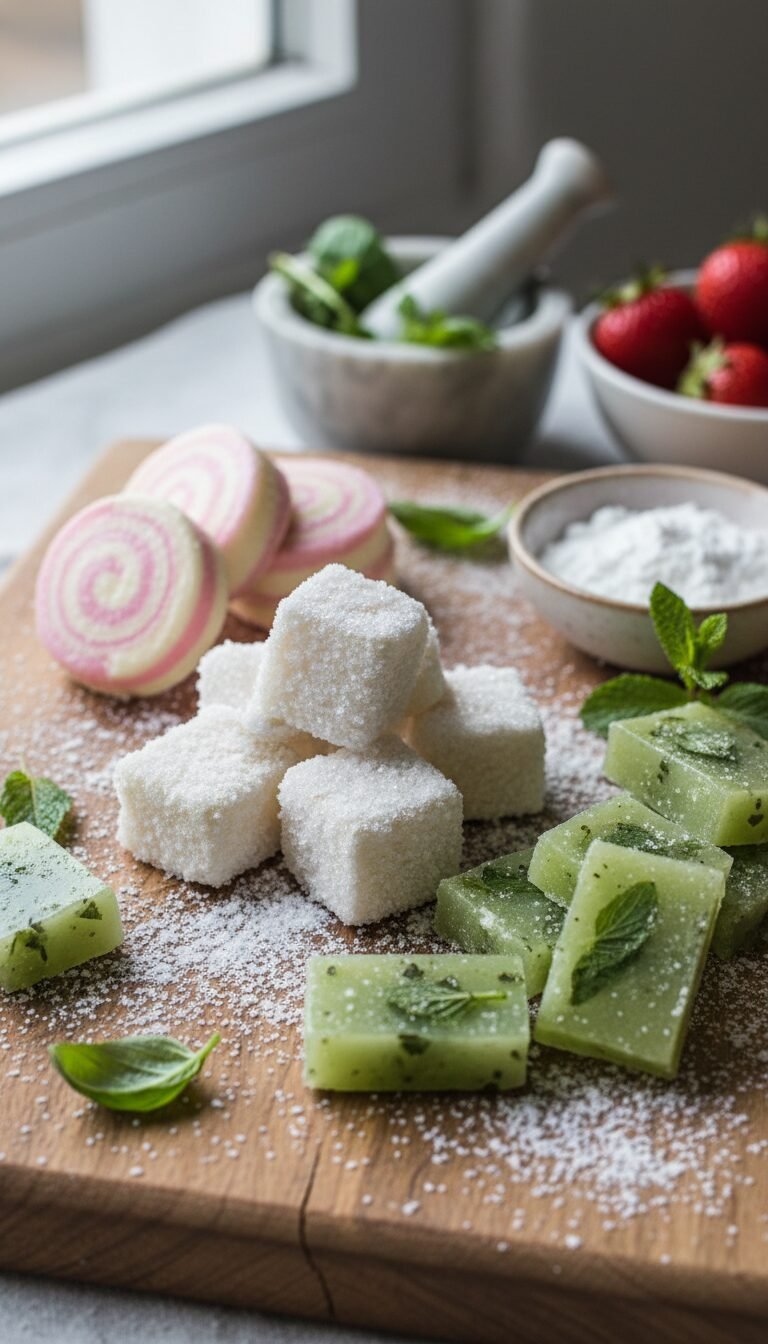
Creative Variations: Taking Your Gummies to the Next Level
Once you have mastered the basic strawberry recipe, the sky is the limit. Here are some of my favorite ways to elevate the humble gummy into a gourmet treat.
1. Sour Patch Style
Do you love that lip-puckering sour kick? You can easily replicate this. You will need citric acid, which is found in the canning aisle of most grocery stores. Mix a small amount of citric acid with granulated sugar (or erythritol for a low-sugar version). Once your gummies are fully set and removed from the molds, toss them in this sour dust immediately before serving. Note: The acid will pull moisture out of the gummy over time, making them weep, so only dust them right before eating!
2. Strawberries & Cream
For a decadent, opaque gummy that tastes like a milkshake, swap the water in the recipe for full-fat coconut milk or heavy cream. The fat adds a luxurious mouthfeel. Just be careful not to overheat the dairy or coconut milk, as it can curdle. These are incredibly satisfying and offer a great fat-to-protein ratio for Keto dieters.
3. The “Grown-Up” Gummy
Who says kids get to have all the fun? You can infuse your water with herbs before blooming the gelatin. Strawberry and Basil is a sophisticated flavor combination. Steep fresh basil leaves in your hot water, strain them out, and then use that basil-water to bloom your gelatin. You can also add a splash of champagne or rosé to the mixture (just account for the extra liquid volume) for a boozy brunch treat.
4. Gut-Health Supercharge
If you are making these specifically for health, consider adding probiotics. However, heat kills probiotics. You would need to open a probiotic capsule and whisk it in at the very last second before pouring, ensuring the mixture has cooled down as much as possible without setting. You can also add Vitamin C powder or magnesium powder to turn these into custom vitamin supplements for your family.
Sweet Success: Storing and Enjoying Your Creation
Congratulations! You have officially graduated from the world of artificial syrups to the delicious realm of homemade confectionery. By making your own strawberry gummies, you have taken a small but significant step towards cleaner eating, all while indulging in something that tastes objectively better than the industrial alternative.
To keep your gummies fresh, remember the golden rule: keep them cool. Store them in an airtight container in the refrigerator for up to two weeks. If you made a massive batch (which is easy to do because they are so addictive), you can actually freeze them! They won’t freeze rock-hard; they just get extra chewy and are quite refreshing on a hot day.
So, the next time you have a punnet of strawberries looking a little tired in the fridge, or you just want a fun project for a rainy afternoon, remember this recipe. It is simple, healthy, and undeniably delicious. Now, go forth and get your gummy on—your taste buds and your body will thank you!