Easter Sugar Cookie Bars Recipe
Imagine the softest, chewiest sugar cookie you’ve ever had, but without the hassle of chilling dough, rolling it out, and cutting shapes. These festive bars are a one-pan wonder topped with fluffy buttercream and all the pastel sprinkles your heart desires!
15 mins
18 mins
1 hour 15 mins
24 bars
Dessert
Baking
American
Vegetarian
Let’s be honest, moms: we all love the idea of making beautiful, intricately decorated Easter sugar cookies with the kids. But the reality? It usually involves flour covering every surface of the kitchen, dough that gets too warm to cut, and cookies that turn into unrecognizable blobs in the oven. That is exactly why these Easter Sugar Cookie Bars are going to be your new best friend this spring.
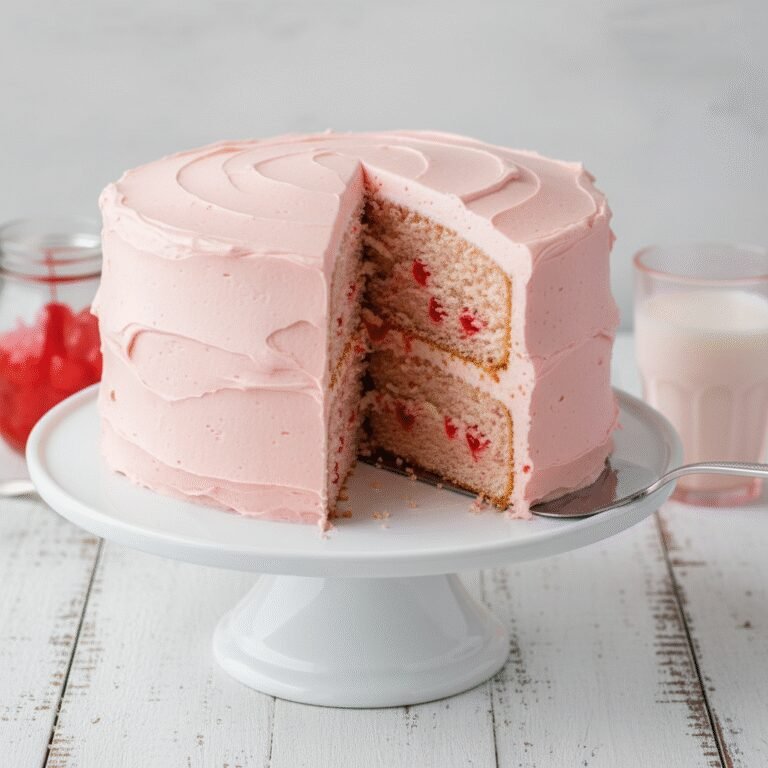
Think of these as the cooler, low-maintenance cousin of the classic cut-out cookie. You get that irresistible, buttery vanilla flavor and that signature soft-baked texture (reminiscent of those famous pink-frosted grocery store cookies we all secretly love), but with a fraction of the effort. You simply press the dough into a 9×13 pan, bake, and slather with frosting. No rolling pin required!
These bars are the ultimate crowd-pleaser for Easter brunch, school parties, or just a fun weekend baking project. The base is dense and chewy, while the generous layer of cream cheese buttercream adds just the right amount of tang to cut through the sweetness. Plus, the surface area is perfect for letting the little ones go wild with pastel sprinkles and mini chocolate eggs. Grab your apron, and let’s make some magic happen in the kitchen!
History & Origins
The humble sugar cookie has a surprisingly deep history, tracing its roots back to the 1700s in Nazareth, Pennsylvania. German Protestant settlers created the earliest version, known as the Nazareth Sugar Cookie, which was baked in the shape of a keystone (the state symbol). Over the centuries, sugar cookies became synonymous with holidays, evolving from simple, crisp biscuits to the soft, frosted varieties we adore today.
The concept of the “cookie bar” is a much more modern, distinctly American invention born out of the need for convenience. As lives got busier in the mid-20th century, home bakers began adapting classic recipes to fit into sheet pans. It was a culinary revolution for busy parents: all the flavor of a batch of cookies, baked at once, and sliced into squares. This Easter version marries that historic love for festive, decorated sweets with the modern need for quick, reliable, and shareable treats.
Why This Recipe Works
There is actually a bit of food science behind why these bars turn out so incredibly soft and tender compared to a standard crisp cookie. First, we use a combination of butter and cream cheese in the dough (or sometimes sour cream), or we rely heavily on the ratio of fat to flour. In this specific recipe, the secret weapon is cornstarch. Adding cornstarch to the flour mixture softens the harsh proteins in the wheat, inhibiting gluten formation. This results in a crumb that is tender and melt-in-your-mouth rather than tough or snappy.
Furthermore, baking this dough in a 9×13 pan rather than as individual scoops changes the heat distribution. The center stays insulated, remaining slightly underbaked and fudgy, while the edges get just a hint of golden crispness. We also use both an egg and an extra egg yolk; that extra fat from the yolk adds richness and moisture that egg whites alone can’t provide. Finally, the frosting isn’t just pure sugar; adding a touch of cream cheese or heavy whipping cream creates an emulsion that is airy and light, sitting perfectly atop the dense bar without weighing it down.
Why You’ll Love This Recipe
- ✓No chilling or rolling dough required
- ✓Soft, Lofthouse-style texture
- ✓Festive and customizable for Easter
- ✓Feeds a large crowd easily
- ✓Kid-friendly decorating activity
- ✓Stays soft for days
Equipment You’ll Need
- ✓9×13 Baking Pan
- ✓Stand Mixer or Hand Mixer
- ✓Parchment Paper
- ✓Rubber Spatula
- ✓Offset Spatula (for frosting)
- ✓Measuring Cups and Spoons
- ✓Mixing Bowls
Ingredients
- ✓1 cup (2 sticks) unsalted butter, softened to room temperature
- ✓1 ½ cups granulated sugar
- ✓2 large eggs, room temperature
- ✓2 teaspoons pure vanilla extract
- ✓½ teaspoon almond extract (optional, but recommended)
- ✓3 cups all-purpose flour
- ✓1 tablespoon cornstarch
- ✓1 ½ teaspoons baking powder
- ✓½ teaspoon salt
- ✓FOR THE FROSTING: ½ cup unsalted butter, softened
- ✓FOR THE FROSTING: 4 oz cream cheese, softened
- ✓FOR THE FROSTING: 3-4 cups powdered sugar
- ✓FOR THE FROSTING: 1 teaspoon vanilla extract
- ✓FOR THE FROSTING: 2-3 tablespoons heavy cream
- ✓Pastel food coloring (pink, blue, yellow, purple)
- ✓Easter sprinkles or mini chocolate eggs
Instructions
- Preheat and Prep: Preheat your oven to 350°F (175°C). Line a 9×13 inch baking pan with parchment paper, leaving a slight overhang on the sides for easy removal later. Lightly spray with non-stick cooking spray.
- Cream Butter and Sugar: In the bowl of a stand mixer fitted with the paddle attachment (or a large bowl with a hand mixer), beat the softened butter and granulated sugar together on medium-high speed for about 2-3 minutes until light, fluffy, and pale in color.
- Add Wet Ingredients: Add the eggs one at a time, mixing well after each addition. Scrape down the sides of the bowl. Mix in the vanilla extract and almond extract until combined.
- Mix Dry Ingredients: In a separate medium bowl, whisk together the flour, cornstarch, baking powder, and salt. This ensures the leavening agents are evenly distributed.
- Combine: Turn the mixer to low speed and gradually add the dry ingredients to the wet ingredients. Mix only until just combined and no streaks of flour remain. Do not overmix, or the bars will be tough.
- Press into Pan: Transfer the dough to the prepared baking pan. It will be thick and slightly sticky. Use a rubber spatula or your hands (lightly floured) to press the dough into an even layer, reaching all the corners.
- Bake: Bake for 15-18 minutes. The key is to pull them out when the edges are just barely set and the center still looks slightly soft. Do not let them brown significantly on top! They will continue to set as they cool.
- Cool Completely: Place the pan on a wire rack and let the bars cool completely. This takes about 45 minutes to an hour. If you frost them while warm, the frosting will melt.
- Make the Frosting: While the bars cool, beat the softened butter and cream cheese together until completely smooth and lump-free. Slowly add the powdered sugar, one cup at a time. Add the vanilla and heavy cream. Whip on high speed for 3 minutes until fluffy and white.
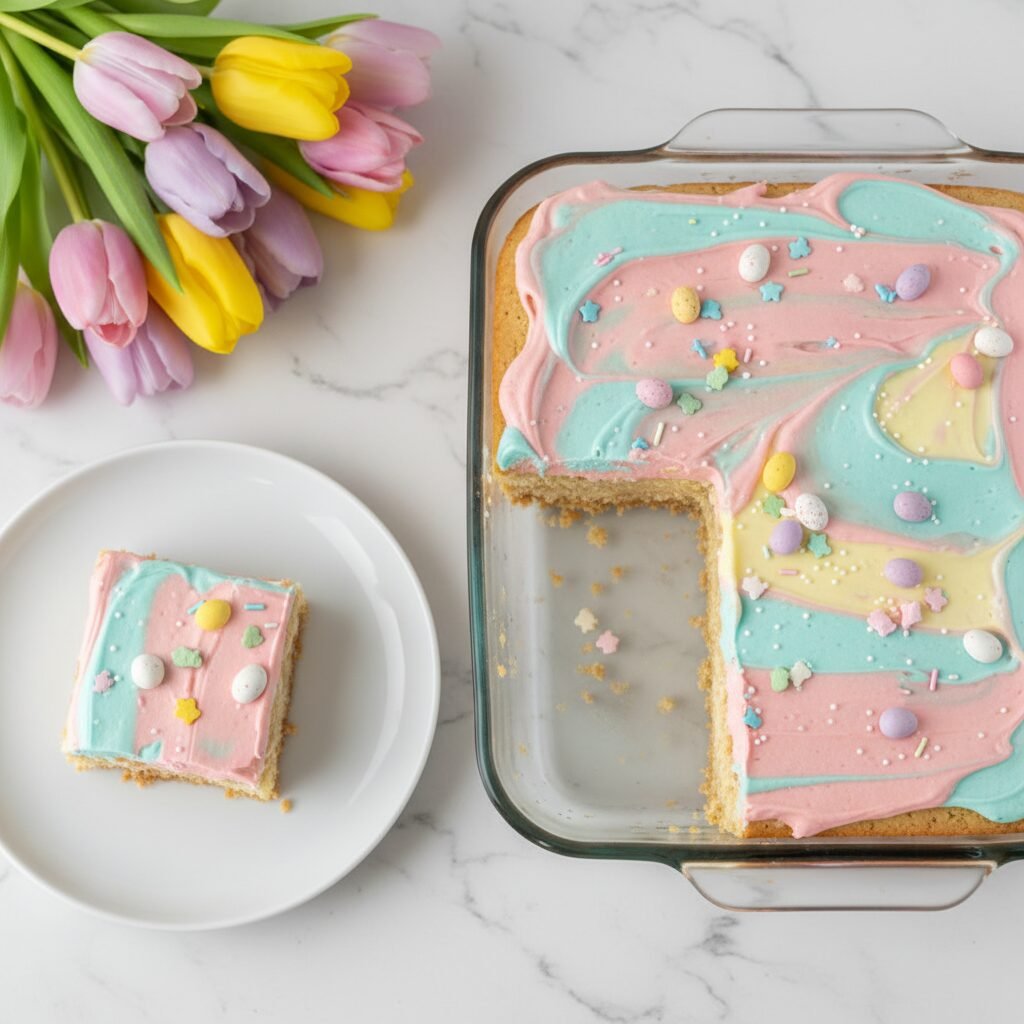
- Color and Decorate: Divide the frosting into separate bowls if you want multiple colors, or keep it white. Use an offset spatula to spread a thick layer over the cooled cookie bars. Top immediately with Easter sprinkles.
- Slice and Serve: Lift the bars out of the pan using the parchment overhang. Place on a cutting board and slice into squares. Enjoy!
Expert Cooking Tips
- ✓Room Temperature is Key: Ensure your butter and eggs are truly at room temperature. This creates an emulsion that traps air, resulting in a fluffier cookie bar.
- ✓Don’t Overbake: This is the golden rule of sugar cookies. They should look pale and soft when you take them out. If they turn golden brown, they will be crunchy rather than soft.
- ✓The Cornstarch Secret: Do not skip the cornstarch! It breaks down the gluten strands in the flour to ensure that tender, bakery-style crumb.
- ✓Lining the Pan: Using parchment paper makes cleanup a breeze and allows you to lift the entire block of cookies out for perfect, clean cuts.
Substitutions and Variations
If you have dietary restrictions or missing ingredients, don’t worry! For a Gluten-Free version, swap the all-purpose flour for a high-quality 1:1 gluten-free flour blend (like King Arthur or Bob’s Red Mill). If you don’t have cornstarch, you can omit it, though the texture will be slightly less tender. No cream cheese for the frosting? You can make a standard American buttercream using just butter, sugar, and milk, though the cream cheese adds a lovely tang that balances the sugar. For a nut-free school safe treat, simply omit the almond extract.
Common Mistakes to Avoid
The most common mistake is over-measuring the flour. If you scoop the measuring cup directly into the flour bag, you pack it down, resulting in dry bars. Instead, use the “spoon and level” method: spoon flour into the cup and level it off with a knife. Another mistake is frosting too soon. I know it’s tempting, but if the bars are even slightly warm, your beautiful buttercream will turn into a greasy glaze. Patience is a virtue here!
Serving Suggestions
These bars look stunning arranged on a white ceramic platter where the pastel colors can really pop. Serve them alongside a cold glass of milk or a hot cup of coffee for the adults. For an Easter party, cut them into smaller, bite-sized triangles to stretch the batch further. They pair wonderfully with fresh fruit like strawberries or pineapple to cut the sweetness.
Storage and Reheating Tips
Store these bars in an airtight container at room temperature for up to 3 days. Because of the cream cheese in the frosting, if your kitchen is very warm, you might prefer to store them in the refrigerator, where they will last for up to 5-6 days. If refrigerating, let them sit on the counter for 20 minutes before eating to soften up. You can also freeze the unfrosted bars for up to 2 months.
Nutrition Facts (Estimated)
| Serving Size | 1 bar |
| Calories | 285 |
| Fat | 14g |
| Saturated Fat | 8g |
| Unsaturated Fat | 5g |
| Trans Fat | 0g |
| Cholesterol | 45mg |
| Sodium | 110mg |
| Carbohydrates | 38g |
| Fiber | 0.5g |
| Sugar | 24g |
| Protein | 2g |
Frequently Asked Questions
Can I make the dough ahead of time?
Yes! You can press the dough into the pan, cover it tightly with plastic wrap, and refrigerate it for up to 24 hours before baking. You may need to add 2-3 minutes to the baking time if going straight from the fridge to the oven.
Why did my bars sink in the middle?
Sinking usually happens if the bars were underbaked too much or if too much air was beaten into the eggs. While we want them soft, they need to be set. Ensure your baking powder is fresh as well.
Can I use store-bought frosting?
Absolutely. If you are in a time crunch, two tubs of whipped vanilla frosting will work perfectly. You can still dye them pastel colors to keep the festive look!
How do I get clean cuts when slicing?
Chill the frosted bars in the fridge for about 30 minutes before cutting. Use a large, sharp chef’s knife, and wipe the blade clean with a warm, damp cloth between each cut.
Can I use margarine instead of butter?
I don’t recommend it. Margarine has a higher water content and different melting point, which can affect the structure and flavor. Real butter provides the best texture and taste.
My dough is really sticky, is that normal?
Yes, this dough is meant to be soft and slightly tacky. If it is unmanageable, you can lightly flour your hands or spray your spatula with non-stick spray when pressing it into the pan.
Can I add mix-ins to the dough?
Sure! White chocolate chips or confetti sprinkles folded into the batter are great additions. Just avoid heavy fruits which might make the dough soggy.
What if I don’t have a 9×13 pan?
You can halve the recipe and bake it in an 8×8 or 9×9 square pan. The baking time will be roughly the same, but keep an eye on it starting at 15 minutes.
Conclusion
There you have it—the easiest, softest, and most festive way to bring some sweetness to your Easter celebration. These Easter Sugar Cookie Bars eliminate the stress of traditional cookie baking while delivering maximum flavor and fun. Whether you are baking with toddlers or prepping for a large family gathering, this recipe is a guaranteed winner. So grab those sprinkles, embrace the pastel vibes, and enjoy every single bite. Happy Easter baking!