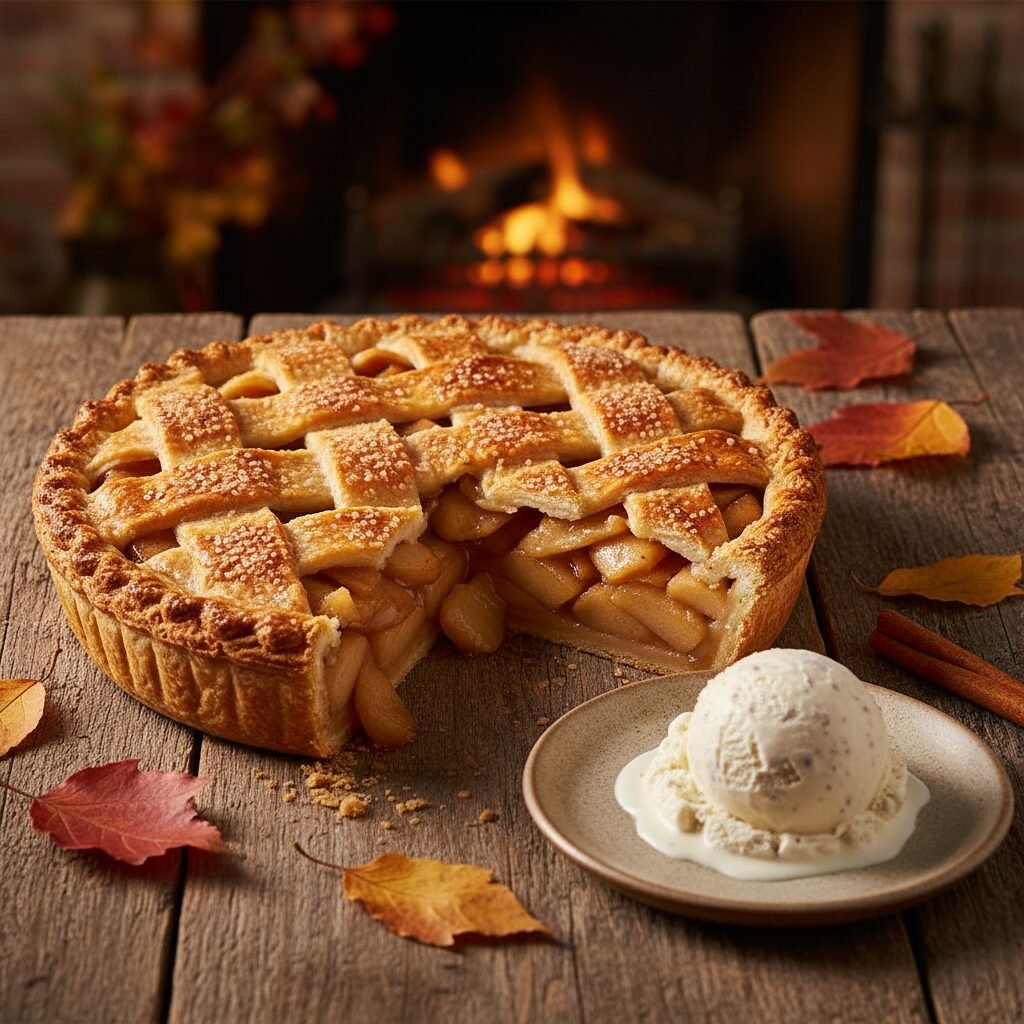
Classic Homemade Apple Pie Recipe
There is truly nothing that screams ‘home’ quite like the scent of a freshly baked apple pie wafting through the kitchen. This recipe combines a tender, flaky, all-butter crust with a filling that strikes the perfect balance between sweet and tart.
45 mins
55 mins
3 hrs 30 mins
8 slices
Dessert
Baking
American
Vegetarian
Hey friends! Grab a cup of coffee and let’s talk about the undisputed king of comfort desserts: the Classic Apple Pie. If you have been searching for that movie-perfect pie with a golden, flaky crust and a filling that stays inside the slice rather than puddling on the plate, you have come to the right place. I know, I know—homemade pie crust can be intimidating. The fear of a soggy bottom or a tough dough is real! But I promise you, this recipe is designed to be foolproof and stress-free.
We are going back to basics here. No fancy gadgets are required, just some cold butter, fresh apples, and a little bit of patience. This pie is the centerpiece of Thanksgiving, the hero of the Fourth of July, and the best way to use up that bushel of apples you picked at the orchard. It is rustic, it is heartwarming, and it tastes a million times better than anything you can buy in a box. So, tie on your apron, and let’s bake something beautiful together!
History & Origins
While we love the phrase ‘as American as apple pie,’ the truth is a little more worldly! Apple pie actually traces its roots back to England. The first recorded recipe for apple pie was written in 1381! Early versions were quite different from what we enjoy today; the crusts were often inedible containers known as ‘coffyns,’ designed simply to hold the filling during baking, and they rarely included sugar, which was a luxury item.
When settlers came to America, they brought their love for pies with them, but they had to wait for the apple trees they planted to mature. Once apples became abundant in the colonies, the dish evolved. Over centuries, it transformed into the sweet, lattice-topped dessert we know and love, becoming a symbol of American prosperity and home cooking by the 20th century. Today, it is a global favorite, but nothing beats the nostalgia of the American classic.
Why This Recipe Works
This recipe works because it respects the science of baking without getting too complicated. First, we use an all-butter crust. While shortening is easier to work with, butter provides superior flavor and that distinct flaky lift due to the water content evaporating and creating steam layers.
Second, we tackle the filling. A common issue with apple pie is the ‘gap’ that forms between the top crust and the fruit after the apples shrink. To combat this, we macerate the apples (toss them with sugar and let them sit) before filling the pie. This draws out excess liquid, which we then thicken on the stove. This concentrates the apple flavor and ensures your filling isn’t watery, preventing that dreaded soggy bottom crust.
Why You’ll Love This Recipe
- ✓Uses an all-butter crust for maximum flakiness
- ✓Filling is never watery thanks to a special maceration step
- ✓Perfect balance of tart Granny Smith and sweet Honeycrisp apples
- ✓Can be made ahead and frozen for easy holiday prep
- ✓Includes a secret ingredient for a golden, glossy finish
Equipment You’ll Need
- ✓9-inch pie dish (glass or ceramic recommended)
- ✓Food processor or pastry blender
- ✓Large mixing bowl
- ✓Rolling pin
- ✓Rimmed baking sheet
- ✓Pastry brush
- ✓Pie shield or aluminum foil
Ingredients
- ✓For the Crust:
- ✓2 1/2 cups all-purpose flour, plus extra for rolling
- ✓1 tablespoon granulated sugar
- ✓1 teaspoon salt
- ✓1 cup (2 sticks) unsalted butter, very cold and cubed
- ✓6-8 tablespoons ice water
- ✓For the Filling:
- ✓6-7 cups apples (mix of Granny Smith and Honeycrisp), peeled, cored, and sliced 1/4 inch thick
- ✓3/4 cup granulated sugar
- ✓2 tablespoons all-purpose flour or cornstarch
- ✓1 teaspoon ground cinnamon
- ✓1/4 teaspoon ground nutmeg
- ✓1/4 teaspoon ground allspice
- ✓1 tablespoon lemon juice
- ✓1 tablespoon unsalted butter, cut into small bits
- ✓For the Wash:
- ✓1 large egg beaten with 1 tablespoon water
- ✓Coarse sugar (turbinado) for sprinkling
Instructions
- Step 1: Make the Dough. In a food processor or large bowl, mix the flour, sugar, and salt. Add the cold, cubed butter. Pulse or use a pastry blender until the mixture looks like coarse meal with some pea-sized chunks of butter remaining. This texture is key for flakiness!
- Step 2: Hydrate. Slowly add the ice water, one tablespoon at a time, mixing gently until the dough just begins to hold together when pinched. Do not overwork it! Divide the dough into two disks, wrap tightly in plastic wrap, and refrigerate for at least 1 hour.
- Step 3: Prep the Apples. While the dough chills, peel, core, and slice your apples. Place them in a large bowl and toss with the lemon juice and sugar. Let them sit for 30 minutes at room temperature. This draws out the juice.
- Step 4: Thicken the Juices. Drain the liquid from the apples into a small saucepan (keep the apples in the bowl!). Simmer the liquid over medium heat until it reduces to a syrup (about 3-5 minutes). Pour this warm syrup back over the apples and toss with the spices and flour/cornstarch.
- Step 5: Roll the Crust. Preheat oven to 400°F (200°C). On a floured surface, roll out one disk of dough into a 12-inch circle. Carefully transfer it to your pie dish. Trim the edges leaving a little overhang.
- Step 6: Assemble. Pile the apple filling into the crust, mounding it slightly higher in the center. Dot the top of the apples with the small bits of butter.
- Step 7: Top Crust. Roll out the second disk of dough. You can place it whole over the top (cutting slits for steam to escape) or cut strips to create a lattice pattern. Trim and crimp the edges to seal.
- Step 8: Bake. Brush the top crust with the egg wash and sprinkle generously with coarse sugar. Place the pie on a rimmed baking sheet (to catch drips) and bake at 400°F for 20 minutes. Then, reduce heat to 375°F (190°C) and bake for another 35-45 minutes until the crust is golden brown and the filling is bubbling through the vents.
- Step 9: Cool completely. This is the hardest part! Let the pie cool on a wire rack for at least 3 hours before slicing. This allows the filling to set so it doesn’t run.
Expert Cooking Tips
- ✓Keep it Cold: If your butter starts to melt while making the dough, pop the bowl in the freezer for 10 minutes. Cold butter equals flaky layers.
- ✓Don’t Skip the Vent: If doing a full top crust, you must cut slits to let steam escape, otherwise, you will have a gap between the crust and fruit.
- ✓Use a Pie Shield: If the edges of your crust are browning too fast, cover them with a pie shield or a ring of aluminum foil halfway through baking.
- ✓Glass vs. Metal: I prefer a glass pie dish because you can carefully lift it up and peek at the bottom to ensure the bottom crust is browned and not soggy.
Substitutions and Variations
If you are gluten-free, swap the all-purpose flour for a high-quality 1:1 gluten-free baking flour blend. For the apples, if you can’t find Honeycrisp, Braeburn or Jonagold are excellent alternatives. If you are watching your sugar intake, you can reduce the sugar in the filling by a quarter cup, though the texture of the syrup might change slightly. No lemon juice? Apple cider vinegar works in a pinch to keep the apples from oxidizing.
Common Mistakes to Avoid
The biggest mistake is slicing into the pie while it is still warm. I know it smells amazing, but if you cut it too soon, the filling will be soup. Another common error is overworking the dough; if you handle it too much, the gluten develops, and the crust becomes tough rather than tender. Finally, make sure your oven is fully preheated—a cold oven leads to a sad, pale crust.
Serving Suggestions
Classic apple pie begs for a scoop of high-quality vanilla bean ice cream—this is known as serving it ‘à la mode.’ Alternatively, a dollop of freshly whipped cream with a dash of cinnamon is divine. For a salty-sweet twist, drizzle warm salted caramel sauce over your slice. Serve with hot coffee or a cold glass of milk.
Storage and Reheating Tips
Once completely cooled, the pie can be stored at room temperature, covered loosely with foil or a cake dome, for up to 2 days. For longer storage, keep it in the refrigerator for up to 4 days. You can also freeze the baked pie (wrap it well!) for up to 3 months. Thaw overnight in the fridge and reheat in a 350°F oven to crisp up the crust before serving.
Nutrition Facts (Estimated)
| Serving Size | 1 slice |
| Calories | 480 |
| Fat | 25g |
| Saturated Fat | 14g |
| Unsaturated Fat | 9g |
| Trans Fat | 0g |
| Cholesterol | 60mg |
| Sodium | 310mg |
| Carbohydrates | 62g |
| Fiber | 4g |
| Sugar | 28g |
| Protein | 4g |
Frequently Asked Questions
Why is my bottom crust soggy?
Soggy bottoms usually happen because the filling was too wet or the oven wasn’t hot enough. Baking the pie on a preheated baking sheet helps conduct heat to the bottom faster. Also, ensure you thicken your apple juices as described in the instructions.
What are the best apples for apple pie?
A mix is best! Granny Smith apples offer tartness and structure (they don’t turn to mush), while Honeycrisp or Braeburn apples provide natural sweetness and a softer texture. Avoid Red Delicious; they get mealy when baked.
Can I make the dough ahead of time?
Absolutely! You can make the pie dough disks and keep them in the fridge for up to 3 days, or freeze them for up to 3 months. Just let them thaw in the fridge overnight before rolling.
Do I have to peel the apples?
Technically no, but for a classic texture, yes. Apple skins can become tough and leathery during baking and separate from the flesh, which disrupts the smooth eating experience of the pie.
Can I use store-bought crust?
No judgment here! If you are short on time, a refrigerated store-bought crust works fine. Just let it come to room temperature slightly before unrolling so it doesn’t crack.
How do I reheat apple pie?
To restore the crispiness of the crust, reheat slices or the whole pie in a 350°F oven for 10-15 minutes. Microwaving will make the crust chewy and soggy.
Why did my pie crust shrink?
Crusts shrink if the dough wasn’t rested enough (gluten needs to relax) or if it was stretched when placed in the pan. When lining the pan, lift and drop the dough into the corners rather than pushing or stretching it.
How do I know when the pie is done?
Look for a golden-brown crust and, most importantly, the filling should be bubbling vigorously. Not just at the edges, but bubbling near the center vents. This ensures the thickener has activated.
Conclusion
There you have it—the blueprint for the perfect Classic Homemade Apple Pie. It is a labor of love, but the result is so incredibly worth it. Whether you are baking for a holiday gathering or just want to treat your family to a special Sunday dessert, this pie is sure to earn you rave reviews. Remember, the secret ingredient is always a little bit of love (and a lot of butter!). Happy baking!