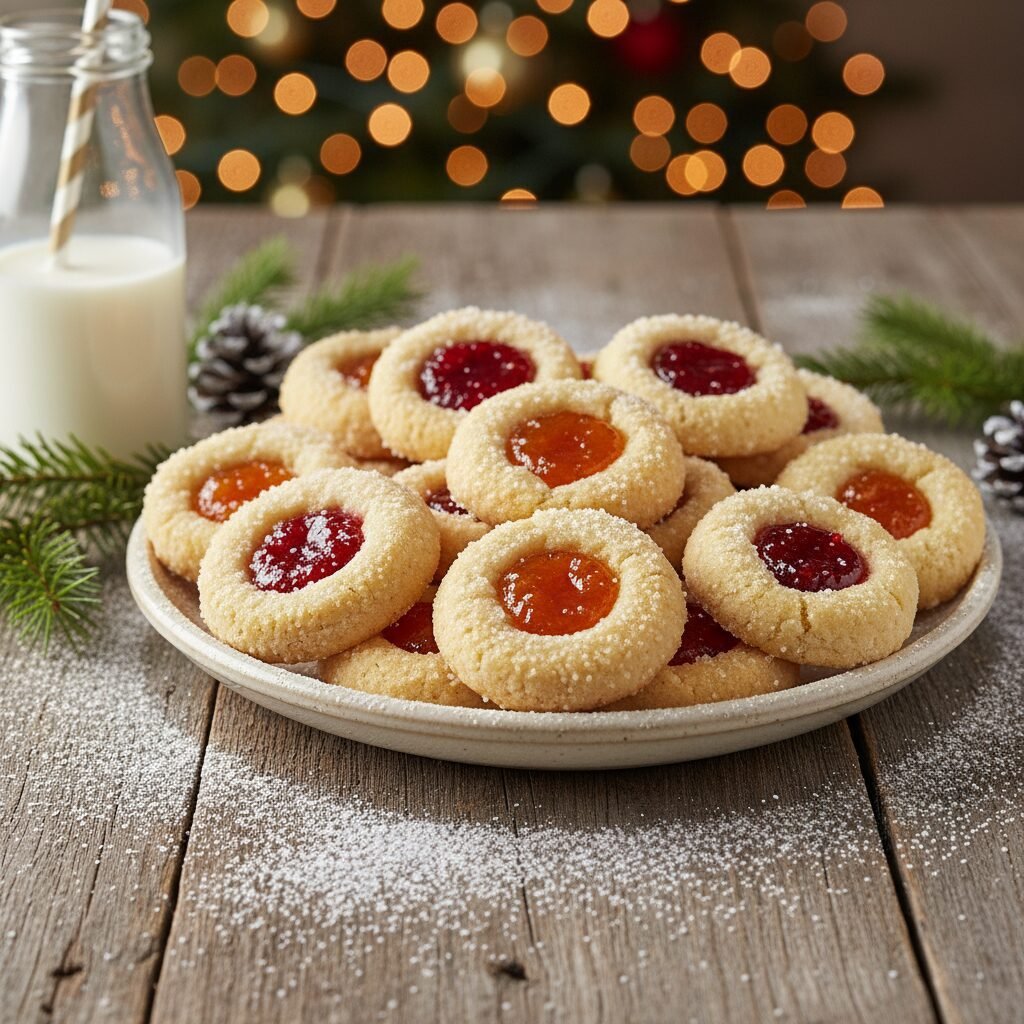
Christmas Thumbprint Cookies
If there is one cookie that screams ‘Christmas’ in our house, it is the classic Thumbprint Cookie. With a melt-in-your-mouth buttery crumb and a jewel-like center of sweet jam, these are the festive showstoppers your holiday cookie box needs.
20 minutes
12 minutes
35 minutes
30 Cookies
Dessert
Baking
American / Swedish
Vegetarian
Welcome to the cozy corner of the internet where butter, sugar, and holiday magic collide! If you are looking for that quintessential Christmas cookie that looks as beautiful as it tastes, you have found it. Christmas Thumbprint Cookies are a non-negotiable tradition in my family. There is something incredibly nostalgic about the process: rolling the soft dough, coating it in sparkling sugar, and letting the little ones press their thumbs into the center to make space for that sweet, sticky jam.
These cookies are essentially a rich, tender shortbread. Unlike a sturdy sugar cookie or a chewy chocolate chip cookie, these are delicate. They crumble perfectly when you bite into them, dissolving into a pool of buttery vanilla goodness that balances perfectly with the tartness of raspberry or apricot jam. I love them because they are infinitely customizable. While I stick to the classic red and golden jams for that festive look, you can easily swap in chocolate ganache, lemon curd, or even caramel.
For the busy moms out there, this recipe is a lifesaver. It requires minimal ingredients that you likely already have in your pantry, and the dough comes together in minutes. Plus, they are sturdy enough to ship in care packages but elegant enough to serve on your best holiday platter. So, grab your apron, turn on the holiday tunes, and let’s get baking!
History & Origins
While we often think of these as an American holiday staple, the roots of the thumbprint cookie actually trace back to Sweden, where they are known as Hallongrotta, which translates charmingly to "Raspberry Cave." Isn’t that just the cutest name you have ever heard? In Swedish baking tradition, these are a standard fixture at a fika—the cherished coffee and cake break.
The traditional Swedish version is usually a very simple butter cookie filled with raspberry jam. As the recipe migrated to the United States and evolved over the decades, bakers began adding their own twists. Some roll the dough in chopped walnuts or pecans (often called "Bird’s Nest Cookies"), while others, like in this recipe, roll them in granulated sugar for a lovely crystalized texture. Despite their journey across the ocean and the various name changes, the heart of the cookie remains the same: a simple vessel for delivering delicious jam.
Why This Recipe Works
You might be wondering, what makes this specific recipe foolproof? It comes down to the ratio of fat to flour and the exclusion of leavening agents like baking powder or baking soda. By leaving out the leavening, we ensure the cookies don’t puff up and lose that precious indentation we need for the jam. Instead, they stay dense and tender.
We also use egg yolks instead of the whole egg. The yolk adds richness and fat, contributing to that velvety mouthfeel, while avoiding the extra water content found in egg whites that could make the cookie too tough or cakey. Finally, rolling the dough balls in granulated sugar before baking serves a dual purpose: it adds a delightful textural crunch to contrast the soft center, and it helps the cookie hold its shape slightly better in the oven. The jam creates a chewy, concentrated fruit center that acts as the perfect foil to the not-too-sweet dough.
Why You’ll Love This Recipe
- ✓Melt-in-your-mouth buttery shortbread texture
- ✓No chilling required for the dough
- ✓Highly customizable with different jams or fillings
- ✓Freezer-friendly for holiday meal prep
- ✓Kid-friendly baking activity
Equipment You’ll Need
- ✓Stand mixer or electric hand mixer
- ✓Large baking sheets
- ✓Parchment paper or silicone baking mats
- ✓1-tablespoon cookie scoop
- ✓Wire cooling rack
- ✓Measuring cups and spoons
Ingredients
- ✓1 cup (2 sticks) unsalted butter, softened to room temperature
- ✓2/3 cup granulated sugar (plus 1/2 cup extra for rolling)
- ✓2 large egg yolks, room temperature
- ✓1 teaspoon pure vanilla extract
- ✓1/4 teaspoon salt
- ✓2 1/3 cups all-purpose flour (spooned and leveled)
- ✓1/2 cup raspberry jam or apricot preserves
Instructions
- Preheat your oven to 350°F (175°C). Line two large baking sheets with parchment paper or silicone baking mats. Set aside.
- In the bowl of a stand mixer fitted with the paddle attachment (or using a hand mixer), beat the softened butter and 2/3 cup sugar together on medium-high speed until creamy and combined, about 2 minutes. You want it smooth, but not overly fluffy like a cake batter.
- Add the egg yolks, vanilla extract, and salt. Beat on medium speed until fully combined, scraping down the sides of the bowl as needed.
- Turn the mixer to low speed and gradually add the flour. Mix just until the dough comes together and no streaks of flour remain. Do not overmix, or the cookies will be tough.
- Pour the extra 1/2 cup of sugar into a small bowl. Scoop the dough into 1-tablespoon sized balls. Roll each ball between your palms until smooth, then roll it in the bowl of sugar to coat thoroughly.
- Place the dough balls on the prepared baking sheets, spacing them about 2 inches apart. Using your thumb (or the back of a rounded measuring spoon), gently press an indentation into the center of each cookie. If the edges crack slightly, just gently press them back together with your fingers.
- Fill each indentation with about 1/2 teaspoon of jam. Be careful not to overfill, or the jam will bubble over during baking.
- Bake for 12-14 minutes, or until the cookies are set and the bottoms are just barely starting to turn golden. The tops should remain pale.
- Remove from the oven and let the cookies cool on the baking sheet for 5-10 minutes. They are very soft when hot and need this time to firm up. Transfer to a wire rack to cool completely.
Expert Cooking Tips
- ✓Measure Flour Correctly: Use the spoon-and-level method. Scooping directly with the measuring cup packs the flour down, leading to dry, crumbly cookies.
- ✓Room Temperature Ingredients: Make sure your butter and egg yolks are at room temperature so they emulsify properly.
- ✓The Indentation Hack: If you don’t want to use your thumb, the back of a 1/2 teaspoon measuring spoon creates a perfect, uniform well for the jam.
- ✓Fixing Cracks: Shortbread dough is prone to cracking when pressed. This is normal! Just smooth the cracks with your warm fingers before baking to ensure the jam stays contained.
- ✓Cooling is Key: Do not try to move these cookies immediately after taking them out of the oven. They are fragile until they cool.
Substitutions and Variations
Gluten-Free: You can successfully make these using a high-quality 1:1 Gluten-Free All-Purpose Baking Flour (like King Arthur or Bob’s Red Mill). The texture remains surprisingly similar.
Nutty Coating: Instead of rolling in granulated sugar, try rolling the dough balls in finely chopped walnuts, pecans, or pistachios for a savory crunch.
Jam Alternatives: Not a fruit fan? You can bake the indentations empty (they might puff up slightly, so repress them gently halfway through baking) and fill them after cooling with chocolate ganache, salted caramel, or Nutella.
Egg Free: If you have an allergy, you can try substituting the yolks with 1-2 tablespoons of heavy cream or milk, though the texture will be slightly less rich.
Common Mistakes to Avoid
The most common mistake with thumbprints is overbaking. Because there are no eggs whites or leavening, these cookies don’t brown on top like chocolate chip cookies. If you wait for the tops to turn golden, they will be dry and hard. Trust the timer—when the bottoms are lightly golden, they are done!
Another issue is spreading. If your butter was melted or too soft, the cookies might flatten out. If your kitchen is very warm, pop the baking sheet with the formed cookies in the fridge for 10 minutes before baking to firm up the fat.
Serving Suggestions
These cookies are the stars of a holiday cookie exchange box. They look stunning nestled next to gingerbread men and snowballs. Serve them warm with a tall glass of cold milk, or enjoy them in the afternoon with a hot cup of Earl Grey tea or strong coffee. For a festive party platter, dust them lightly with powdered sugar right before serving for a "snowy" effect.
Storage and Reheating Tips
Room Temperature: Store the baked cookies in an airtight container at room temperature for up to 5 days. Separate layers with wax paper so the sticky jam doesn’t mess up the other cookies.
Freezing Dough: You can roll the balls and make the indentations, then freeze them on a baking sheet. Once solid, transfer to a bag. Bake from frozen, adding 1-2 minutes to the bake time. Fill with jam just before baking.
Freezing Baked Cookies: These freeze beautifully! Place them in a freezer-safe container for up to 3 months. Thaw on the counter for an hour before serving.
Nutrition Facts (Estimated)
| Serving Size | 1 Cookie |
| Calories | 110 kcal |
| Fat | 6g |
| Saturated Fat | 3.5g |
| Unsaturated Fat | 2.5g |
| Trans Fat | 0g |
| Cholesterol | 20mg |
| Sodium | 45mg |
| Carbohydrates | 13g |
| Fiber | 0.5g |
| Sugar | 8g |
| Protein | 1g |
Frequently Asked Questions
Why did my cookies spread and lose their shape?
This usually happens if the butter was too warm or the dough wasn’t measured correctly (too little flour). Ensure your butter is softened but not oily. You can also chill the shaped cookies for 20 minutes before baking to help them hold their shape.
Can I fill the cookies after baking instead of before?
Yes! If you prefer fresh fillings like lemon curd or chocolate ganache, bake the cookies with the indentation empty. You may need to gently re-press the indentation halfway through baking if it puffs up. Fill them once they are completely cool.
My dough is cracking too much when I press it. What do I do?
Shortbread is naturally crumbly. If it’s unmanageable, your dough might be too dry (did you pack the flour?). Try warming the dough ball in your hands for a few seconds before rolling to make it more pliable, and press down slowly.
Can I use salted butter?
You can, but I recommend reducing the added salt in the recipe to just a pinch. Unsalted butter gives you more control over the flavor profile.
What is the best jam to use?
Seedless jams work best for a smooth look, but preserves with fruit chunks add nice texture. Raspberry and apricot are classics, but strawberry, blackberry, or fig jam are delicious too. Avoid very watery jellies.
How do I get the cookies to be the same size?
Using a cookie scoop is the secret weapon! A 1-tablespoon scoop ensures every cookie bakes evenly and looks uniform.
Can I make the dough ahead of time?
Absolutely. You can make the dough and store it in the refrigerator (wrapped tightly in plastic wrap) for up to 3 days. Let it sit at room temperature for 30 minutes before scooping and rolling.
Why is my jam runny after baking?
Jam naturally melts in the oven. It should firm up and become chewy as the cookies cool. If it’s still messy after cooling, you may have used a jam with very low pectin or high water content.
Conclusion
There you have it—the secret to the perfect Christmas Thumbprint Cookies! I hope this recipe brings a little extra sparkle to your holiday season. Whether you are baking for a crowd, leaving a treat for Santa, or just satisfying a Tuesday afternoon craving, these buttery, jam-filled delights never disappoint. Don’t forget to snap a picture of your beautiful creations and tag me on social media; seeing your holiday baking truly makes my day. Happy baking, friends!