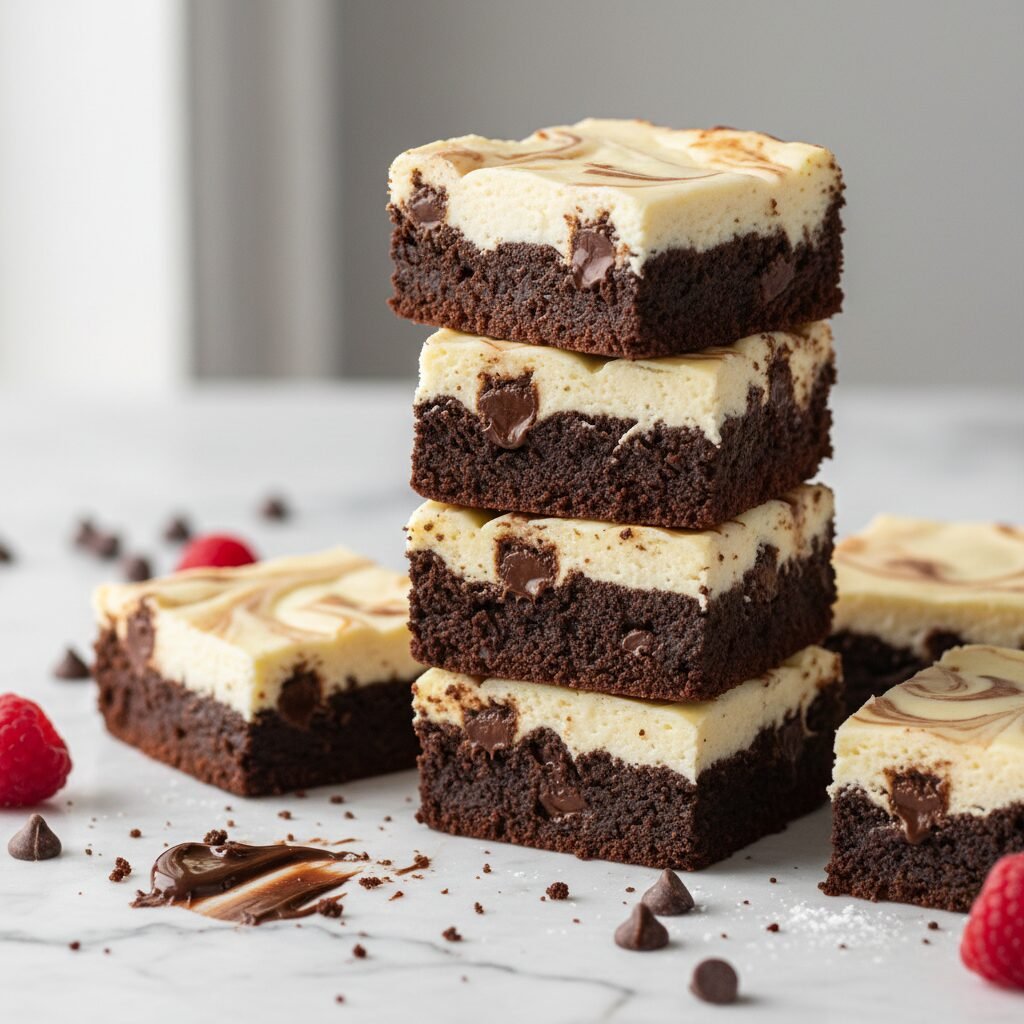
Best Easy Cheesecake Brownies Dessert
Can’t decide between a decadent chocolate brownie and a creamy slice of cheesecake? You don’t have to! These Easy Cheesecake Brownies combine the best of both worlds into one stunning, marble-swirled dessert that looks like it came from a bakery but is secretly a breeze to whip up.
20 minutes
35 minutes
55 minutes
16 squares
Dessert
Baking
American
Vegetarian
Let’s be honest, we all have those days where the chocolate craving hits hard, but you also want something a little sophisticated. That is exactly where these Easy Cheesecake Brownies come into play. Imagine biting into a dense, fudgy, chocolate-packed brownie base, only to be met with a pockets of sweet, tangy, vanilla-scented cheesecake. It is truly a match made in dessert heaven.
For all my busy moms out there, this recipe is a total game-changer. It looks incredibly impressive with that mesmerizing black-and-white marble swirl, making it perfect for bake sales, potlucks, or just a Tuesday night treat. But here is the secret: it requires very little actual effort. We aren’t talking about water baths or complicated tempering of chocolate here. This is a mix-by-hand, one-bowl (okay, maybe two bowls) kind of situation.
I have spent years tweaking this recipe to get the ratios just right. Some cheesecake brownies are too dry, while others are too wet and never quite set. This version hits that sweet spot of chewy edges, a gooey center, and a cheesecake layer that is creamy without being heavy. Whether you are a baking novice or a seasoned pro, this recipe is designed to make you look like a pastry chef with minimal stress.
History & Origins
The history of the cheesecake brownie is essentially a love story between two iconic American desserts. To understand this fusion, we have to look back at the origins of its parts. The brownie, a quintessential American invention, is often traced back to the Palmer House Hotel in Chicago during the late 19th century. Legend has it that Bertha Palmer requested a dessert for ladies attending the World’s Columbian Exposition that was smaller than a slice of cake but easily eaten from a boxed lunch. The result was a dense, fudgy treat containing walnuts and an apricot glaze.
Cheesecake, on the other hand, has roots going back to Ancient Greece, but the modern cream cheese version we know and love is a distinctly New York phenomenon that gained popularity in the 20th century after the invention of commercial cream cheese. The marriage of these two—the Marbled Brownie—likely gained traction in the mid-to-late 20th century as home baking became more experimental and convenience products became household staples.
Combining the dense, rich texture of a brownie with the light, tangy profile of cheesecake was a culinary inevitability. It represents the modern era of “fusion” baking, where texture contrast is just as important as flavor. Today, you will find variations of this treat in coffee shops worldwide, but nothing beats the homemade version where you can control the quality of the chocolate and the creaminess of the cheese.
Why This Recipe Works
So, why does this recipe work so well? It all comes down to the science of flavor balance and texture contrast. Chocolate brownies are naturally rich, heavy, and intensely sweet. Cream cheese, by nature, carries a tanginess due to its lactic acid content. When you swirl the two together, the acidity of the cheesecake cuts through the heaviness of the chocolate, cleansing the palate slightly and making you want to take another bite. It prevents the dessert from becoming cloyingly sweet.
Texturally, we are playing with density. The brownie base in this recipe uses melted butter and cocoa powder rather than just melted chocolate bars. This ensures a chewy, fudgy texture rather than a cakey one. The cheesecake layer adds a smooth, creamy mouthfeel that contrasts beautifully with the slight crunch of the brownie top. We also use an egg yolk in the cheesecake mixture rather than a whole egg; this increases the fat content and richness, ensuring the cheesecake layer doesn’t curdle or become rubbery while baking at the same temperature as the brownie.
Why You’ll Love This Recipe
- ✓Perfectly fudgy chocolate base (no cakey brownies here!)
- ✓Creamy, tangy cheesecake swirl that cuts the sweetness
- ✓Uses simple pantry staples you likely have right now
- ✓Freezer-friendly for make-ahead desserts
- ✓Looks professionally baked but requires zero fancy equipment
- ✓Ready in under an hour
Equipment You’ll Need
- ✓8×8 or 9×9 inch square baking pan
- ✓Parchment paper
- ✓Large mixing bowl (microwave safe)
- ✓Medium mixing bowl
- ✓Electric hand mixer or whisk
- ✓Rubber spatula
- ✓Butter knife or skewer (for swirling)
Ingredients
- ✓Brownie Base:
- ✓1/2 cup unsalted butter, melted and slightly cooled
- ✓1 cup granulated sugar
- ✓2 large eggs, room temperature
- ✓1 teaspoon vanilla extract
- ✓1/3 cup unsweetened cocoa powder (high quality)
- ✓1/2 cup all-purpose flour
- ✓1/4 teaspoon salt
- ✓1/2 cup semi-sweet chocolate chips (optional, for extra fudge)
- ✓Cheesecake Swirl:
- ✓8 oz cream cheese, softened to room temperature (brick style, not tub)
- ✓1/4 cup granulated sugar
- ✓1 large egg yolk
- ✓1/2 teaspoon vanilla extract
Instructions
- Preheat and Prep: Preheat your oven to 350°F (175°C). Line an 8×8 or 9×9 inch baking pan with parchment paper, leaving an overhang on the sides for easy removal later. Grease the paper lightly with butter or cooking spray.
- Make the Brownie Batter: In a large microwave-safe bowl, melt the butter. Stir in the 1 cup of sugar while the butter is still warm. Add the eggs and vanilla extract, whisking vigorously for about 1-2 minutes until the mixture is pale and shiny (this creates that crinkly top!).
- Add Dry Ingredients: Sift in the cocoa powder, flour, and salt. Switch to a rubber spatula and fold the dry ingredients into the wet mixture just until no flour streaks remain. Do not overmix. Fold in the chocolate chips if using. Reserve about 1/4 cup of this batter for the topping and pour the rest into your prepared pan, smoothing it out.
- Make the Cheesecake Filling: In a medium bowl, use a hand mixer to beat the softened cream cheese and 1/4 cup sugar until smooth and creamy. Add the egg yolk and vanilla extract. Beat just until combined. Do not overbeat, or the mixture becomes too runny.
- Layer and Swirl: Drop dollops of the cheesecake mixture over the brownie base in the pan. Take the reserved 1/4 cup of brownie batter and drop small spoonfuls of it into the gaps between the cheesecake dollops.
- The Swirl Technique: Take a butter knife or a wooden skewer. Gently drag it through the batter in a figure-8 or S-pattern to swirl the chocolate and cheesecake together. Be careful not to mix them completely; you want distinct ribbons of white and black.
- Bake: Bake for 30-35 minutes. The edges should be set and pulling away slightly from the pan, but the center should still have a very slight jiggle (it will set as it cools).
- Cool: This is the hardest part! Allow the brownies to cool completely in the pan on a wire rack. For the cleanest cuts, refrigerate them for 1 hour after they reach room temperature before slicing.
Expert Cooking Tips
- ✓Room Temperature is Key: Ensure your cream cheese and eggs are at room temperature. Cold cream cheese will result in a lumpy cheesecake layer.
- ✓Don’t Over-Swirl: It is tempting to keep swirling, but if you do it too much, the colors will muddy together and turn gray. Less is more!
- ✓Use Brick Cream Cheese: Always use the full-fat cream cheese sold in bricks. The spreadable tub variety has too much water content and will make your brownies soggy.
- ✓The Shiny Crust Trick: Whisking the sugar and eggs into the warm butter thoroughly is what creates that coveted paper-thin shiny crust on the brownie parts.
- ✓Lining the Pan: Use binder clips to hold the parchment paper to the sides of the pan while you pour the batter, so it doesn’t flop into your mix. Just remember to remove them before baking!
Substitutions and Variations
If you are looking to switch things up, here are a few easy swaps. For a Gluten-Free version, swap the all-purpose flour for a 1:1 gluten-free baking blend (like King Arthur or Bob’s Red Mill). If you don’t have semi-sweet chocolate chips, dark chocolate chunks work beautifully and add sophistication. You can also swap the vanilla extract in the cheesecake layer for a splash of lemon juice if you prefer a brighter, tangier citrus note to contrast the chocolate.
Common Mistakes to Avoid
The biggest mistake people make is overbaking. Because there are two different batters, it can be tricky to tell when it is done. If you bake until a toothpick comes out bone dry, the brownie will be hard. Trust the jiggle! Another common issue is using cold ingredients. If your cream cheese is cold, you will have little white lumps in your swirl that won’t bake out. Lastly, cutting too soon will result in a messy gooey disaster. The cheesecake layer needs time to firm up as it cools.
Serving Suggestions
These brownies are rich enough to stand on their own, but they are absolutely divine when served slightly warm with a scoop of vanilla bean ice cream. For a holiday touch, drizzle them with salted caramel sauce or a raspberry coulis. If you are serving them at a party, cut them into smaller bite-sized squares (mini bites) and dust them lightly with powdered sugar or cocoa powder for a professional finish.
Storage and Reheating Tips
Room Temperature: You can store these in an airtight container at room temperature for up to 24 hours. However, because of the cream cheese, the fridge is safer for longer storage.
Refrigerator: Store in an airtight container in the fridge for up to 5 days. They actually taste incredibly fudgy when cold!
Freezer: These freeze beautifully. Wrap individual squares in plastic wrap and then place them in a zip-top bag. Freeze for up to 3 months. Thaw in the fridge overnight or on the counter for an hour before eating.
Nutrition Facts (Estimated)
| Serving Size | 1 square |
| Calories | 290 kcal |
| Fat | 16g |
| Saturated Fat | 9g |
| Unsaturated Fat | 6g |
| Trans Fat | 0g |
| Cholesterol | 65mg |
| Sodium | 140mg |
| Carbohydrates | 34g |
| Fiber | 2g |
| Sugar | 22g |
| Protein | 4g |
Frequently Asked Questions
Do I have to refrigerate cheesecake brownies?
Yes, for long-term storage (more than 24 hours), they should be refrigerated because of the cream cheese content. They taste delicious cold, too!
Can I use a box brownie mix?
Absolutely! If you are short on time, prepare a family-size (9×13) brownie mix according to the package instructions, but bake it in a 9×9 pan for thickness. Prepare the homemade cheesecake filling as listed above and swirl it in.
Why is my cheesecake layer runny?
This usually happens if you used ‘spreadable’ tub cream cheese or low-fat cream cheese, which has higher water content. It can also happen if you overbeat the eggs into the mixture, incorporating too much air.
How do I cut them cleanly?
Chill the brownies thoroughly first. Then, run a sharp chef’s knife under hot water, wipe it dry, and make one cut. Wipe the knife clean between every single cut.
Can I double this recipe?
Yes! You can double the ingredients and bake it in a 9×13 inch pan. You may need to add 5-10 minutes to the baking time.
Glass or metal pan?
A light-colored metal pan is best for brownies as it conducts heat evenly. Glass pans take longer to heat up and hold heat longer, which can lead to overbaked edges and underbaked centers. If using glass, lower the oven temp by 25°F.
Can I add fruit?
Yes! Fresh raspberries or a swirl of raspberry jam added with the cheesecake layer is a classic and delicious addition.
Why did my brownies sink in the middle?
This is normal for fudgy brownies and cheesecake! As the structure sets and cools, it condenses. It just makes them denser and fudgier.
Conclusion
There you have it—the only recipe you will ever need for the Best Easy Cheesecake Brownies. It is the perfect recipe to have in your back pocket for when you need to impress guests or just treat your family to something special. The contrast of the dark chocolate and the white cheesecake is visually stunning, and the taste is even better. So grab that mixing bowl, preheat your oven, and get ready to smell the most amazing aroma filling your kitchen. Happy baking!