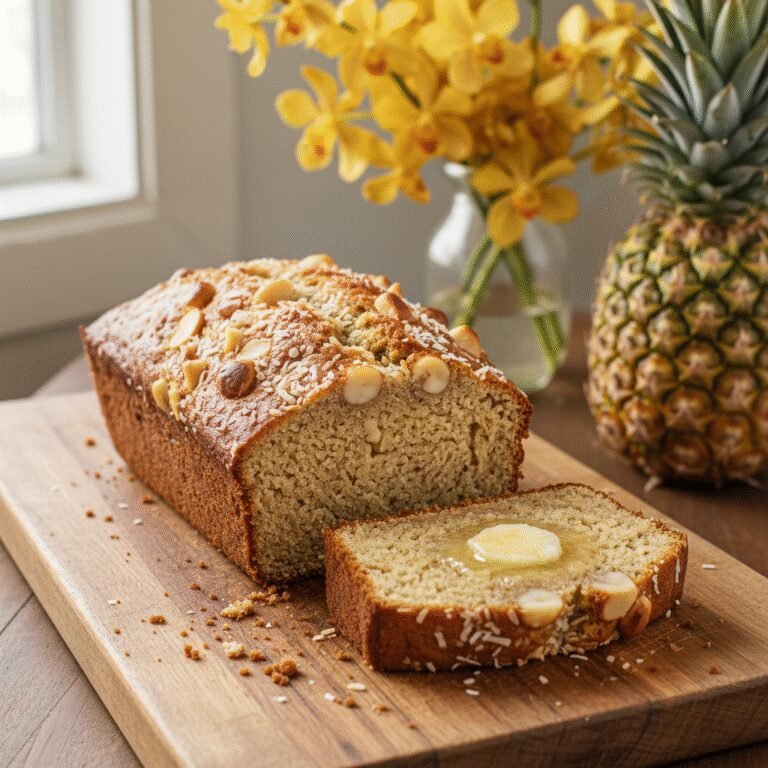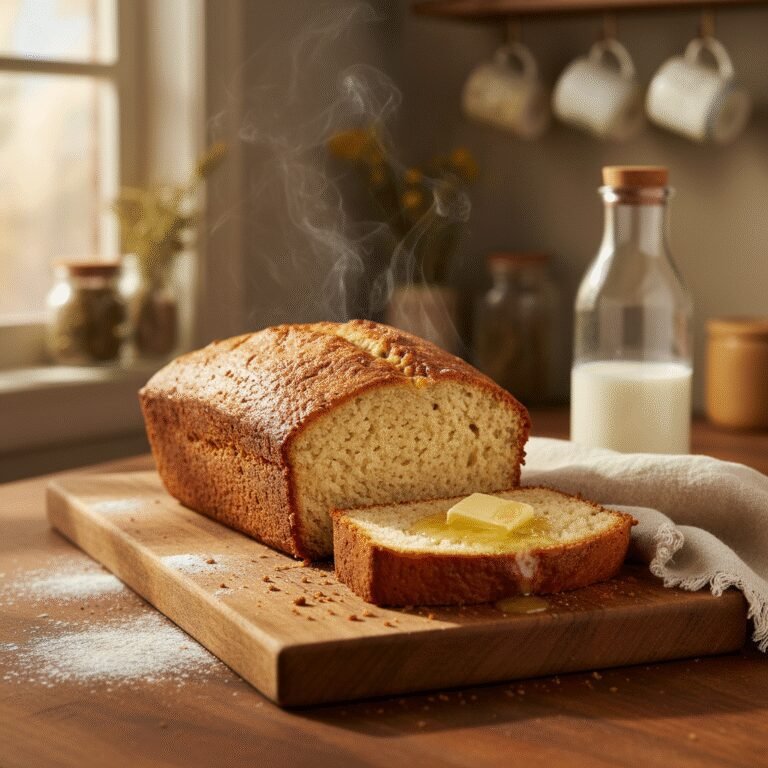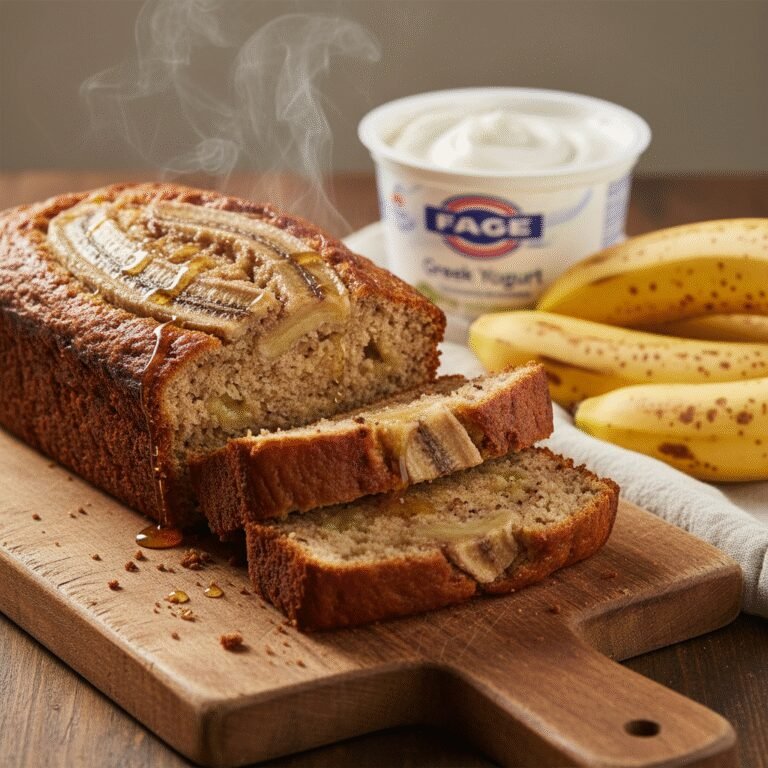
Banana Walnut Bread
Turn those spotted, brown bananas sitting on your counter into golden, moist perfection. This Banana Walnut Bread is the ultimate comfort food that fills your home with the warmest, most inviting aroma imaginable.
15 minutes
60 minutes
1 hour 15 minutes
1 Loaf (10 Slices)
Breakfast / Snack
Baking
American
Vegetarian
Is there anything more universally comforting than the smell of banana bread baking in the oven? It’s one of those scents that instantly transports you back to childhood kitchens, lazy Sunday mornings, and the feeling of a warm hug. As moms, we all know the struggle of buying a bunch of bananas with the best intentions, only to watch them slowly turn into brown, spotted science experiments on the counter. But here is the secret: that is exactly where the magic begins.
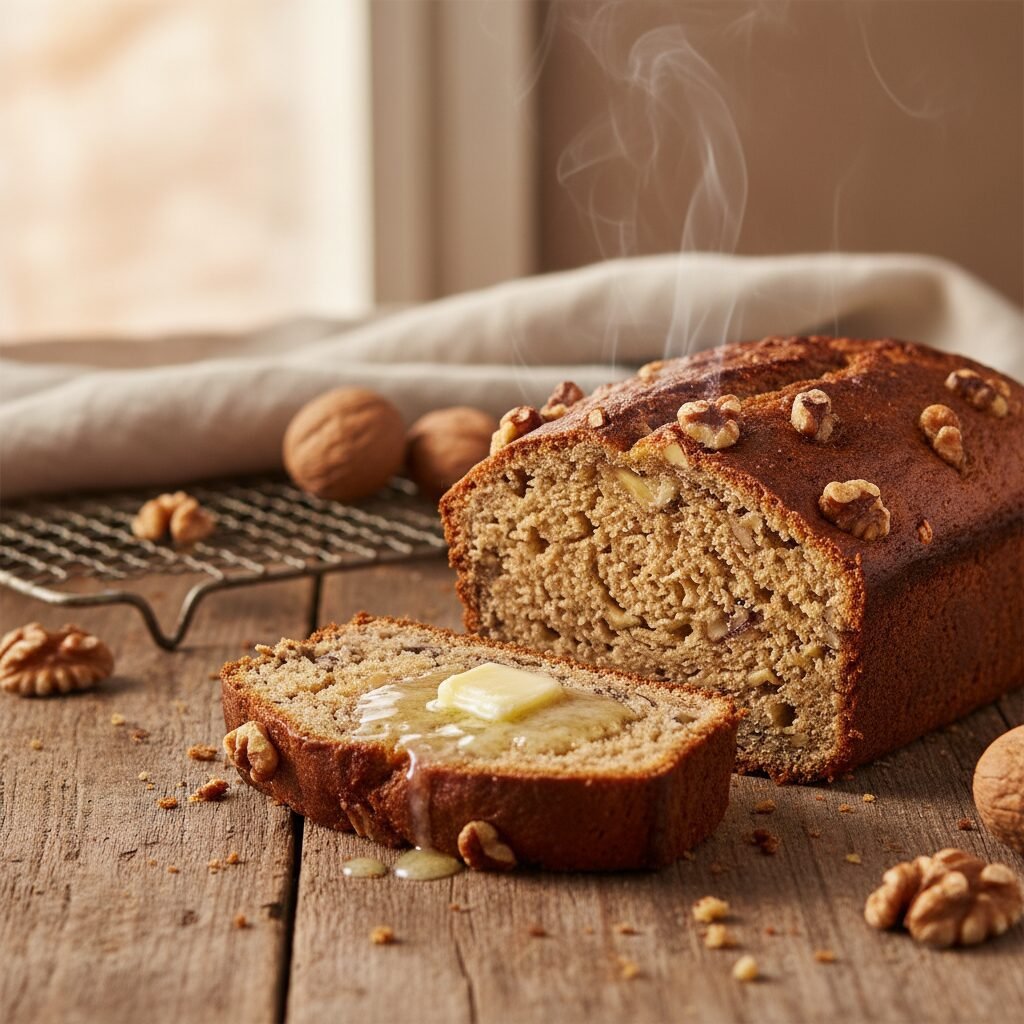
This Banana Walnut Bread recipe isn’t just another way to save fruit from the compost bin; it is a celebration of simple, wholesome ingredients coming together to create something spectacular. We are talking about a loaf that is incredibly moist (never dry!), perfectly sweet, and studded with the satisfying crunch of toasted walnuts. It is the kind of recipe you will want to laminate and keep in your family binder forever. Whether you are meal-prepping for a busy school week or looking for a sweet treat to pair with your afternoon coffee, this bread delivers every single time.
I have tweaked this recipe over the years to ensure it is foolproof. It strikes that delicate balance between fluffy and dense, with a caramelized crust that you will find yourself picking at before the loaf has even cooled. So, grab your mixing bowls and let’s turn those sad-looking bananas into the star of the show!
History & Origins
Banana bread feels like it has been around forever, but it actually became a household staple in the United States during the Great Depression. Before the 1930s, bananas were a bit of a luxury import. However, as refrigeration improved and food preservation became a necessity during tough economic times, housewives were looking for ways to use every scrap of food, including overripe bananas that were too mushy to eat raw.
The rise of chemical leavening agents like baking powder and baking soda in the 1930s also played a huge role. These ingredients made “quick breads”—breads that don’t require yeast or rising time—accessible and easy for home cooks. The recipe exploded in popularity again in the 1950s with the release of home baking cookbooks like the original Chiquita Banana’s Recipe Book. Today, it remains one of the most searched and baked recipes in America, proving that good taste truly never goes out of style.
Why This Recipe Works
There is actually a bit of science behind why this specific recipe works so well. First, we rely heavily on overripe bananas. As bananas ripen, their starch converts to sugar, which not only provides natural sweetness but also adds incredible moisture to the batter. This allows us to cut back slightly on added refined sugars.
Secondly, the fat ratio is key. We use melted butter for that rich, unmistakable flavor, but you can also swap in a little oil if you want the loaf to stay soft for days on end. The addition of walnuts isn’t just for taste; their texture provides a necessary contrast to the soft crumb, preventing the “mushy” texture that some banana breads suffer from. Finally, using a combination of baking soda and a touch of acidic ingredient (like the natural acidity in brown sugar or a splash of yogurt if you choose to add it) ensures a beautiful rise, giving you that classic domed top.
Why You’ll Love This Recipe
- ✓Uses up overripe bananas perfectly
- ✓Incredibly moist and tender crumb
- ✓Crunchy, heart-healthy walnuts in every bite
- ✓Freezer-friendly for easy meal prep
- ✓Ready in just over an hour
- ✓Makes your house smell amazing
Equipment You’ll Need
- ✓9×5 inch Loaf Pan
- ✓Large Mixing Bowl
- ✓Medium Mixing Bowl
- ✓Fork or Potato Masher
- ✓Whisk
- ✓Rubber Spatula
- ✓Wire Cooling Rack
Ingredients
- ✓3 large ripe bananas (very brown and spotted)
- ✓1/2 cup unsalted butter, melted
- ✓3/4 cup granulated sugar (or half brown sugar for more depth)
- ✓1 large egg, beaten
- ✓1 teaspoon vanilla extract
- ✓1 teaspoon baking soda
- ✓1 pinch of salt
- ✓1 1/2 cups all-purpose flour
- ✓1/2 teaspoon ground cinnamon (optional but recommended)
- ✓3/4 cup chopped walnuts (toasted lightly for best flavor)
Instructions
- Preheat and Prep: Preheat your oven to 350°F (175°C). Grease your 9×5-inch loaf pan with butter or non-stick spray. For extra easy removal, you can line it with parchment paper leaving an overhang on the sides.
- Mash the Bananas: In a large mixing bowl, peel the ripe bananas and mash them well with a fork or potato masher. You want a consistency that is mostly smooth but still has a few small chunks for texture.
- Mix Wet Ingredients: Pour the melted butter into the mashed bananas and stir to combine. Mix in the sugar, beaten egg, and vanilla extract. Stir until the mixture is smooth and uniform.
- Combine Dry Ingredients: In a separate medium bowl, whisk together the flour, baking soda, salt, and cinnamon. This ensures the leavening agent is evenly distributed.
- Make the Batter: Gently fold the dry ingredients into the wet banana mixture using a rubber spatula. Stop mixing as soon as the flour streaks disappear. Overmixing yields a tough bread!
- Add the Crunch: Gently fold in the chopped walnuts, reserving a tablespoon or two to sprinkle on top if desired.
- Bake: Pour the batter into your prepared loaf pan. Smooth the top with your spatula. Bake for 55 to 65 minutes. To check for doneness, insert a toothpick into the center; it should come out clean or with just a few moist crumbs attached.
- Cool: Remove from the oven and let the bread cool in the pan for about 10 minutes. Then, lift it out onto a wire rack to cool completely before slicing. Slicing it while too hot can cause it to crumble.
Expert Cooking Tips
- ✓Ripeness Matters: The bananas should be more brown than yellow. If they are black, that is even better! The darker the peel, the sweeter and moister the bread.
- ✓Toast the Nuts: For a deeper, nuttier flavor, toast your walnuts in a dry pan for 3-5 minutes before adding them to the batter.
- ✓Don’t Overmix: This is the golden rule of quick breads. Mix just until combined to keep the gluten development low, ensuring a tender loaf.
- ✓Checking Doneness: If the top is browning too quickly but the center is still raw, tent a piece of aluminum foil loosely over the top of the loaf for the last 15 minutes of baking.
- ✓Room Temperature Egg: Using a room temperature egg helps it incorporate better into the batter without seizing the melted butter.
Substitutions and Variations
We know that sometimes the pantry isn’t fully stocked, or dietary needs change. Here are some easy swaps:
- Flour: You can substitute up to half of the all-purpose flour with whole wheat flour for a heartier texture. For a gluten-free version, use a 1:1 gluten-free baking flour blend.
- Butter: Melted coconut oil or a neutral vegetable oil works great if you are dairy-free.
- Sugar: You can swap granulated sugar for brown sugar for a moister, more caramel-like flavor. Honey or maple syrup can also be used, but reduce the amount to 1/2 cup and slightly reduce the other liquids.
- Walnuts: Pecans are a fantastic alternative. If you have a nut allergy, simply omit them or swap for chocolate chips!
- Egg: For a vegan option, use a “flax egg” (1 tbsp ground flaxseed mixed with 3 tbsp water, let sit for 5 mins).
Common Mistakes to Avoid
Even the best bakers make mistakes! Here are a few to watch out for:
- Underbaking: Banana bread is dense and takes a while to cook. If you pull it out too early, the center will be gummy. Trust the toothpick test!
- Using Under-ripe Bananas: Yellow or green bananas lack the sugar and moisture needed. If you must use them, bake them in their skins at 300°F for 15-20 mins until black.
- Slicing Too Soon: It is tempting to cut into it immediately, but the bread finishes setting as it cools. Cutting it hot releases steam and can make the bread dry out faster later.
Serving Suggestions
This bread is divine on its own, but you can elevate it effortlessly. Serve a thick slice slightly warm with a generous smear of salted butter or cream cheese. For a decadent breakfast, turn stale slices into banana bread French toast! It also pairs beautifully with a hot cup of coffee or a cold glass of milk for the kids.
Storage and Reheating Tips
To keep your banana bread moist, wrap it tightly in plastic wrap or store it in an airtight container at room temperature for up to 3 days. If you want to keep it longer, wrap it well and refrigerate for up to a week. For long-term storage, slice the loaf, wrap individual slices in plastic wrap and foil, and freeze for up to 3 months. Just pop a slice in the toaster or microwave when the craving hits!
Nutrition Facts (Estimated)
| Serving Size | 1 Slice |
| Calories | 290 kcal |
| Fat | 14g |
| Saturated Fat | 6g |
| Unsaturated Fat | 8g |
| Trans Fat | 0g |
| Cholesterol | 45mg |
| Sodium | 210mg |
| Carbohydrates | 38g |
| Fiber | 2g |
| Sugar | 18g |
| Protein | 5g |
Frequently Asked Questions
Can I freeze the bananas before making this?
Absolutely! I always throw brown bananas in the freezer. Just let them thaw completely in a bowl before using (don’t drain the liquid—that’s flavor!).
Why did my banana bread sink in the middle?
This usually happens if the batter was overmixed or if the oven door was opened too early during baking. It can also mean the center wasn’t fully cooked.
Can I make this into muffins instead?
Yes! Pour the batter into a greased muffin tin. Bake at 350°F for about 18-22 minutes. It makes roughly 12 standard muffins.
How do I ripen bananas quickly?
Place unpeeled bananas on a baking sheet and bake at 300°F for 15-20 minutes until the skins are black and the fruit is soft.
Can I reduce the sugar?
You can reduce the sugar to 1/2 cup without affecting the texture too much, especially if your bananas are very ripe and sweet.
Why is my bread dry?
Dry bread is often caused by measuring flour incorrectly (scooping instead of spooning and leveling) or overbaking.
Can I add chocolate chips?
Yes, please! Add 1/2 cup of semi-sweet or dark chocolate chips when you add the walnuts for a delicious treat.
Is baking soda necessary?
Yes, baking soda reacts with the acidity in the bananas and brown sugar to help the dense batter rise. Don’t skip it!
Conclusion
There you have it—the only Banana Walnut Bread recipe you will ever need. It is simple, reliable, and absolutely delicious. Whether you are a seasoned baker or just trying to use up some old fruit, this loaf is sure to bring a smile to your face and warmth to your kitchen. Don’t forget to pin this recipe for later and share your creations with us on social media!