The Best Classic Deviled Eggs
These aren’t just any eggs; they are the nostalgic party starter everyone fights over. With perfectly boiled whites and a smooth, mustard-y yolk mixture, this recipe is the ultimate crowd-pleaser.
15 minutes
12 minutes
27 minutes
24 Deviled Eggs
Appetizer
Boiling
American
Gluten Free
Is it really a family gathering if someone doesn’t show up with a special platter of deviled eggs? I don’t think so! Whether it’s Easter brunch, a Fourth of July picnic, or the Thanksgiving appetizer spread, these little bites of heaven are absolute non-negotiables in my house. There is something so comforting about the creamy, tangy filling nestled inside a tender egg white that just screams ‘home.’
I’ve tried a million variations over the years—adding avocado, bacon, sriracha, you name it. But honestly? I always come back to the classic. The simple combination of mayonnaise, mustard, a splash of vinegar, and a dusting of paprika is timeless for a reason. It hits every flavor note: creamy, salty, tangy, and savory.
This recipe is dedicated to all the busy moms out there who need a win. It’s budget-friendly, naturally gluten-free, keto-friendly, and you can prep it ahead of time. Plus, I’m going to share my foolproof method for easy-peel eggs so you never have to hide pockmarked egg whites under garnish again!
History & Origins
Have you ever wondered why we call them ‘deviled’ eggs? It sounds a bit mischievous for such an angelic snack! The term actually dates back to the 18th century. In culinary terms, ‘deviling’ food meant preparing it with hot spices or zesty condiments, usually mustard and pepper. It was a reference to the heat associated with the devil and hell.
However, the concept of stuffed eggs goes back much further—all the way to ancient Rome! Wealthy Romans served boiled eggs seasoned with spicy sauces as a starter to their fancy meals. By the 15th century, stuffed eggs were popping up in cookbooks across Europe. But the mayonnaise-based version we know and love today is distinctly American, becoming a staple in the 1940s after mayonnaise became commercially available. It’s a dish with deep roots and a lot of staying power.
Why This Recipe Works
The magic of a perfect deviled egg lies in the balance of fat and acid. The egg yolks are naturally rich and fatty, and when you mash them, they can be heavy. By introducing mayonnaise (more fat, but creamy emulsion) and mustard (acid and spice) plus vinegar, we cut through that richness. This creates a filling that feels light on the palate despite being decadent.
Texturally, we are looking for contrast. The egg white provides a firm, bouncy vessel that holds the filling. If the filling is too stiff, it’s unpleasant to eat; if it’s too runny, it’s a mess. This recipe uses the perfect ratio of liquid to solid ingredients to ensure the yolk mixture is pipeable and silky smooth, holding its shape beautifully on the platter.
Why You’ll Love This Recipe
- ✓Foolproof easy-peel hard-boiled egg method
- ✓Creamy, lump-free filling texture
- ✓Perfect balance of tangy and savory flavors
- ✓Can be made up to 2 days in advance
- ✓Budget-friendly party appetizer
- ✓Keto and Low-Carb friendly
Equipment You’ll Need
- ✓Large Saucepan with Lid
- ✓Large Bowl (for ice bath)
- ✓Small Mixing Bowl
- ✓Fork or Potato Masher
- ✓Sharp Knife
- ✓Piping Bag or Ziplock Bag
- ✓Star Piping Tip (optional)
Ingredients
- ✓12 large eggs (older eggs peel better!)
- ✓1/2 cup high-quality mayonnaise (like Duke’s or Hellmann’s)
- ✓2 teaspoons Dijon mustard
- ✓1 teaspoon white vinegar or apple cider vinegar
- ✓1/4 teaspoon salt (adjust to taste)
- ✓1/4 teaspoon freshly ground black pepper
- ✓1/8 teaspoon garlic powder (optional)
- ✓Smoked paprika, for garnish
- ✓Fresh chives or dill, chopped for garnish
Instructions
- Step 1: The Perfect Boil. Place your eggs in a single layer in a large saucepan. Cover them with cold water by about an inch. Place the pan over high heat and bring the water to a full, rolling boil.
- Step 2: The Rest. As soon as the water boils, turn off the heat completely and cover the pan with a lid. Let the eggs sit in the hot water for exactly 12 minutes (set a timer!). This method prevents the dreaded green ring around the yolk.
- Step 3: The Ice Bath. While the eggs are sitting, prepare a large bowl with cold water and lots of ice. When the timer goes off, use a slotted spoon to immediately transfer the eggs into the ice bath. Let them cool completely for at least 15 minutes. This shocks the membrane and makes peeling easier.
- Step 4: Peel and Slice. Gently tap each egg on the counter to crack the shell all over. Peel under cool running water. Slice each egg in half lengthwise. Wipe the knife clean between cuts to keep the whites pristine.
- Step 5: Make the Filling. Gently pop the yolks out into a small mixing bowl and place the whites on a serving platter. Mash the yolks with a fork or potato masher until they are very fine and crumbly—no big lumps allowed!
- Step 6: Mix it Up. Add the mayonnaise, Dijon mustard, vinegar, salt, pepper, and garlic powder to the yolks. Stir vigorously until the mixture is completely smooth and creamy. If you want it extra fluffy, you can use a hand mixer.
- Step 7: Fill the Eggs. Transfer the filling to a piping bag fitted with a star tip (or a ziplock bag with the corner snipped off). Pipe the mixture generously into the hollows of the egg whites.
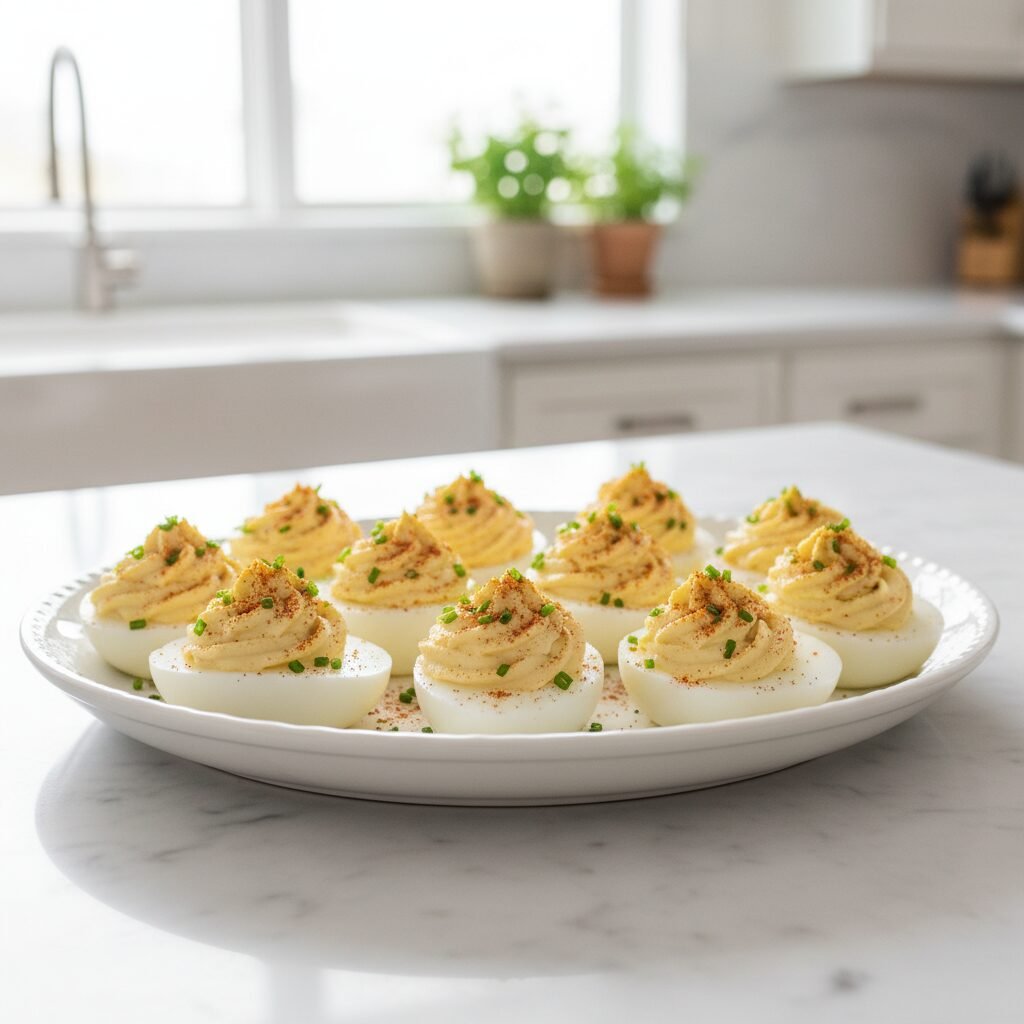
- Step 8: Garnish. Sprinkle lightly with smoked paprika for that classic look and top with fresh chives or dill if desired. Serve immediately or chill until ready.
Expert Cooking Tips
- ✓Use Older Eggs: Fresh eggs are notoriously hard to peel because the pH is lower, causing the white to cling to the shell. Buy your eggs a week before you plan to make this recipe.
- ✓Don’t Skip the Ice Bath: This is the most critical step for stopping the cooking process and ensuring the yolks stay bright yellow instead of turning chalky and grey.
- ✓Room Temp Mayo: If your mayonnaise and mustard are at room temperature when mixing, they will emulsify better with the yolks, creating a silkier texture.
- ✓The Ziplock Hack: You don’t need fancy equipment. Put the filling in a sandwich bag, push it to one corner, twist the top, and snip the corner. Voila—instant piping bag!
Substitutions and Variations
We all have different tastes and pantry staples, so feel free to mix it up! If you aren’t a fan of mayonnaise, you can swap half or all of it for plain Greek yogurt for a tangier, protein-packed version (though the texture will be slightly less silky). No Dijon mustard? Classic yellow mustard works perfectly and gives it that bright yellow potluck look. If you like things spicy, swap the paprika for cayenne pepper or add a dash of hot sauce to the yolk mixture. For a pickle kick, stir in a tablespoon of sweet pickle relish or finely minced cornichons.
Common Mistakes to Avoid
The biggest mistake people make is overcooking the eggs. This leads to dry, chalky yolks with that unappetizing green-grey ring around the outside. Stick to the ‘boil and sit’ method to avoid this. Another common error is lumpy filling. Take the extra minute to really mash those yolks into a fine powder before adding the wet ingredients. Finally, be careful not to tear the whites when removing the yolks; gently squeeze the white to loosen the yolk before popping it out.
Serving Suggestions
Deviled eggs are the chameleons of the appetizer world. Serve them on a dedicated egg platter (you know, the ones with the little indentations) to keep them from sliding around. They pair beautifully with other finger foods like pigs in a blanket, veggie trays, and charcuterie boards. For a Southern brunch, serve them alongside biscuits, ham, and fruit salad. If you want to get fancy, top them with a tiny piece of crispy bacon, a slice of jalapeño, or even a little caviar for New Year’s Eve!
Storage and Reheating Tips
You can boil and peel the eggs up to 2 days in advance; just store the whites and the prepared yolk filling separately in airtight containers in the fridge. Assemble them just before serving for the freshest taste. Once assembled, they should be eaten within 2 days. Store leftovers in an airtight container. If you leave them uncovered in the fridge, the yolk filling will form a hard, dark crust, and the whites will get rubbery—so keep them covered tightly!
Nutrition Facts (Estimated)
| Serving Size | 2 halves |
| Calories | 130 kcal |
| Fat | 10g |
| Saturated Fat | 2.5g |
| Unsaturated Fat | 6g |
| Trans Fat | 0g |
| Cholesterol | 185mg |
| Sodium | 160mg |
| Carbohydrates | 1g |
| Fiber | 0g |
| Sugar | 1g |
| Protein | 6g |
Frequently Asked Questions
Why is there a green ring around my yolk?
The green ring is caused by a chemical reaction between sulfur in the egg white and iron in the yolk, which happens when eggs are overcooked. Follow the timing in the recipe strictly to keep them bright yellow!
How far in advance can I make deviled eggs?
You can make them up to 2 days ahead. For the best presentation, keep the filling in a piping bag and the whites in a container, then pipe them right before your guests arrive.
How do I peel eggs without ruining the whites?
Use eggs that are 7-10 days old, and shock them in an ice bath immediately after boiling. Peeling them under cool running water also helps separate the membrane from the white.
Can I freeze deviled eggs?
No, I wouldn’t recommend it. Cooked egg whites become rubbery and watery when frozen and thawed. The texture will be ruined.
My filling is too runny, how do I fix it?
If you added too much liquid, you can thicken it by adding another boiled yolk (if you have an extra), a little instant mashed potato flakes, or even a tiny bit of cream cheese.
Can I use miracle whip instead of mayonnaise?
Absolutely! Many Southern families swear by Miracle Whip. It will make the eggs significantly sweeter and tangier, so you might want to reduce the vinegar.
How do I transport them to a party?
If you don’t have a carrier with egg slots, place the eggs in a container lined with crumpled paper towels or a clean kitchen towel to create a nest that prevents them from sliding.
Are deviled eggs healthy?
They are a great source of protein and healthy fats, and they are low in carbs. While mayonnaise adds calories, eating them in moderation is a healthy snack option.
Conclusion
There you have it, the ultimate guide to making the best classic deviled eggs! It is such a simple recipe, but when done right, it truly steals the show. Whether you are a seasoned pro or a first-time egg boiler, I hope this guide helps you create a platter that your family will talk about for years. Don’t forget to take a picture before they all disappear—because trust me, they will go fast! Happy cooking, friends!