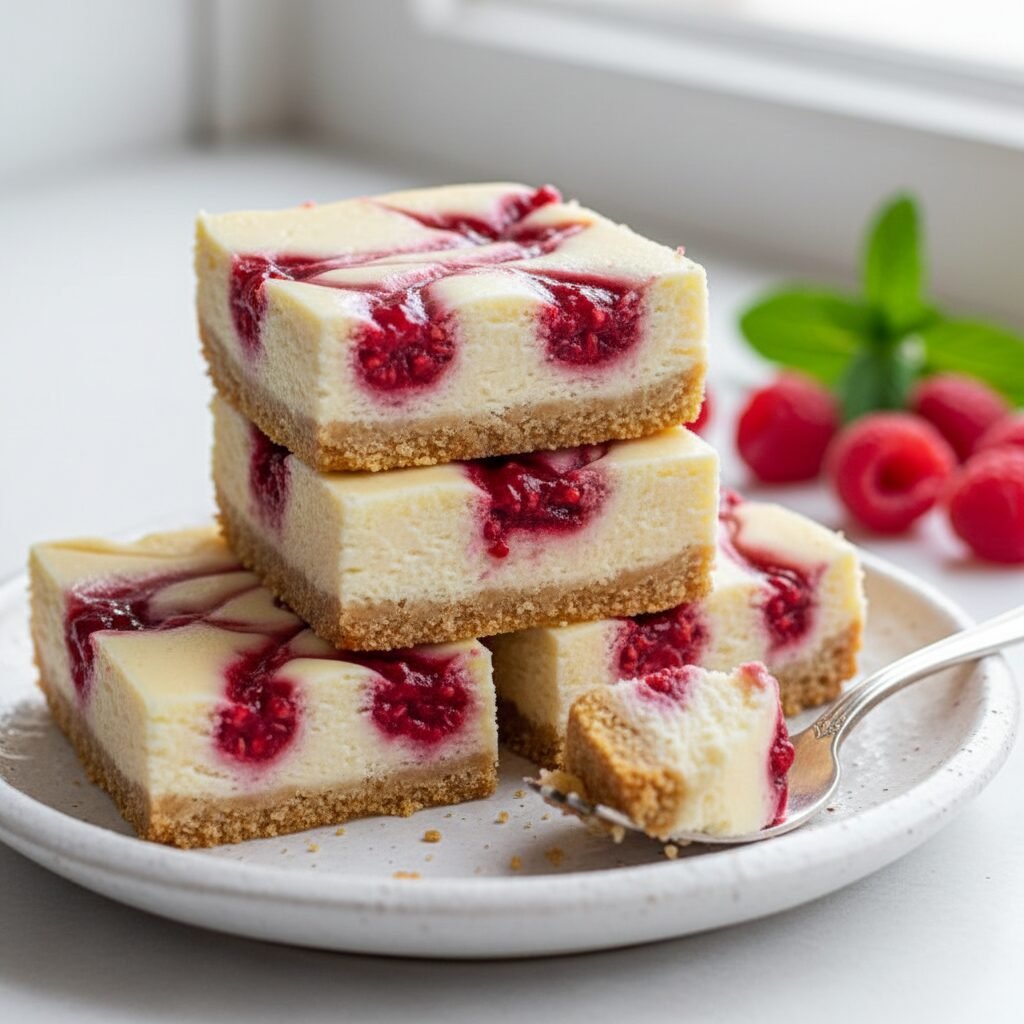
Raspberry Cheesecake Bars
Imagine the rich, velvety texture of a classic New York cheesecake combined with the bright, tangy burst of fresh summer berries. These Raspberry Cheesecake Bars are easier to make than a whole cake, require no water bath, and are perfectly portioned for sharing.
25 minutes
35 minutes
4 hours 30 minutes (includes cooling)
16 bars
Dessert
Baking
American
Vegetarian
Hey friends! Let’s be real for a second. We all love cheesecake. It is the gold standard of desserts—creamy, tangy, sweet, and comforting. But let’s also be honest: making a full-sized cheesecake can be a bit of a production. Between the springform pan, the water bath anxiety, and the fear of the dreaded surface crack, it is a lot of pressure for a Tuesday night or a casual weekend get-together.
That is exactly why I am obsessed with these Raspberry Cheesecake Bars. They give you 100% of that luxurious cheesecake satisfaction with about 50% of the effort. We are talking about a thick, buttery graham cracker crust (the best part, right?), a smooth-as-silk cream cheese filling, and a homemade raspberry sauce swirled right on top that looks like modern art but takes five minutes to make.
Whether you are a busy mom looking for a treat to bring to a potluck, planning a baby shower, or just need something sweet to hide in the back of the fridge for ‘mommy time,’ these bars are the answer. They slice beautifully, freeze like a dream, and honestly, the swirl makes you look like a professional pastry chef. Let’s get baking!
History & Origins
Cheesecake itself has a surprisingly ancient history, dating back to ancient Greece over 4,000 years ago. It was considered a good source of energy and was even served to athletes during the first Olympic Games in 776 B.C. However, the cheesecake we know and love today—specifically the New York style using cream cheese—didn’t come around until the late 19th century when William Lawrence accidentally invented cream cheese while trying to recreate a French cheese called Neufchâtel.
The concept of ‘cheesecake bars’ is a distinctly modern American evolution. As baking moved towards convenience and potluck-style gatherings in the mid-20th century, home cooks began adapting complex cakes into traybakes and bars. This allowed for easier transport, simpler portioning, and faster cooking times. By baking in a square or rectangular pan, the heat distributes more evenly, eliminating the need for the fussy water baths required for tall, round cakes. These Raspberry Cheesecake Bars are the perfect marriage of ancient indulgence and modern convenience.
Why This Recipe Works
There is a little bit of culinary science behind why these bars are so addictive. First, it is all about the balance of textures and flavors. The crust provides a crunchy, salty-sweet contrast to the smooth, rich filling. We use a high ratio of butter to crumbs to ensure the crust holds together and doesn’t crumble when you bite into a bar.
Secondly, the raspberry swirl isn’t just for looks. The natural acidity and tartness of the raspberries cut through the heavy fat content of the cream cheese and sour cream. This ‘palate cleansing’ effect makes the dessert feel lighter than it actually is, which keeps you coming back for another bite. We also add a touch of cornstarch to the raspberry sauce; this ensures that the fruit puree has the same viscosity as the cheesecake batter, so it swirls on top rather than sinking to the bottom.
Finally, adding sour cream to the batter softens the texture of the cream cheese, resulting in a filling that is creamy rather than stiff or chalky. It adds that signature tang that distinguishes a great cheesecake from a mediocre one.
Why You’ll Love This Recipe
- ✓No water bath required – fuss-free baking!
- ✓Perfect balance of tart raspberries and sweet cream.
- ✓Ideal for making ahead of time (they taste better the next day).
- ✓Beautiful marble swirl that looks impressive but is easy to do.
- ✓Freezer-friendly for up to 3 months.
Equipment You’ll Need
- ✓8×8 or 9×9 inch square baking pan
- ✓Electric hand mixer or stand mixer
- ✓Food processor (for crust) or ziplock bag and rolling pin
- ✓Small saucepan
- ✓Fine mesh sieve (optional, for seedless sauce)
- ✓Parchment paper
- ✓Rubber spatula
Ingredients
- ✓For the Crust:
- ✓1 1/2 cups graham cracker crumbs (about 10-12 full sheets)
- ✓6 tablespoons unsalted butter, melted
- ✓1/4 cup granulated sugar
- ✓Pinch of salt
- ✓For the Raspberry Swirl:
- ✓6 oz fresh raspberries (about 1 cup plus a few for garnish)
- ✓2 tablespoons granulated sugar
- ✓1 teaspoon lemon juice
- ✓1/2 teaspoon cornstarch dissolved in 1 teaspoon water
- ✓For the Cheesecake Filling:
- ✓16 oz (2 blocks) full-fat cream cheese, softened to room temperature
- ✓1/2 cup granulated sugar
- ✓1/4 cup sour cream, room temperature
- ✓1 teaspoon vanilla extract
- ✓2 large eggs, room temperature
- ✓1 teaspoon lemon zest (optional)
Instructions
- Step 1: Prep and Crust. Preheat your oven to 325°F (163°C). Line an 8×8 or 9×9 inch baking pan with parchment paper, leaving an overhang on the sides to easily lift the bars out later. In a medium bowl, mix the graham cracker crumbs, melted butter, 1/4 cup sugar, and salt until the texture resembles wet sand. Press this mixture firmly into the bottom of the prepared pan. Use the bottom of a measuring cup to pack it down tight. Bake for 8 minutes, then remove and set aside to cool slightly.
- Step 2: Make the Raspberry Sauce. While the crust bakes, combine the raspberries, 2 tablespoons sugar, and lemon juice in a small saucepan over medium heat. Cook, mashing the berries with a spoon, until they break down and release their juices (about 5 minutes). Stir in the cornstarch mixture and cook for another minute until slightly thickened. Remove from heat. Optional: Strain through a fine-mesh sieve if you want a seedless swirl. Set aside to cool.
- Step 3: Make the Filling. In a large mixing bowl using a hand mixer or stand mixer fitted with the paddle attachment, beat the room temperature cream cheese and 1/2 cup sugar on medium speed until completely smooth and creamy (about 2-3 minutes). Scrape down the bowl. Add the sour cream, vanilla extract, and lemon zest. Beat until combined.
- Step 4: Add Eggs. Add the eggs one at a time, mixing on low speed just until incorporated. Do not overmix at this stage, or you will whip too much air into the batter, which can cause cracks. Pour the cheesecake batter over the crust and smooth the top with a spatula.
- Step 5: The Swirl. Drop small spoonfuls of the raspberry sauce randomly over the top of the cheesecake batter. Using a toothpick or a knife, gently swirl the raspberry sauce into the batter to create a marbled effect. Don’t over-swirl, or the colors will muddy.
- Step 6: Bake. Bake for 30-35 minutes. The edges should be set and slightly puffed, but the center should still have a little ‘wobble’ or jiggle to it (like Jell-O). It will firm up as it cools.
- Step 7: Cool and Chill. Turn off the oven and crack the door open. Let the bars sit in the cooling oven for 20 minutes (this helps prevent cracking). Remove from the oven and cool completely on a wire rack. Once at room temperature, refrigerate for at least 3-4 hours, preferably overnight, before slicing.
Expert Cooking Tips
- ✓Room Temperature Ingredients: This is the most critical tip! Your cream cheese, eggs, and sour cream must be at room temperature. If the cream cheese is cold, you will get lumpy batter. If you try to beat out the lumps, you will overmix the eggs.
- ✓Pressing the Crust: Use the bottom of a flat glass or a measuring cup to press the crust down firmly. A tight crust ensures the bars hold their shape when sliced.
- ✓Clean Cuts: To get those perfect, sharp edges, dip a sharp knife into hot water, wipe it dry, and make a cut. Repeat the dip-and-wipe process for every single slice.
- ✓Don’t Overbake: If the cheesecake looks completely firm in the middle while in the oven, it is already overdone. Pull it when the center still jiggles.
Substitutions and Variations
If you want to switch things up, this recipe is quite versatile. Crust: You can use digestive biscuits, Oreos (remove the cream filling first for a less sweet crust), or even crushed pretzels for a salty-sweet vibe. Fruit: Strawberries, blackberries, or blueberries work just as well as raspberries. If using frozen berries, do not thaw them before cooking the sauce; just cook them a little longer to evaporate the excess water. Dairy: You can substitute the sour cream with full-fat Greek yogurt in a pinch.
Common Mistakes to Avoid
The most common mistake is overmixing the batter after adding the eggs. This incorporates air bubbles that expand in the oven and then collapse, causing cracks. Always mix on low speed once the eggs are in. Another common issue is slicing too soon. Cheesecake needs cold temperature to set its structure. If you cut it while it is warm or even just room temperature, it will be a gooey mess.
Serving Suggestions
These bars are stunning on their own, but if you want to elevate them for a party, garnish each square with a fresh raspberry and a small mint leaf. A dollop of homemade whipped cream never hurts! For a summer BBQ, serve them chilled alongside a glass of iced tea or prosecco.
Storage and Reheating Tips
Refrigerator: Store leftover bars in an airtight container in the fridge for up to 5 days. Freezer: These freeze beautifully! Wrap individual bars tightly in plastic wrap, then place them in a freezer-safe bag or container. They will last for up to 3 months. Thaw in the refrigerator overnight before serving.
Nutrition Facts (Estimated)
| Serving Size | 1 Bar |
| Calories | 320 kcal |
| Fat | 21g |
| Saturated Fat | 12g |
| Unsaturated Fat | 8g |
| Trans Fat | 0g |
| Cholesterol | 85mg |
| Sodium | 190mg |
| Carbohydrates | 28g |
| Fiber | 1g |
| Sugar | 22g |
| Protein | 4g |
Frequently Asked Questions
Can I use frozen raspberries for the swirl?
Yes, absolutely! Frozen raspberries work great for the sauce. You may just need to simmer them for an extra minute or two to reduce the extra liquid they release.
Why did my cheesecake bars crack?
Cracks usually happen for two reasons: overmixing the batter (adding too much air) or drastic temperature changes. Cooling the cheesecake gradually in the oven with the door cracked helps prevent this.
Can I double this recipe?
Yes! If you want to make a larger batch, you can double the ingredients and bake it in a 9×13 inch pan. You will likely need to increase the baking time by 5-10 minutes.
Do I really need to chill them for 4 hours?
Yes, this is non-negotiable. Cheesecake needs time to set and firm up. If you cut into it too early, the filling will be runny and won’t hold its shape.
Can I use low-fat cream cheese?
Technically yes, but I don’t recommend it. Full-fat brick cream cheese provides the best texture and stability. Low-fat versions can lead to a softer, sometimes watery result.
How do I get the parchment paper to stick to the pan?
A little trick is to lightly grease the pan with butter or cooking spray before putting the parchment paper in. This acts as glue to hold the paper in place.
Can I make this gluten-free?
Easily! Just swap the standard graham crackers for a gluten-free brand. The filling and fruit swirl are naturally gluten-free.
My raspberry sauce sank to the bottom. Why?
This usually happens if the sauce is too heavy or watery. Make sure you cook it down until it thickens slightly, and don’t skip the cornstarch. Also, swirl gently on the surface rather than mixing it deep into the batter.
Conclusion
There you have it—the secret to looking like a baking goddess with minimal effort! These Raspberry Cheesecake Bars are truly a crowd-pleaser that balances elegance with ease. Whether you are treating your family after Sunday dinner or bringing the star dessert to a neighborhood block party, these bars are guaranteed to disappear fast. Don’t forget to pin this recipe for later, and if you make them, tag me so I can see your beautiful swirls! Happy baking, friends!