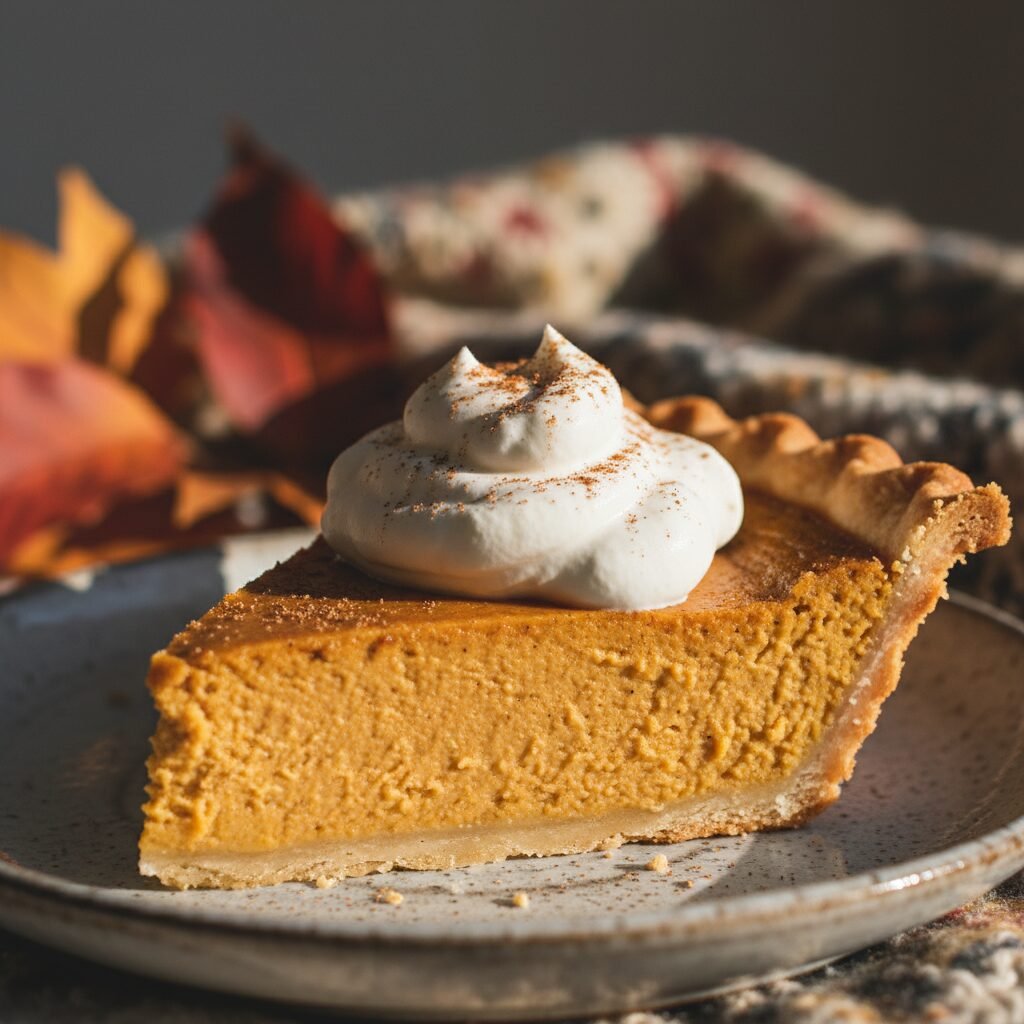
Buttermilk Pumpkin Pie
Move over, traditional pumpkin pie! The addition of buttermilk transforms this classic fall dessert into a tangy, velvety masterpiece that will have your guests begging for the recipe. It is the secret ingredient you never knew you needed.
20 minutes
55 minutes
1 hour 15 minutes (plus cooling)
8 Servings
Dessert
Baking
American (Southern)
Vegetarian
Hey friends! Welcome back to my kitchen. If there is one thing I take seriously during the holidays, it is dessert. We all know the drill: the turkey is great, the sides are comforting, but everyone is really just saving room for the pie. For years, I made the standard recipe on the back of the pumpkin can. It was… fine. It was good! But it wasn’t memorable. Then, a few years ago, I stumbled upon an old Southern trick that completely changed my baking game: Buttermilk.
Adding buttermilk to your pumpkin pie filling is an absolute game-changer. It takes that heavy, sometimes dense texture of a standard squash pie and lightens it up into a silky, custard-like dream. Plus, the slight tanginess of the cultured milk cuts right through the sweetness of the sugar and the earthiness of the pumpkin, creating a flavor profile that is sophisticated yet deeply nostalgic. Whether you are hosting a huge Thanksgiving bash or just looking for a cozy weekend baking project, this Buttermilk Pumpkin Pie is about to become your new family tradition. Trust me, once you try it this way, you will never go back to evaporated milk again!
History & Origins
While pumpkin pie feels as American as, well, apple pie, its roots go way back. Early American settlers were making pumpkin puddings in the crustless style long before they perfected the pastry. But the specific twist we are using today—buttermilk—has deep roots in Southern United States cuisine. In the South, buttermilk was a staple ingredient used to add tenderness to biscuits, cakes, and pies. It was readily available and used to preserve dairy before modern refrigeration.
Historically, Southern cooks understood that the acidity in buttermilk didn’t just add flavor; it actually changed the chemistry of the bake, resulting in softer textures. This specific variation of pumpkin pie likely emerged from farm kitchens where nothing went to waste, and the result is a lighter, fluffier custard that stands apart from the denser New England versions that rely heavily on heavy cream or condensed milk.
Why This Recipe Works
So, why does swapping out regular milk or evaporated milk for buttermilk make such a massive difference? It comes down to food science! Buttermilk is acidic. When you introduce that acidity to the proteins in the eggs and the pumpkin, it helps to tenderize the mixture. This prevents the eggs from scrambling too hard, which is often what gives bad pumpkin pie that rubbery, grainy texture.
Furthermore, the tanginess provides a necessary contrast. Pumpkin is naturally mild and earthy, and traditional spices like cinnamon and cloves are warm. Without a little acidic ‘zip’ to wake up the palate, the flavor can fall flat or feel overly heavy. The buttermilk acts almost like lemon juice does in a fruit pie—it brightens everything up without overpowering the star ingredient. The result is a filling that sets beautifully but remains incredibly creamy and smooth on the tongue.
Why You’ll Love This Recipe
- ✓Unbelievably creamy custard texture thanks to the buttermilk.
- ✓Perfect balance of sweet and tangy flavors.
- ✓Uses simple pantry staples you likely already have.
- ✓Can be made ahead of time to reduce holiday stress.
- ✓The crust stays flaky, never soggy, with our blind-baking tip.
Equipment You’ll Need
- ✓9-inch Pie Dish (glass or ceramic)
- ✓Large Mixing Bowl
- ✓Medium Mixing Bowl
- ✓Whisk
- ✓Pie Weights or Dried Beans
- ✓Parchment Paper
- ✓Wire Cooling Rack
Ingredients
- ✓1 unbaked 9-inch pie crust (homemade or high-quality store-bought)
- ✓1 can (15 oz) pure pumpkin puree (not pumpkin pie filling)
- ✓1 cup sugar (I prefer 1/2 cup granulated white and 1/2 cup light brown sugar)
- ✓1 tablespoon all-purpose flour
- ✓2 large eggs, room temperature
- ✓1 cup buttermilk, well shaken
- ✓1 tablespoon unsalted butter, melted
- ✓1 teaspoon pure vanilla extract
- ✓1 teaspoon ground cinnamon
- ✓1/2 teaspoon ground ginger
- ✓1/4 teaspoon ground nutmeg
- ✓1/4 teaspoon ground cloves
- ✓1/2 teaspoon fine sea salt
Instructions
- Preheat and Prepare: Preheat your oven to 400°F (200°C). Roll out your pie dough and fit it into your 9-inch pie dish. Crimp the edges beautifully. Prick the bottom of the crust all over with a fork.
- Blind Bake the Crust: This step is non-negotiable for a non-soggy bottom! Line the crust with parchment paper and fill it with pie weights or dried beans. Bake for 12-15 minutes until the edges are starting to brown. Remove the weights and paper, and bake for another 3-5 minutes to dry out the bottom. Remove from oven and reduce the oven temperature to 350°F (175°C).
- Mix Dry Ingredients: While the crust is baking, grab a small bowl. Whisk together the sugars, flour, salt, cinnamon, ginger, nutmeg, and cloves. Mixing the spices with the sugar ensures they disperse evenly without clumping.
- Mix Wet Ingredients: In a large bowl, whisk the eggs lightly. Add the pumpkin puree, buttermilk, melted butter, and vanilla extract. Whisk until smooth and uniform.
- Combine: Pour the sugar and spice mixture into the wet ingredients. Whisk vigorously until everything is fully incorporated and the batter looks velvety smooth.
- Bake: Pour the filling into the warm, pre-baked crust. Place the pie on a baking sheet (to catch any spills) and place it in the 350°F oven. Bake for 50 to 60 minutes.
- The Jiggle Test: The pie is done when the edges are set and slightly puffed, but the center still has a slight wobbly jiggle, like gelatin. Do not bake until it is completely firm, or it will crack as it cools.
- Cool: Transfer the pie to a wire rack. This is the hardest part—you must let it cool completely, for at least 3-4 hours, to allow the custard to set properly. Serve at room temperature or chilled.
Expert Cooking Tips
- ✓Room Temperature Eggs: Ensure your eggs and buttermilk are at room temperature before mixing. This helps the emulsion form better for a smoother custard.
- ✓Don’t Skip the Blind Bake: Pumpkin filling is very wet. If you pour it into a raw crust, the bottom will never crisp up. Pre-baking is the secret to that perfect crunch.
- ✓Protect the Edges: If you notice your crust edges browning too fast while the filling is still liquid, gently cover the edges with a pie shield or a ring of aluminum foil.
- ✓Fresh Spices: Check the expiration dates on your spices. Old ginger and nutmeg lose their potency quickly, and fresh spices make a world of difference.
Substitutions and Variations
If you find yourself missing an ingredient, don’t panic! Here are some easy swaps:
- Buttermilk: If you don’t have buttermilk, you can make a substitute by adding 1 tablespoon of lemon juice or white vinegar to a cup of regular milk and letting it sit for 5 minutes until it curdles.
- Pumpkin Pie Spice: Instead of individual spices, you can use 2 teaspoons of pre-mixed pumpkin pie spice.
- Sugar: You can use all white sugar if you prefer a lighter color, or all brown sugar for a deeper molasses flavor.
- Gluten-Free: Simply use a certified gluten-free 1:1 flour for the tablespoon of thickener and a gluten-free pie crust.
Common Mistakes to Avoid
The most common mistake people make with pumpkin pie is overbaking. We are terrified of raw eggs, so we bake it until it’s solid as a rock. However, the residual heat will continue to cook the pie after you take it out of the oven. If you bake it until the center is solid, the proteins tighten up too much, squeezing out moisture and causing those unsightly cracks on top. Trust the jiggle! Another mistake is cutting into it while it’s warm. The custard needs time to structure itself; cutting too early results in a runny slice.
Serving Suggestions
This pie is a star on its own, but toppings never hurt! I love serving this with a massive dollop of homemade maple whipped cream (just add a splash of maple syrup to your heavy cream before whipping). A dusting of cinnamon or even some crushed gingersnap cookies on top adds a lovely texture. For a fancy touch, try candied pecans or a drizzle of salted caramel sauce.
Storage and Reheating Tips
Because this is a custard pie rich in dairy and eggs, it should not be left out at room temperature for more than two hours. Once cooled completely, wrap it loosely with plastic wrap or aluminum foil and store it in the refrigerator for up to 3-4 days. You can serve it cold straight from the fridge or let it sit on the counter for 20 minutes to take the chill off. I generally do not recommend freezing pumpkin pie, as the custard can separate and become watery upon thawing.
Nutrition Facts (Estimated)
| Serving Size | 1 Slice |
| Calories | 320 kcal |
| Fat | 14g |
| Saturated Fat | 6g |
| Unsaturated Fat | 7g |
| Trans Fat | 0g |
| Cholesterol | 65mg |
| Sodium | 310mg |
| Carbohydrates | 42g |
| Fiber | 3g |
| Sugar | 24g |
| Protein | 6g |
Frequently Asked Questions
Can I use fresh pumpkin instead of canned?
Yes, absolutely! If you roast your own sugar pumpkin, just make sure to puree it very smoothly and strain it. Fresh pumpkin has more water than canned, so let it sit in a mesh strainer for an hour to drain excess liquid before using.
Why did my pie crack on top?
Cracks are usually caused by overbaking or cooling the pie too quickly. Pull the pie when the center is still wobbly, and let it cool gradually on a wire rack away from drafts.
Can I make this pie ahead of time?
Yes, in fact, it is better if you do! Making it the day before allows the flavors to meld and the custard to set perfectly. Just keep it in the fridge overnight.
Is full-fat buttermilk necessary?
I highly recommend full-fat buttermilk for the richest texture, but low-fat buttermilk will work. Avoid non-fat versions if possible, as they lack the creaminess we want.
How do I know when the blind bake is done?
The crust should look matte and dry, not shiny or wet. The edges should be a light golden brown. If the bottom looks wet, give it another 2-3 minutes.
Can I use a graham cracker crust instead?
You sure can! A graham cracker or gingersnap crust works beautifully with this filling. You usually don’t need to blind bake a crumb crust as long; just 8 minutes at 350°F is enough to set it.
What if I don’t have pie weights?
No problem! Dried beans (like kidney or black beans) or uncooked rice work perfectly. Just line the crust with parchment first so they don’t stick to the dough.
Can I reduce the sugar?
You can reduce the sugar by about 1/4 cup without ruining the texture, but keep in mind that sugar also adds moisture. The pie might be slightly less glossy.
Conclusion
There you have it, the secret to the best pumpkin pie of your life! It is amazing how one simple ingredient swap—buttermilk for evaporated milk—can elevate a humble dessert into something truly spectacular. I hope this Buttermilk Pumpkin Pie graces your holiday table this year and brings smiles to all your loved ones. It is creamy, tangy, sweet, and spiced to perfection. If you make this, please snap a photo and tag me on Pinterest or Instagram; I love seeing your creations! Happy Baking!