Pillsbury Chicken Pot Pie Recipe
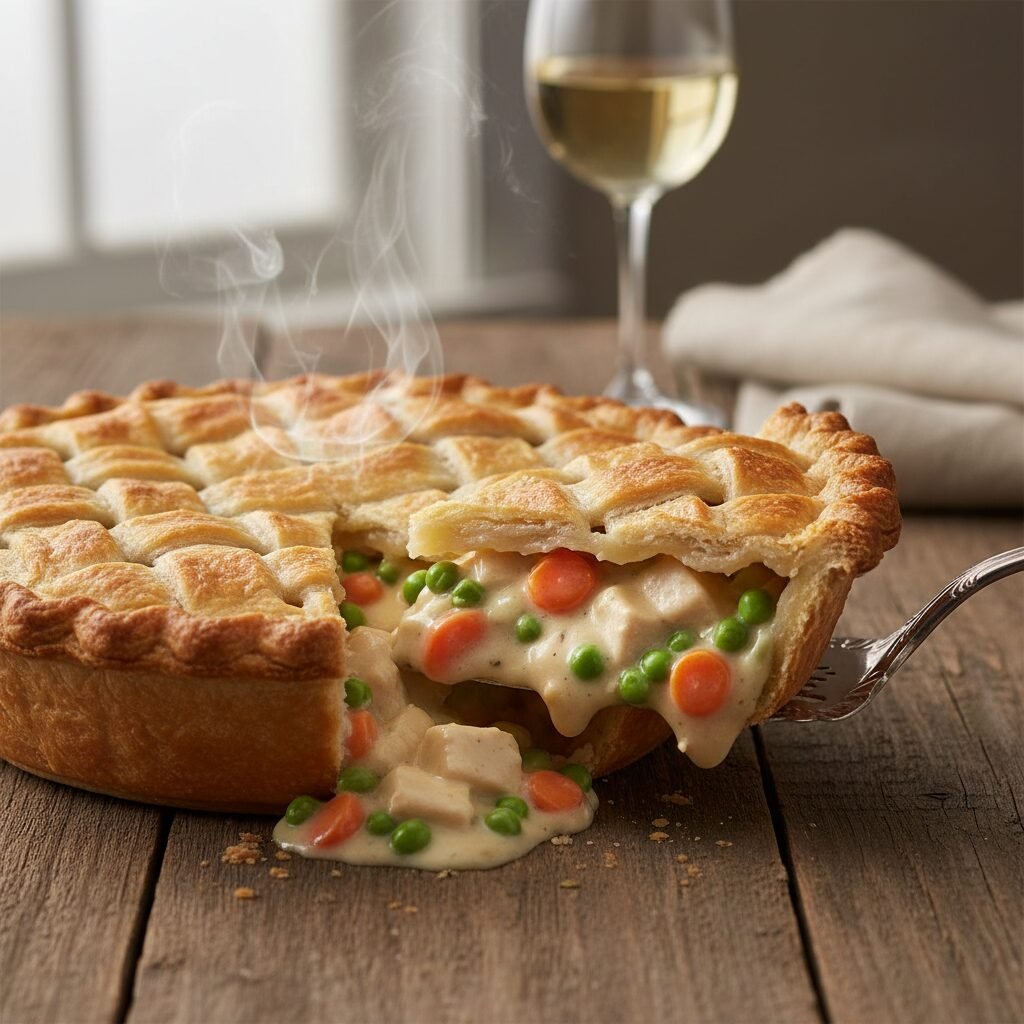
There is nothing quite like pulling a bubbling, golden-brown chicken pot pie out of the oven after a long day. This recipe takes the classic comfort food we all love and makes it achievable on a busy weeknight using a simple store-bought shortcut that tastes entirely homemade.
20 minutes
40 minutes
1 hour
6 Servings
Dinner
Baking
American
Omnivore
Let’s be honest, mamas: some days, the idea of making a pie crust from scratch just isn’t happening. Between school drop-offs, work meetings, and the endless pile of laundry, we need a win in the kitchen that doesn’t require a degree in pastry arts. Enter the Pillsbury Chicken Pot Pie. This isn’t just a recipe; it is a warm hug in a bowl, a culinary safety blanket that signals to your family that everything is right in the world.
Chicken pot pie is the quintessential comfort food. It combines savory, tender chunks of protein, sweet vegetables, and a rich, creamy sauce, all encased in a buttery, flaky shell. While the filling is the heart of the dish, the crust is the soul. By using refrigerated Pillsbury pie crusts, we bypass the stress of cutting in cold butter and rolling out dough, skipping straight to the good part: eating. This method ensures you get that perfect, laminated flakiness every single time without the floury mess on your countertop.
This particular version is designed for the modern family. It is versatile enough to use up leftover rotisserie chicken, adaptable for picky eaters (goodbye, scary mushrooms, if need be!), and hearty enough to keep everyone full until breakfast. Whether it is a rainy Sunday afternoon or a frantic Tuesday night, this pie delivers homestyle flavor with minimal effort. So, preheat that oven and get ready to serve up a slice of pure joy.
History & Origins
The concept of the pot pie has deep roots, stretching all the way back to the Roman Empire, where meats were cooked in open pastry shells for banquets. However, the pot pie as we recognize it today owes much of its lineage to Medieval England. Back then, these savory pies were often called "coffins"—not in the macabre sense, but referring to the sturdy, basket-like crusts that were often inedible and used primarily as a vessel to cook and preserve the filling inside.
As settlers moved to America, they brought their love for meat pies with them. Over centuries, the recipe evolved. The crust became tender and flaky, meant to be eaten and savored alongside the filling. By the mid-20th century, chicken pot pie had cemented itself as an American staple. The 1950s saw a boom in convenience cooking, and frozen pot pies became a TV dinner sensation.
The introduction of refrigerated dough by Pillsbury revolutionized home baking. Suddenly, the daunting task of pastry making was accessible to everyone. The Pillsbury Doughboy, debuting in 1965, became an icon of easy, delicious home baking. Combining this modern convenience with the timeless tradition of a savory meat pie creates a dish that honors history while respecting the time constraints of the modern home cook.
Why This Recipe Works
This recipe works because it perfectly balances texture and flavor while utilizing culinary science to ensure a stable filling. First, we start with a roux—a mixture of equal parts fat (butter) and flour. When cooked together, the flour granules swell and coat the fat. As we slowly whisk in the chicken broth and milk, these granules expand and gelatinize, creating a velvety, thick sauce that suspends the vegetables and chicken evenly. This prevents the dreaded "soup pie" where the filling is too runny to hold its shape when sliced.
Secondly, the use of Pillsbury refrigerated crusts provides a consistent result. These industrial-made doughs are laminated, meaning they have thin layers of fat sandwiched between layers of dough. When the heat of the oven hits the crust, the water in the fat evaporates into steam, puffing up the layers to create that signature flakiness. By using an egg wash on top, we add a layer of protein that promotes the Maillard reaction, resulting in a glossy, deep golden-brown finish that looks professionally baked.
Finally, the flavor profile relies on the classic mirepoix base (onions, carrots, and celery) enhanced by thyme. Thyme contains thymol, an aromatic compound that pairs exceptionally well with poultry and dairy, cutting through the richness of the cream sauce to provide a fresh, herbal note.
Why You’ll Love This Recipe
- ✓Ready in under an hour using store-bought crusts
- ✓Uses rotisserie chicken for ultra-fast prep
- ✓Creamy, scratch-made sauce (no condensed soup cans!)
- ✓Freezer-friendly for meal prepping moms
- ✓Kid-approved vegetable hiding spot
- ✓Golden, flaky double-crust presentation
Equipment You’ll Need
- ✓9-inch Pie Dish (Glass or Ceramic)
- ✓Large Skillet or Dutch Oven
- ✓Whisk
- ✓Chef’s Knife
- ✓Cutting Board
- ✓Pastry Brush
- ✓Measuring Cups and Spoons
- ✓Foil or Pie Shield
Ingredients
- ✓1 box (14.1 oz) Pillsbury™ Refrigerated Pie Crusts (contains 2 crusts), softened as directed on box
- ✓1/3 cup unsalted butter
- ✓1/3 cup all-purpose onion, chopped (about 1 medium onion)
- ✓1/3 cup all-purpose flour
- ✓1/2 teaspoon salt
- ✓1/4 teaspoon black pepper
- ✓1/4 teaspoon dried thyme (or 1 tsp fresh thyme leaves)
- ✓1 3/4 cups chicken broth (low sodium preferred)
- ✓1/2 cup whole milk or half-and-half
- ✓2 1/2 cups shredded cooked chicken (rotisserie chicken works perfectly)
- ✓2 cups frozen mixed vegetables (peas, carrots, corn, green beans), thawed
- ✓1 large egg (for the egg wash)
- ✓1 tablespoon water (for the egg wash)
Instructions
- Step 1: Prep the Oven and Crust. Preheat your oven to 425°F (220°C). Remove the pie crusts from the refrigerator and let them stand at room temperature for about 15 minutes to soften. Unroll one crust and gently press it into the bottom and up the sides of your 9-inch glass pie plate. Set aside.
- Step 2: Sauté Aromatics. In a large skillet or saucepan, melt the 1/3 cup butter over medium heat. Add the chopped onion and cook for 3 to 4 minutes, stirring occasionally, until the onion is translucent and tender.
- Step 3: Make the Roux. Sprinkle the 1/3 cup flour, salt, pepper, and thyme over the onions and butter. Whisk constantly for about 1 to 2 minutes. The mixture will bubble and look like a paste; cooking it briefly removes the raw flour taste.
- Step 4: Create the Sauce. Gradually whisk in the chicken broth and milk. Pour slowly while whisking vigorously to prevent lumps. Cook over medium heat, stirring constantly, until the mixture bubbles and thickens significantly. It should coat the back of a spoon.
- Step 5: Add Filling. Remove the skillet from the heat. Stir in the shredded cooked chicken and the thawed mixed vegetables. Mix until everything is evenly coated in the creamy sauce. Taste and adjust salt if needed.
- Step 6: Fill the Pie. Spoon the chicken and vegetable mixture into the crust-lined pie plate. Spread it out evenly so the top is relatively flat.
- Step 7: Top and Seal. Unroll the second pie crust and place it gently over the filling. Fold the excess top crust under the bottom crust edge, pressing them together to seal. Flute or crimp the edges with your fingers or a fork for a decorative look.
- Step 8: Vent and Wash. Cut several slits in the top crust to allow steam to escape during baking. In a small bowl, beat the egg with 1 tablespoon of water. Brush this egg wash lightly over the top of the crust (this creates that beautiful golden shine).
- Step 9: Bake. Bake in the preheated oven for 30 to 40 minutes. The crust should be golden brown, and the filling should be bubbling through the slits. Tip: If the crust edges brown too quickly, cover them with strips of foil or a pie shield after the first 15-20 minutes.
- Step 10: Cool and Serve. Let the pie stand for at least 15 to 20 minutes before cutting. This is crucial as it allows the filling to set up so it doesn’t run out when you slice it.
Expert Cooking Tips
- ✓Thaw the Veggies: Make sure your frozen vegetables are thawed and drained before adding them. Excess water from frozen veggies can make the sauce runny.
- ✓Room Temp Crust: Do not try to unroll the Pillsbury crusts while they are ice cold; they will crack. Let them sit on the counter for the full 15 minutes.
- ✓Rotisserie Hack: Use a store-bought rotisserie chicken to save massive amounts of time. The flavor is usually better than boiling your own breast meat!
- ✓Shield the Edges: Pie crust edges burn faster than the center. Keep an eye on them and use a pie shield or foil ring if they get dark too fast.
Substitutions and Variations
Cooking is all about adaptation, so feel free to tweak this recipe to fit your pantry! If you don’t have chicken, leftover turkey from the holidays is a phenomenal substitute. For a vegetarian version, swap the chicken for cubed firm tofu or extra potatoes and use vegetable broth instead of chicken broth.
Regarding the dairy, whole milk gives the best balance, but you can use 2% milk for a lighter version or heavy cream for an ultra-decadent filling. If you are dairy-free, use unsweetened almond milk and swap the butter for a plant-based butter stick or olive oil. If you don’t have Pillsbury pie crusts, a tube of Pillsbury Grands!™ Biscuits can be flattened out or placed on top for a "cobbler" style pot pie.
Common Mistakes to Avoid
The most common mistake is cutting into the pie too soon. I know it smells amazing, and you are hungry, but if you cut it immediately out of the oven, the filling will flow out like soup. Giving it 20 minutes to rest allows the starches to cool slightly and solidify, giving you that perfect slice.
Another error is under-seasoning. The crust and the veggies can be bland if you aren’t careful. Taste your filling sauce before you dump it into the pie shell. Does it need more salt? A pinch of garlic powder? Trust your tongue!
Serving Suggestions
Since chicken pot pie is a rich, heavy dish, it pairs best with lighter, acidic sides to cut through the creaminess. A crisp green salad with a sharp vinaigrette is the perfect partner. If you are feeling extra cozy and don’t mind the carb-on-carb action, a side of garlic mashed potatoes is heavenly. For a festive touch, serve with a dollop of cranberry sauce on the side.
Storage and Reheating Tips
Refrigerator: Store leftover pie, covered tightly with foil or plastic wrap, in the fridge for up to 3-4 days.
Freezer: You can freeze the unbaked pie! Assemble it completely (minus the egg wash), wrap it in plastic wrap and then foil, and freeze for up to 2 months. Bake from frozen, adding about 20-30 minutes to the baking time.
Reheating: To reheat leftovers, place slices on a baking sheet in a 350°F oven for 10-15 minutes. Microwaving works but will make the crust soft and chewy rather than flaky.
Nutrition Facts (Estimated)
| Serving Size | 1 slice (1/6 of pie) |
| Calories | 480 kcal |
| Fat | 28g |
| Saturated Fat | 10g |
| Unsaturated Fat | 14g |
| Trans Fat | 0g |
| Cholesterol | 65mg |
| Sodium | 780mg |
| Carbohydrates | 38g |
| Fiber | 3g |
| Sugar | 4g |
| Protein | 18g |
Frequently Asked Questions
Can I use cooked raw vegetables instead of frozen?
Yes! If you prefer fresh carrots, celery, and green beans, chop them small and sauté them with the onions in Step 2 so they soften before baking.
How do I prevent a soggy bottom crust?
Ensure your filling isn’t boiling hot when you pour it in, and bake the pie on the lowest rack of your oven so the bottom gets the most heat. You can also brush the bottom crust with a little egg white before filling.
Can I make this ahead of time?
Absolutely. You can make the filling a day in advance and store it in the fridge. When you are ready to bake, just fill the crusts and pop it in the oven. You might need to add 5 minutes to the bake time if the filling is cold.
Do I have to use a bottom crust?
Nope! If you want to cut some calories or just prefer less dough, pour the filling into a greased pie dish and just top it with one crust. It becomes a ‘pot pie’ in the truest sense.
My sauce is too thick, what do I do?
Just whisk in a little more chicken broth or milk, one tablespoon at a time, until it reaches your desired consistency.
Can I use puff pastry instead of pie crust?
Yes, puff pastry makes for a lighter, flakier topping. However, it is usually best used only as a top crust, not a bottom crust.
Is the egg wash necessary?
It is not strictly necessary for taste, but it is highly recommended for aesthetics. It gives the pie that glossy, appetizing golden-brown color. Without it, the crust will look pale and matte.
What herbs go best with this?
Thyme is classic, but rosemary, sage, and parsley are also delicious. A ‘poultry seasoning’ blend is a great shortcut.
Conclusion
There you have it, the secret weapon for winning dinner time: the Pillsbury Chicken Pot Pie. It is the perfect intersection of homemade love and smart convenience. By taking a few shortcuts without sacrificing quality ingredients, you can put a meal on the table that looks like it took all afternoon but actually left you time to help with homework or enjoy a glass of wine.
The next time the weather turns gray or you just need a meal that feels like home, remember this recipe. It is reliable, delicious, and guaranteed to clear plates. Happy baking, friends!