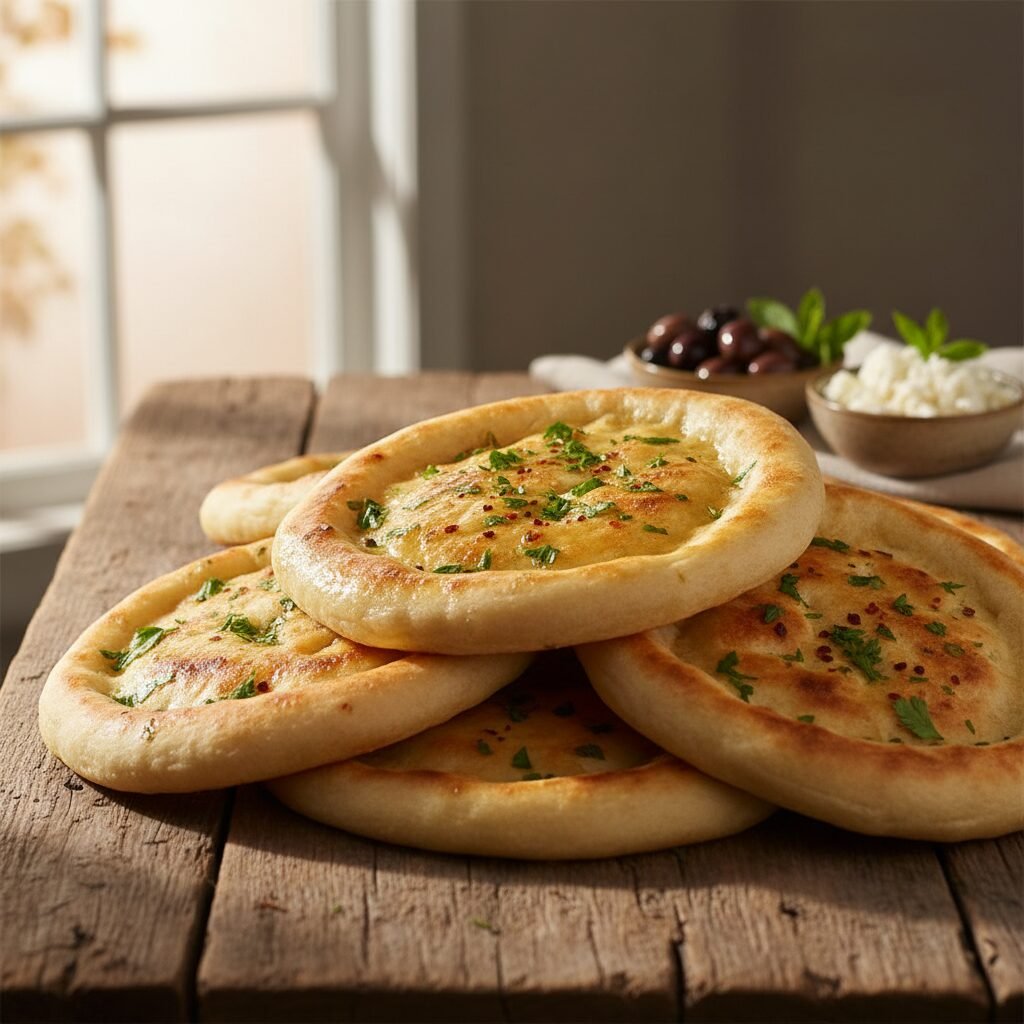
No Oven Turkish Bread
Imagine biting into a warm, fluffy cloud of bread that you made right on your stovetop without even touching the oven dial. This Turkish Bazlama is surprisingly easy, requires only pantry staples, and tastes infinitely better than store-bought pita.
20 minutes
15 minutes
1 hour 35 minutes (includes rising time)
6 large flatbreads
Bread
Stovetop / Pan-fry
Turkish
Vegetarian
There is something undeniably magical about making bread. The way the flour transforms into a smooth, elastic dough, the anticipation while it rises, and that heavenly scent that fills the kitchen—it is pure comfort. But let’s be real, sometimes the idea of preheating a massive oven and dealing with baking stones or Dutch ovens feels like a lot of work, especially on a busy weeknight. That is exactly why I am obsessed with this No Oven Turkish Bread, traditionally known as Bazlama.
If you have never tried Bazlama, think of it as the fluffier, softer cousin of pita bread or naan. It is a village-style leavened flatbread that is cooked on a stovetop, resulting in a pillowy texture with beautiful golden-brown spots. It is the kind of recipe that makes you feel like a master baker, even if you are a total beginner.
This recipe is a lifesaver for moms who want to put fresh, wholesome bread on the table without the fuss. It is perfect for scooping up hummus, wrapping around grilled chicken, or honestly? Just eating straight from the pan with a generous brush of garlic and parsley butter. Trust me, once you make this, you might never buy flatbread from the grocery store again!
History & Origins
Bazlama has deep roots in Turkish cuisine and culture, hailing from the rural villages of Anatolia. Traditionally, this bread wasn’t made in a modern kitchen; it was cooked outdoors over a wood fire on a heavy metal griddle called a sac (pronounced ‘saj’). It was the daily bread for many families, made fresh in the morning to be eaten throughout the day.
The beauty of Bazlama lies in its simplicity. Historically, it required very few ingredients—flour, water, salt, and yeast—making it accessible to everyone. In village life, the act of making bread was often a communal activity, with women gathering to knead dough and cook together. While we are swapping the wood fire for a cast-iron skillet or non-stick pan today, the soul of the recipe remains the same: simple ingredients transforming into something nourishing and delicious.
Why This Recipe Works
The magic of this recipe lies in the cooking method. By using a hot skillet instead of an oven, we create an environment of intense, direct heat. When the rolled-out dough hits the hot pan, the moisture inside the dough turns to steam almost instantly. Because the gluten network (developed during kneading) traps this steam, the bread puffs up dramatically, creating that signature hollow pocket and fluffy interior.
Furthermore, including yogurt or milk in the dough, along with a touch of olive oil, enriches the gluten structure. This fat content inhibits gluten formation just slightly, which ensures the bread remains tender and soft rather than chewy or tough. It is the perfect balance of chemistry and heat!
Why You’ll Love This Recipe
- ✓No oven required – cooks entirely on the stovetop
- ✓Incredibly soft and pillowy texture
- ✓Uses simple pantry ingredients
- ✓Kid-friendly and fun to make together
- ✓Freezes beautifully for meal prep
- ✓Versatile: use for wraps, pizza bases, or dipping
Equipment You’ll Need
- ✓Large mixing bowl
- ✓Cast iron skillet or heavy-bottomed non-stick pan
- ✓Rolling pin
- ✓Clean kitchen towel
- ✓Whisk
- ✓Measuring cups and spoons
Ingredients
- ✓4 cups All-Purpose Flour (plus extra for dusting)
- ✓1 cup Warm Water (approx. 110°F/45°C)
- ✓1/2 cup Warm Milk (or plain Greek yogurt for extra tang)
- ✓2 teaspoons Instant Yeast
- ✓1 teaspoon White Sugar (to feed the yeast)
- ✓1.5 teaspoons Salt
- ✓3 tablespoons Olive Oil
- ✓Optional Garlic Butter Topping:
- ✓3 tablespoons Unsalted Butter, melted
- ✓1 tablespoon Fresh Parsley, finely chopped
- ✓1 clove Garlic, minced
Instructions
- Activate the Yeast: In a small bowl or your measuring cup, combine the warm water, warm milk, and sugar. Sprinkle the instant yeast on top and whisk gently. Let it sit for about 5-10 minutes until it becomes frothy and bubbly. This proves your yeast is alive and ready to work!
- Mix the Dough: In a large mixing bowl, combine the flour and salt. Create a well in the center and pour in the activated yeast mixture and the olive oil. Use a wooden spoon or your hands to mix until a shaggy dough forms.
- Knead to Perfection: Transfer the dough onto a lightly floured surface. Knead for about 8-10 minutes. You want the dough to be smooth, elastic, and slightly tacky but not sticky. If it sticks to your hands, add a sprinkle of flour, but be careful not to add too much or the bread will be dense.
- First Rise: Lightly grease your mixing bowl with a little olive oil. Place the dough inside, turning it once to coat it in oil. Cover with a damp kitchen towel or plastic wrap. Place in a warm, draft-free spot for about 1 hour, or until the dough has doubled in size.
- Divide and Rest: Punch the dough down gently to release air bubbles. Transfer to a floured surface and divide into 6 equal pieces. Shape each piece into a smooth ball. Cover the balls with a clean towel and let them rest for 10-15 minutes. This relaxes the gluten, making them easier to roll out.
- Roll Out: Take one dough ball (keep the others covered) and roll it into a circle or oval, about 1/4 inch thick. Do not roll them paper-thin; they need a little thickness to puff up.
- Cook the Bread: Heat a non-stick pan or cast-iron skillet over medium heat. Do not add oil to the pan. Place the rolled dough onto the hot skillet. Cook for about 1-2 minutes. You will see bubbles starting to form on the surface.
- The Flip: Once the bottom is golden brown and the top is bubbly, flip the bread. Cook for another 1-2 minutes. It should puff up nicely (sometimes looking like a balloon!). Pressing gently on the edges with a spatula can encourage the puffing.
- Butter and Serve: Remove from the pan and immediately brush with the garlic butter mixture if using. Stack the cooked breads on a plate and cover with a clean towel to keep them soft and warm while you cook the rest.
Expert Cooking Tips
- ✓Temperature Control: If the pan is too hot, the bread will burn before it cooks inside. If it’s too cold, it won’t puff up. Medium to medium-high is usually the sweet spot.
- ✓Don’t Over-Flour: When rolling out the dough, use just enough flour to prevent sticking. Excess flour can burn in the pan and give a bitter taste.
- ✓Keep Them Covered: This is the most important tip for soft bread! As soon as a piece comes off the pan, cover it with a cloth. The steam trapped inside the cloth keeps the crust soft.
- ✓Clean the Pan: Between breads, if you notice burnt flour in the skillet, carefully wipe it out with a dry paper towel to keep the next batch clean.
Substitutions and Variations
Make it Vegan: Simply swap the warm milk for water or unsweetened plant-based milk (almond or oat work well), and use olive oil instead of butter for the topping.
Flour Options: You can substitute up to half of the all-purpose flour with whole wheat flour for a fiber boost. Just keep in mind the texture will be slightly denser. Bread flour can also be used for a chewier texture.
Yogurt vs. Milk: Traditionally, many recipes use plain yogurt. If you are out of milk, mix 1/2 cup of plain yogurt with a splash of water to thin it out. This adds a lovely tanginess.
Common Mistakes to Avoid
Rolling too thin: If you roll the dough as thin as a tortilla, it won’t have enough structure to puff up and split into layers. Aim for about 1/4 inch thickness.
Pan not hot enough: The puff happens because of a sudden burst of steam. If the pan is lukewarm, the yeast dies slowly without that explosive expansion. Preheat your pan properly!
Adding too much flour: It is tempting to add more flour if the dough feels sticky, but a slightly tacky dough yields the softest bread. Trust the kneading process to reduce stickiness.
Serving Suggestions
This bread is incredibly versatile! Serve it warm as part of a traditional Turkish breakfast with feta cheese, olives, cucumbers, and tomatoes. It is also the perfect vessel for scooping up Baba Ganoush or Hummus. For dinner, use it as a wrap for grilled kofta or chicken kebabs. My kids love it as a quick mini-pizza base—just add sauce and cheese and broil for a minute!
Storage and Reheating Tips
Room Temperature: Store cooled leftover bread in an airtight container or Ziploc bag at room temperature for up to 2 days. The airtight seal is crucial to prevent them from drying out.
Freezing: These freeze amazingly well! Stack them with a piece of parchment paper between each bread to prevent sticking, then place in a freezer bag. Freeze for up to 3 months.
Reheating: Reheat straight from frozen in a toaster, or warm them up in a dry pan for 30 seconds on each side. They will taste just as fresh as day one.
Nutrition Facts (Estimated)
| Serving Size | 1 Flatbread |
| Calories | 210 kcal |
| Fat | 4g |
| Saturated Fat | 1g |
| Unsaturated Fat | 2.5g |
| Trans Fat | 0g |
| Cholesterol | 2mg |
| Sodium | 380mg |
| Carbohydrates | 38g |
| Fiber | 2g |
| Sugar | 2g |
| Protein | 6g |
Frequently Asked Questions
Why didn’t my bread puff up?
This usually happens if the pan wasn’t hot enough or if the dough was rolled too thin. Also, ensure your yeast was active and bubbly before mixing.
Can I use active dry yeast instead of instant?
Yes! If using active dry yeast, you must dissolve it in the warm liquid with sugar and let it sit for 10 minutes until frothy before adding it to the flour. Instant yeast can technically be mixed straight in, but I prefer blooming it anyway to be safe.
Can I make the dough ahead of time?
Absolutely. You can let the dough rise in the refrigerator overnight (slow fermentation). This actually develops more flavor! Just bring it to room temperature for about 30 minutes before rolling out.
Is this the same as Naan bread?
They are very similar! Naan is often enriched with egg and yogurt and traditionally cooked in a Tandoor oven (though often made in skillets at home). Bazlama is usually egg-free and relies on the stovetop method exclusively.
Can I use gluten-free flour?
You can try using a high-quality 1:1 gluten-free baking flour blend that contains xanthan gum. However, yeast breads are tricky without gluten, so they may not puff as significantly or have the exact same chew.
Do I need oil in the pan?
No, you should cook these in a dry pan. Adding oil to the pan essentially fries the bread, changing the texture. Brush with butter/oil after cooking.
My bread is stiff, what went wrong?
You likely cooked it too long on low heat, drying it out, or you added too much flour during kneading. Remember: high heat for a short time keeps it soft.
Can I add herbs to the dough?
Yes! You can fold in dried oregano, chili flakes, or garlic powder into the flour before mixing for infused flavor.
Conclusion
Making your own bread doesn’t have to be a scary, all-day affair. This No Oven Turkish Bread proves that with a simple bowl, a skillet, and a little bit of patience, you can create bakery-quality results right in your own kitchen. There is something so grounding about watching the dough rise and feeding your family something made from scratch. So, grab that flour from the pantry, and get ready to impress yourself. You’ve got this, mama!