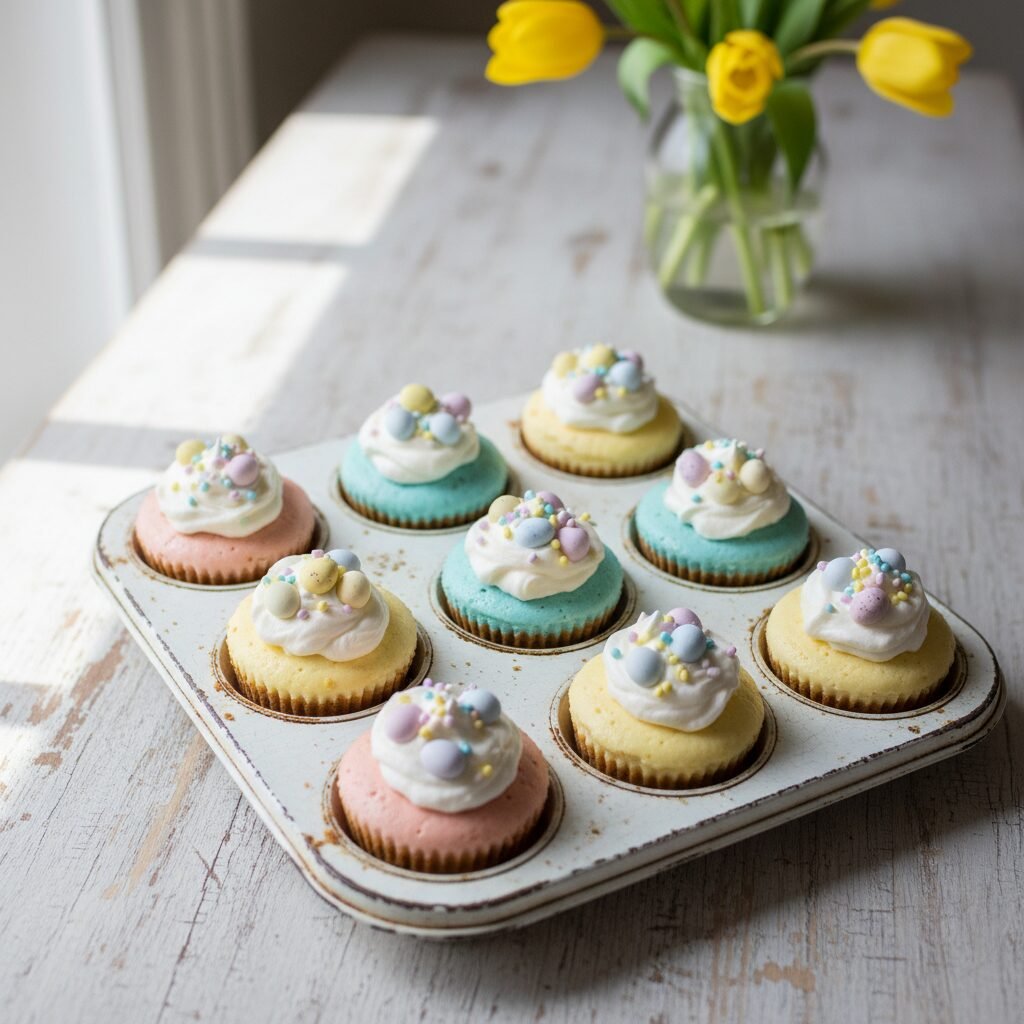
Easter No Bake Mini Cheesecakes
If you are looking for the perfect crowd-pleasing dessert that requires zero oven time, you have found it! These Easter No Bake Mini Cheesecakes are creamy, dreamy, and bursting with pastel perfection.
20 minutes
0 minutes
4 hours (includes chilling)
12 mini cheesecakes
Dessert
No-Bake / Refrigeration
American
Vegetarian
Spring has officially sprung, and with it comes the delightful chaos of Easter preparations. Between stuffing plastic eggs, coordinating Sunday best outfits, and planning a savory ham dinner, the last thing we want to do is babysit a finicky dessert in a hot oven. That is exactly where these Easter No Bake Mini Cheesecakes come to the rescue. They are the absolute sweet spot between low-effort and high-impact, offering a stunning presentation that looks like you spent hours in the kitchen, even though you probably whipped them up while the kids were napping.
There is something undeniably magical about pastel-colored desserts. They capture the essence of the season—soft pinks, baby blues, and mint greens that mirror the blooming flowers outside. These mini cheesecakes are not just food; they are edible decor for your holiday table. The texture is light, airy, and mousse-like, sitting atop a buttery, crunchy graham cracker crust that provides the perfect contrast. Because they are individual servings, they are fantastic for portion control (though we won’t judge if you eat two!) and make serving a breeze at potlucks or family gatherings.
For moms, this recipe is a total game-changer because it is incredibly kid-friendly. Little hands love crushing the graham crackers and stirring in the food coloring. It is a wonderful way to create core memories in the kitchen without the danger of hot stoves. Whether you top them with chocolate mini eggs, marshmallow peeps, or simple sprinkles, these cheesecakes are customizable canvases waiting for your creative touch. Let’s make this Easter the sweetest one yet with a dessert that is as stress-free as it is delicious.
History & Origins
While cheesecake itself has roots tracing back to ancient Greece (where it was served to athletes during the first Olympic Games in 776 B.C.!), the concept of the no-bake cheesecake is a much more modern marvel. The classic New York style cheesecake, dense and rich with eggs and baked in a water bath, dominated the dessert scene for decades. However, the mid-20th century brought a wave of convenience cooking to American households. With the invention of reliable refrigeration and the mass production of gelatin and stabilized whipped toppings, home cooks began experimenting with refrigerator cakes.
The specific evolution of the “mini” cheesecake gained massive popularity with the rise of the muffin tin in home baking. It solved two major problems: the long baking and cooling time of a standard cheesecake, and the dreaded “cracked top” that plagues so many bakers. By removing the eggs and relying on the aeration of heavy cream (or sometimes gelatin) to set the structure, the no-bake method became a staple for warmer months when turning on the oven was undesirable. Today, these bite-sized treats are a Pinterest staple, celebrated for their versatility and the sheer joy of eating a dessert that doesn’t require a fork and knife.
Why This Recipe Works
The magic of this recipe lies in the science of aeration and stabilization. Unlike a baked cheesecake which relies on the coagulation of egg proteins to create a firm structure, a no-bake cheesecake relies on mechanical leavening and temperature. When we whip heavy cream, we are trapping millions of tiny air bubbles inside fat globules. This creates a stable foam that, when folded gently into the cream cheese mixture, provides that signature light and airy texture.
Furthermore, the high fat content in the cream cheese and butter solidifies when chilled. By keeping the ingredients cold after assembly, the fats return to a semi-solid state, holding the cheesecake’s shape perfectly. We also use a touch of lemon juice in this recipe; the acid not only brightens the flavor profile, cutting through the richness of the dairy, but it also helps to slightly thicken the cream cheese mixture through a process similar to how yogurt is made. This combination ensures a sliceable, spoonable consistency that melts in your mouth without collapsing on the plate.
Why You’ll Love This Recipe
- ✓Completely oven-free recipe keeps your kitchen cool
- ✓Ready in 20 minutes active prep time
- ✓Fully customizable pastel colors for Easter
- ✓Kid-friendly preparation steps
- ✓Can be made up to 2 days in advance
- ✓Perfect individual portion sizes
Equipment You’ll Need
- ✓Standard 12-cup muffin tin
- ✓Paper cupcake liners
- ✓Electric hand mixer or stand mixer
- ✓Large mixing bowl
- ✓Medium mixing bowl
- ✓Ziploc bag or piping bag
- ✓Rubber spatula
Ingredients
- ✓1 1/2 cups graham cracker crumbs
- ✓6 tablespoons unsalted butter, melted
- ✓1/4 cup granulated sugar (for crust)
- ✓16 oz (2 blocks) full-fat cream cheese, softened to room temperature
- ✓1 cup heavy whipping cream, cold
- ✓1 cup powdered sugar (confectioners’ sugar)
- ✓1 teaspoon pure vanilla extract
- ✓1 tablespoon fresh lemon juice
- ✓Gel food coloring (pink, blue, yellow, purple)
- ✓Cadbury Mini Eggs or pastel sprinkles for garnish
Instructions
- Prepare the Pan: Line a standard 12-cup muffin tin with paper cupcake liners. This makes removal easy and cleanup a breeze.
- Make the Crust: In a medium bowl, combine the graham cracker crumbs, granulated sugar, and melted butter. Stir until the mixture resembles wet sand. Evenly distribute the crumbs into the 12 liners (about 1.5 tablespoons each). Use the bottom of a shot glass or a spoon to press the crust down firmly to pack it tight.
- Whip the Cream: In a large bowl (or stand mixer bowl), whip the cold heavy cream until stiff peaks form. Be careful not to over-whip into butter. Set this whipped cream aside in a separate bowl.
- Beat the Cream Cheese: In the same large mixing bowl (no need to wash it), beat the softened cream cheese until it is completely smooth and creamy. There should be no lumps.
- Combine Filling: Add the powdered sugar, vanilla extract, and lemon juice to the cream cheese. Beat again until fully combined and fluffy.
- Fold in Cream: Gently fold the whipped cream into the cream cheese mixture using a rubber spatula. Do this slowly to keep the mixture airy. Do not use the electric mixer for this step.
- Color the Batter: Divide the cheesecake batter into 3 or 4 small bowls (depending on how many colors you want). Add a tiny drop of gel food coloring to each bowl and fold gently until the desired pastel shade is reached.
- Assemble: Spoon or pipe the colored cheesecake filling over the crusts. smooth the tops with the back of a spoon or an offset spatula.
- Chill: Place the muffin tin in the refrigerator for at least 4 hours, or overnight. This step is crucial for the cheesecakes to set.
- Garnish and Serve: Just before serving, top each mini cheesecake with a dollop of extra whipped cream, a Cadbury Mini Egg, or festive sprinkles. Peel off the wrapper and enjoy!
Expert Cooking Tips
- ✓Room Temperature Cream Cheese: This is the non-negotiable rule of cheesecake. If your cream cheese is cold, it will be lumpy, and no amount of mixing will fix it. Leave it on the counter for at least an hour before starting.
- ✓Gel Food Coloring: Use gel instead of liquid drops. Liquid coloring can add too much moisture to the batter, causing it to be runny. Gel is potent, so start with a toothpick dip!
- ✓Stiff Peaks: When whipping your heavy cream, ensure you get stiff peaks. This structure is what holds the cheesecake up without gelatin.
- ✓Press the Crust: Really pack that crust down hard. If it’s loose, it will crumble when you peel the paper liner off.
Substitutions and Variations
If you aren’t a fan of graham crackers, you can easily swap them for Golden Oreos, Nilla Wafers, or even digestive biscuits for a more European flair. For a gluten-free version, simply use gluten-free graham cracker crumbs; the filling is naturally gluten-free. If you want to lighten it up slightly, you can use Neufchâtel cheese, but avoid fat-free cream cheese as it won’t set properly. You can also substitute the heavy cream for Cool Whip if you are in a rush, though the homemade whipped cream tastes significantly better!
Common Mistakes to Avoid
The biggest mistake people make is rushing the chill time. I know it is tempting to eat them right away, but if you pull them out too early, they will be a gloopy mess. Give them the full 4 hours, or better yet, make them the night before! Another common error is over-mixing the whipped cream into the cheese. You want to fold, not stir. Stirring knocks the air out, resulting in a dense, flat cheesecake rather than a fluffy one.
Serving Suggestions
These look beautiful arranged on a tiered cake stand or a white ceramic platter to let the pastel colors pop. Serve them alongside fresh berries like strawberries or blueberries to cut the sweetness. For an adults-only brunch, they pair wonderfully with a crisp Moscato or a Rosé. If you are hosting a large party, you can make ‘mini-minis’ using a mini muffin tin for bite-sized poppers!
Storage and Reheating Tips
Store these cheesecakes in the refrigerator in an airtight container for up to 5 days. Keep the toppings (like the candy eggs) off until you serve, as the color from the candy shell can bleed into the cheesecake moisture. You can also freeze these! Freeze them solid on a baking sheet, then transfer to a freezer bag for up to 2 months. Thaw in the fridge for 30 minutes before eating for a texture similar to ice cream.
Nutrition Facts (Estimated)
| Serving Size | 1 mini cheesecake |
| Calories | 280 kcal |
| Fat | 21g |
| Saturated Fat | 12g |
| Unsaturated Fat | 8g |
| Trans Fat | 0g |
| Cholesterol | 65mg |
| Sodium | 190mg |
| Carbohydrates | 22g |
| Fiber | 0.5g |
| Sugar | 18g |
| Protein | 3g |
Frequently Asked Questions
Can I leave these out at room temperature?
No, because of the dairy content, they should not be left out for more than 2 hours. Keep them refrigerated until it’s time to serve dessert.
Why is my cheesecake filling runny?
This usually happens if the heavy cream wasn’t whipped to stiff peaks, or if liquid food coloring added too much moisture. It can also happen if you used low-fat cream cheese.
Do I need to use gelatin?
Not for this recipe! The combination of high-fat cream cheese and stiffly beaten heavy cream provides enough structure for mini cheesecakes. Full-sized no-bake cheesecakes often require gelatin, but these minis hold up fine without it.
Can I use a store-bought crust?
Since these are made in a muffin tin, you can’t use a pre-made pie crust. However, you can buy pre-crushed graham cracker crumbs to save time on smashing them yourself.
How do I get smooth tops?
Use a small offset spatula or the back of a teaspoon dipped in warm water to smooth the tops before chilling. Piping the filling in also helps create a smoother surface than spooning.
Can I make this dairy-free?
Yes, but you must use high-quality dairy-free cream cheese (like Kite Hill) and a stable coconut whipping cream. The texture might be slightly softer.
What other flavors can I make?
The base is vanilla, but you can add lemon zest, almond extract, or even mix in crushed freeze-dried strawberries for natural flavor and color.
Is the lemon juice necessary?
It is highly recommended. You won’t taste a strong lemon flavor, but the acid helps the proteins in the cream cheese coagulate (thicken), ensuring a firm set.
Conclusion
These Easter No Bake Mini Cheesecakes are truly the hero of holiday hosting. They check every box: delicious, adorable, easy, and make-ahead friendly. Whether you are an experienced baker or a mom trying to pull off a miracle with zero time, this recipe delivers restaurant-quality results with minimal effort. The smiles on your family’s faces when they see these colorful treats will be worth every second of the (very short) prep time. Happy Easter, and happy no-baking!