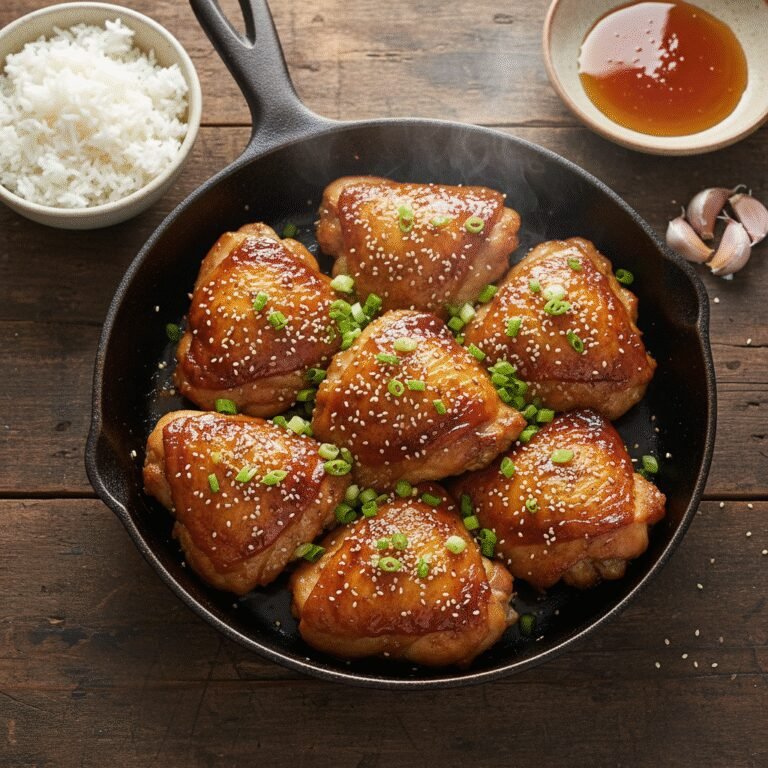
Easy Baked Teriyaki Chicken Recipe
This Easy Baked Teriyaki Chicken offers the perfect solution for hectic weeknights, delivering restaurant-quality flavor with minimal effort. Tender, juicy chicken thighs are coated in a homemade, preservative-free sauce that strikes the ideal balance between sweet and savory.
10 minutes
30 minutes
40 minutes
4 servings
Main Course
Baking
Japanese-American
Dairy-Free
In the bustling rhythm of modern family life, finding a dinner recipe that satisfies both the craving for comfort food and the need for nutritional balance is a constant pursuit. As a professional food writer and a mother, I understand the allure of takeout menus after a long day. However, this Easy Baked Teriyaki Chicken recipe is designed to be faster, healthier, and significantly more delicious than delivery. By bringing the beloved flavors of Japanese-American cuisine into your home kitchen, you can control the sodium levels and sugar content without sacrificing that signature sticky glaze that makes teriyaki so irresistible.
The beauty of this dish lies in its simplicity and reliability. Unlike stovetop versions that require constant monitoring to prevent burning, the baking method allows for even cooking and tender results every time. We utilize chicken thighs for their inherent juiciness, ensuring that the meat remains succulent even as the sauce caramelizes into a glossy, mahogany finish. Whether you are meal prepping for the week ahead or scrambling to get dinner on the table before soccer practice, this recipe is a culinary lifesaver that transforms pantry staples into a gourmet experience.
Furthermore, cooking this dish at home allows for a sensory experience that brings the family together. The aroma of ginger, garlic, and soy sauce wafting through the kitchen signals that a warm, hearty meal is imminent. This recipe is not just about sustenance; it is about creating a moment of pause and enjoyment amidst the chaos of daily schedules. It is perfectly suited for the Pinterest-savvy mom who values aesthetics, flavor, and practicality in equal measure.
History & Origins
While Teriyaki is often associated with Japanese cuisine, the version most Americans know and love has a distinct history rooted in cross-cultural adaptation. The word itself is derived from two Japanese words: teri, meaning luster or shine, and yaki, meaning grilled or broiled. Traditionally, in Japan, fish—such as yellowtail or mackerel—was the primary protein used, brushed with a simple tare sauce made of soy sauce, sake, and mirin during the grilling process.
The sticky, sweet chicken teriyaki that is ubiquitous in the United States today actually traces its origins to Japanese immigrants in Hawaii and the Pacific Northwest. In the mid-20th century, these innovative cooks adapted traditional recipes to utilize local ingredients like pineapple juice and brown sugar, which were more readily available and appealed to American palates. This evolution birthed the thicker, glossier sauce that defines modern Seattle-style teriyaki. This recipe pays homage to that culinary evolution, bridging the gap between traditional techniques and the comfort-food style that has become a staple in American households.
Why This Recipe Works
This recipe succeeds due to the scientific principles of caramelization and protein coagulation. By using chicken thighs rather than breasts, we leverage the higher fat content and connective tissue, which breaks down during baking to keep the meat moist. Chicken breasts often dry out under the high heat required to glaze a sauce, but thighs remain forgiving and tender.
The sauce works through a reduction process and the addition of cornstarch (a slurry). The cornstarch acts as a thickening agent, gelatinizing when heated to create a sauce that clings to the meat rather than sliding off. The combination of soy sauce (amino acids) and sugar promotes the Maillard reaction, creating complex flavor compounds and that appetizing deep brown color. Baking the chicken first allows it to cook through gently, while a final broil or high-heat glaze ensures the exterior has that desirable texture without burning the sugars prematurely.
Why You’ll Love This Recipe
- ✓Ready in under 45 minutes
- ✓Uses pantry staple ingredients
- ✓Healthier than takeout alternatives
- ✓Kid-friendly sweet and savory flavor
- ✓Excellent for meal prepping
- ✓Minimal cleanup required
Equipment You’ll Need
- ✓9×13 inch baking dish
- ✓Small saucepan
- ✓Whisk
- ✓Meat thermometer
- ✓Chef’s knife
- ✓Cutting board
Ingredients
- ✓2 lbs boneless, skinless chicken thighs (approx. 6-8 thighs)
- ✓1/2 cup low-sodium soy sauce
- ✓1/4 cup water
- ✓1/4 cup light brown sugar, packed
- ✓2 tablespoons rice vinegar or mirin
- ✓1 tablespoon sesame oil
- ✓2 cloves garlic, minced
- ✓1 tablespoon fresh ginger, grated
- ✓1 tablespoon cornstarch mixed with 1 tablespoon cold water (slurry)
- ✓1 teaspoon sesame seeds (for garnish)
- ✓2 green onions, thinly sliced (for garnish)
Instructions
- Preheat the Oven: Preheat your oven to 400°F (200°C). Lightly grease a 9×13 inch baking dish with cooking spray or line it with parchment paper for easier cleanup.
- Prepare the Sauce Base: In a small saucepan over medium heat, combine the soy sauce, water, brown sugar, rice vinegar, sesame oil, minced garlic, and grated ginger. Whisk continuously until the sugar has completely dissolved and the mixture begins to simmer.
- Thicken the Sauce: Stir in the cornstarch slurry (cornstarch mixed with cold water). Continue to whisk the sauce as it bubbles. Let it simmer for 1-2 minutes until it thickens enough to coat the back of a spoon. Remove from heat.
- Prepare the Chicken: Arrange the chicken thighs in a single layer in the prepared baking dish. Pat them dry with paper towels to ensure the sauce adheres properly. Season lightly with black pepper (salt is likely unnecessary due to the soy sauce).
- Glaze and Bake: Pour approximately half of the thickened teriyaki sauce over the chicken thighs, turning them to coat both sides. Reserve the remaining sauce for serving. Place the dish in the oven and bake for 20 minutes.
- Flip and Baste: After 20 minutes, remove the dish from the oven. Flip the chicken thighs over and baste them with the juices and sauce in the pan. Return to the oven and bake for another 10-15 minutes, or until the internal temperature reaches 165°F (74°C).
- Broil (Optional): For a stickier, slightly charred finish, switch the oven to the broil setting. Broil the chicken for 2-3 minutes, watching closely to prevent the sugar from burning.
- Rest and Serve: Remove the chicken from the oven and let it rest for 5 minutes. Drizzle with the reserved warm teriyaki sauce. Garnish with sesame seeds and sliced green onions before serving.
Expert Cooking Tips
- ✓Use Fresh Ginger: While powdered ginger works in a pinch, fresh grated ginger provides a zesty kick that elevates the dish significantly.
- ✓Don’t Skip the Slurry: The cornstarch slurry is essential for achieving that glossy, restaurant-style thickness. Without it, the sauce will be too watery.
- ✓Internal Temperature: Always cook to temperature, not just time. Chicken thighs are safe at 165°F, but they become even more tender around 175°F due to collagen breakdown.
- ✓Lining the Pan: Sugary sauces can be difficult to scrub off. Using parchment paper or aluminum foil saves significant cleaning time.
Substitutions and Variations
For families with specific dietary needs, this recipe is highly adaptable. To make this dish Gluten-Free, substitute the soy sauce with Tamari or coconut aminos; ensure your cornstarch is certified gluten-free as well. If you are looking to reduce refined sugars, you can replace the brown sugar with honey or maple syrup, though the flavor profile will shift slightly. For a vegetarian option, this exact sauce and baking method works wonderfully with extra-firm tofu (pressed) or even cauliflower steaks.
Common Mistakes to Avoid
The most common mistake with teriyaki chicken is burning the sauce. Because of the high sugar content, the glaze can go from caramelized to burnt very quickly under the broiler. Watch it like a hawk during the final minutes. Another pitfall is overcrowding the pan. If the chicken thighs are touching or overlapping, they will steam instead of roast, leading to soggy meat. Ensure there is space between each piece for proper heat circulation. Finally, using regular soy sauce instead of low-sodium can result in a dish that is inedibly salty; always opt for low-sodium or dilute regular soy sauce with extra water.
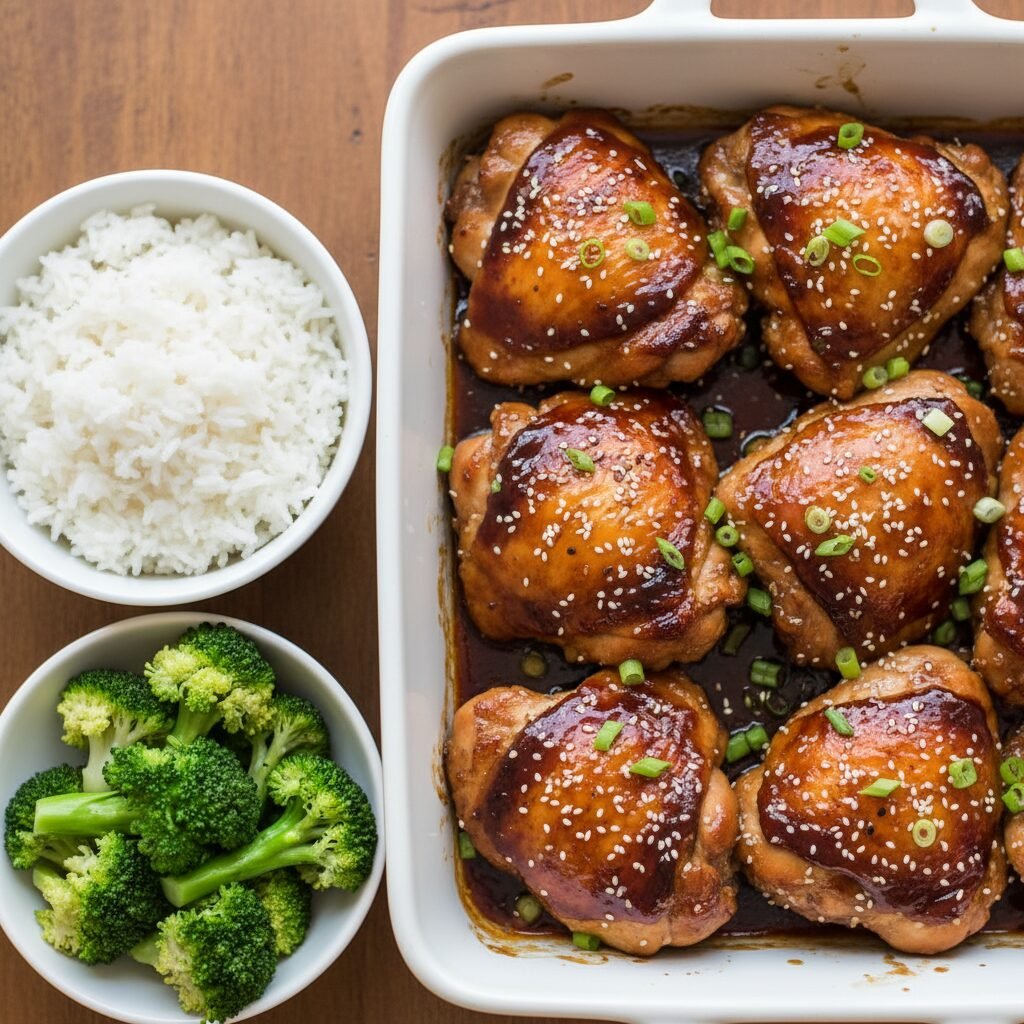
Serving Suggestions
This Easy Baked Teriyaki Chicken is best served over a bed of fluffy, steamed Jasmine or Calrose rice to soak up the extra sauce. For a complete nutritional profile, pair it with steamed broccoli, sautéed snap peas, or stir-fried bok choy. A side of cucumber salad marinated in rice vinegar adds a refreshing crunch that cuts through the richness of the chicken. For a low-carb option, serve the chicken over cauliflower rice or zucchini noodles.
Storage and Reheating Tips
Refrigeration: Store leftovers in an airtight container in the refrigerator for up to 3-4 days. The sauce actually improves in flavor as it sits.
Freezing: You can freeze the cooked chicken in a freezer-safe container for up to 3 months. Thaw overnight in the refrigerator before reheating.
Reheating: Reheat in the microwave with a splash of water to keep the chicken moist, or warm in the oven at 350°F covered with foil until heated through.
Nutrition Facts (Estimated)
| Serving Size | 1 chicken thigh with sauce |
| Calories | 340 kcal |
| Fat | 14g |
| Saturated Fat | 3.5g |
| Unsaturated Fat | 9g |
| Trans Fat | 0g |
| Cholesterol | 135mg |
| Sodium | 890mg |
| Carbohydrates | 22g |
| Fiber | 0.5g |
| Sugar | 18g |
| Protein | 28g |
Frequently Asked Questions
Can I use chicken breasts instead of thighs?
Yes, you can use chicken breasts, but be careful not to overcook them as they dry out faster. Reduce the cooking time by about 5-8 minutes and check the internal temperature frequently.
Is this recipe gluten-free?
As written, it contains soy sauce which usually has wheat. To make it gluten-free, use Tamari or a specific gluten-free soy sauce.
Why is my sauce runny?
The sauce likely didn’t boil long enough after adding the cornstarch, or not enough cornstarch was used. Be sure to bring the sauce to a simmer to activate the thickening agent.
Can I marinate the chicken beforehand?
Absolutely. You can pour the un-thickened sauce over the raw chicken and let it marinate in the fridge for up to 24 hours for deeper flavor penetration. Then, bake as directed.
What is Mirin and do I need it?
Mirin is a sweet Japanese rice wine that adds depth and shine. If you don’t have it, you can substitute it with rice vinegar mixed with a teaspoon of sugar, or dry sherry.
Can I make this in a slow cooker?
Yes. Place chicken and sauce in a slow cooker and cook on Low for 4-5 hours or High for 2-3 hours. Remove chicken, shred or slice, and thicken the sauce in a saucepan before recombining.
Is this recipe kid-friendly?
Yes, it is a favorite among children due to the sweet profile of the sauce. If your kids are sensitive to spice, omit the fresh ginger or reduce the garlic.
How do I get the chicken to look glossy like the photos?
The gloss comes from the sugar and cornstarch in the sauce. Saving half the sauce to pour over the finished chicken, or brushing it on right before serving, ensures that high-gloss finish.
Conclusion
Mastering this Easy Baked Teriyaki Chicken recipe means you always have a secret weapon for busy weeknights. It delivers the comfort of your favorite Japanese-American restaurant with the wholesome benefits of home cooking. The tender chicken, coated in that rich, savory-sweet glaze, is sure to become a requested favorite at your family dinner table. Give this recipe a try tonight, and enjoy a stress-free meal that nourishes both body and soul.