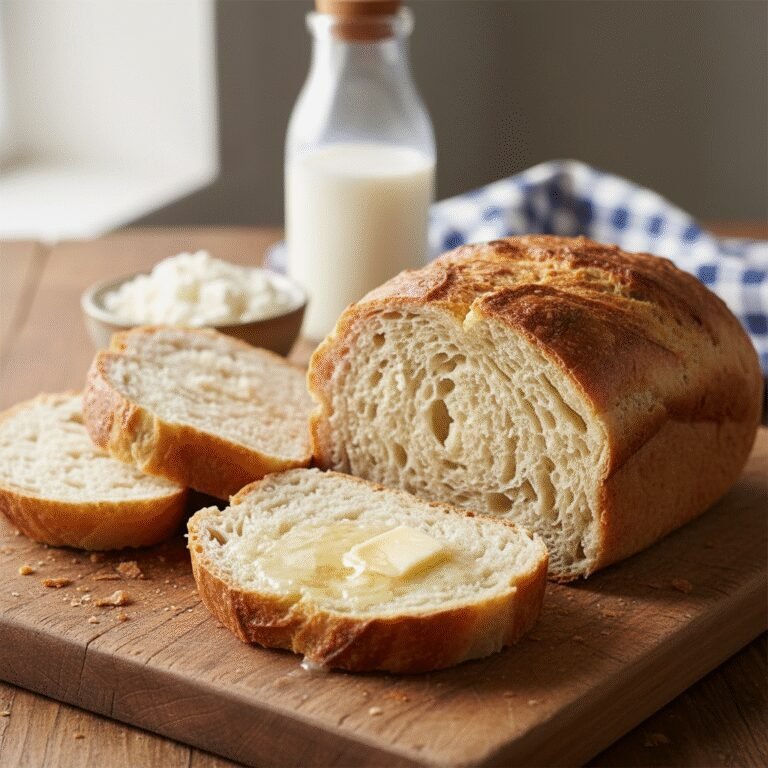
Honey Wheat Bread
There is truly nothing that compares to the aroma of fresh bread wafting through the house. This Honey Wheat Bread strikes the perfect balance—hearty enough to be nutritious but soft enough to win over the pickiest eaters.
25 minutes
35 minutes
3 hours (includes rising time)
2 Loaves (approx. 16 slices each)
Bread
Baking
American
Vegetarian
Hey friends! If there is one recipe that instantly turns a house into a home, it is a fresh loaf of bread baking in the oven. I know, I know—working with yeast can feel a little intimidating if you haven’t done it often. But trust me, this Honey Wheat Bread is the perfect gateway recipe. It is forgiving, reliable, and results in two gorgeous, golden-brown loaves that will make you feel like a professional baker.
As a mom, I am always trying to find that sweet spot between “healthy” and “actually edible” for the kids. Pure whole wheat bread can sometimes be dense, bitter, and a little too “cardboard-like” for little palates. That is where this recipe shines! By using a blend of whole wheat and all-purpose flour, plus a generous helping of sweet honey and rich butter, we get a loaf that is fluffy, tender, and moist.
Imagine slicing into a warm piece, slathering it with salted butter, and watching it melt into the soft crumb. Whether you are making school lunches, grilled cheese for dinner, or just want the best morning toast of your life, this bread is about to become a staple in your kitchen rotation. Let’s get baking!
History & Origins
Bread has been the staff of life for thousands of years, with evidence of wheat domestication dating back to 9000 BC in the Fertile Crescent. However, the specific style of “Honey Wheat” is a more modern American evolution. Historically, bread was made with stone-ground whole grains, which resulted in darker, denser loaves.
With the invention of industrial steel roller milling in the late 19th century, white flour became cheap and accessible, leading to the fluffy white bread boom of the 20th century. While delicious, nutritional value was lost. In the mid-to-late 20th century, a health-conscious resurgence brought whole grains back into the spotlight.
The “Honey Wheat” variety emerged as a bridge between the two worlds. It combined the nutritional profile of the graham or whole wheat movements with the softness and sweetness that the American palate had grown to love. Today, it remains one of the most popular types of bread in the US, marrying the rustic history of grain with the comfort of modern baking.
Why This Recipe Works
This recipe works because it respects the science of gluten and hydration. Whole wheat flour contains the bran and germ of the wheat kernel. While nutritious, these sharp little bits can actually cut through gluten strands, which is why 100% whole wheat bread often turns out heavy and dense. By mixing in All-Purpose Flour (or Bread Flour), we provide enough strong gluten protein to create a high rise and a fluffy, airy texture.
Secondly, the Honey does more than just sweeten the loaf. Honey is hygroscopic, meaning it attracts and retains moisture. This ensures your bread stays soft for days rather than drying out immediately. It also provides readily available sugar for the yeast to feast on, ensuring a vigorous rise.
Finally, the addition of Milk and Butter enriches the dough. Fat coats the flour proteins, inhibiting gluten formation slightly—just enough to create a tender, shreddable crumb rather than a chewy, tough baguette-style texture. It is the perfect chemistry for sandwich bread.
Why You’ll Love This Recipe
- ✓Perfectly soft and fluffy texture that kids love
- ✓Uses a blend of flours for nutrition without the density
- ✓Naturally sweetened with honey—no refined white sugar
- ✓Makes two large loaves (one for now, one for the freezer!)
- ✓Better taste and ingredients than the bakery aisle
- ✓Your house will smell absolutely amazing
Equipment You’ll Need
- ✓Stand Mixer with Dough Hook (or large bowl for hand kneading)
- ✓Two 9×5 inch Loaf Pans
- ✓Instant Read Thermometer
- ✓Wire Cooling Rack
- ✓Measuring Cups and Spoons
- ✓Clean Kitchen Towel or Plastic Wrap
Ingredients
- ✓2 cups warm water (105°F – 110°F)
- ✓1 tablespoon active dry yeast (or 1.5 packets)
- ✓1/3 cup honey (local is best!)
- ✓1/3 cup warm milk
- ✓1/4 cup unsalted butter, melted and slightly cooled
- ✓1 tablespoon salt
- ✓3 cups whole wheat flour
- ✓3 to 4 cups all-purpose flour (can substitute bread flour)
Instructions
- Activate the Yeast: In the bowl of your stand mixer, combine the warm water, warm milk, honey, and yeast. Whisk gently and let it sit for 5-10 minutes until the mixture is foamy and bubbly. This proves your yeast is alive!
- Mix the Base: Add the melted butter, salt, and the 3 cups of whole wheat flour to the yeast mixture. Using the dough hook (or a sturdy wooden spoon), mix on low speed until combined.
- Add White Flour: With the mixer running on low, gradually add the all-purpose flour, one cup at a time. You may not need all 4 cups. Stop adding flour when the dough pulls away from the sides of the bowl but is still slightly tacky to the touch. It should not be sticky, but it shouldn’t be dry either.
- Knead: Knead on low-medium speed for 6-8 minutes (or 10 minutes by hand on a floured surface) until the dough is smooth and elastic. You can test it by pressing a finger into the dough; it should spring back.
- First Rise: Lightly grease a large bowl with oil or cooking spray. Place the dough inside, turning it once to coat the top in oil. Cover with a clean kitchen towel or plastic wrap. Place in a warm, draft-free spot and let rise for about 1 hour, or until doubled in size.
- Shape the Loaves: Punch the dough down gently to release air bubbles. Divide the dough into two equal halves. On a lightly floured surface, press each half into a rectangle roughly the width of your loaf pan. Roll the dough up tightly, pinching the seams closed to create a log.
- Second Rise: Place the logs seam-side down into greased 9×5 inch loaf pans. Cover loosely and let rise again for 30-45 minutes. The dough should rise about 1 inch above the rim of the pan.
- Bake: Preheat your oven to 375°F (190°C) during the final rise. Bake the loaves for 30-35 minutes. The tops should be golden brown, and the loaves should sound hollow when tapped on the bottom. An internal thermometer should read 190°F.
- Cool: Remove from the oven. Let the bread cool in the pans for 10 minutes, then turn them out onto a wire rack to cool completely before slicing. This is crucial for the texture!
Expert Cooking Tips
- ✓Water Temperature Matters: If your water is too hot (over 120°F), it will kill the yeast. If it’s too cold, the yeast won’t wake up. Aim for “bath water” temperature.
- ✓Measure Flour Correctly: Don’t scoop the flour directly with the measuring cup, as this packs it down and results in dry bread. Instead, spoon and level the flour into the cup.
- ✓Don’t Rush the Cool Down: I know it’s tempting to cut into hot bread, but the loaf is still cooking internally while it cools. Slicing too early releases steam and can make the bread gummy.
- ✓Tent with Foil: If the tops of your loaves are browning too quickly but the inside isn’t done, loosely tent a piece of aluminum foil over the pans for the last 10 minutes of baking.
Substitutions and Variations
Baking is a science, but there is a little room for flexibility here! If you don’t have honey, you can use maple syrup or molasses for a deeper flavor (though molasses will darken the bread significantly). For a dairy-free version, simply swap the butter for melted coconut oil or vegetable oil, and use almond milk or water instead of dairy milk.
regarding the flour: You can swap the all-purpose flour for Bread Flour. Bread flour has a higher protein content, which will give you an even chewier, higher-rising loaf, which is fantastic for sandwiches.
Common Mistakes to Avoid
The most common mistake people make with homemade bread is adding too much flour. During the kneading process, the dough might look sticky, so you keep adding flour. Stop! The dough should be tacky (like the sticky part of a Post-it note). If you add too much flour, you will end up with a heavy, dry brick instead of a fluffy loaf. Trust the kneading process to develop the gluten and reduce the stickiness.
Another mistake is under-kneading. If you don’t knead long enough, the gluten structure won’t be strong enough to hold the air bubbles created by the yeast, resulting in a flat, dense loaf.
Serving Suggestions
This bread is incredibly versatile! Here are a few of my favorite ways to serve it:
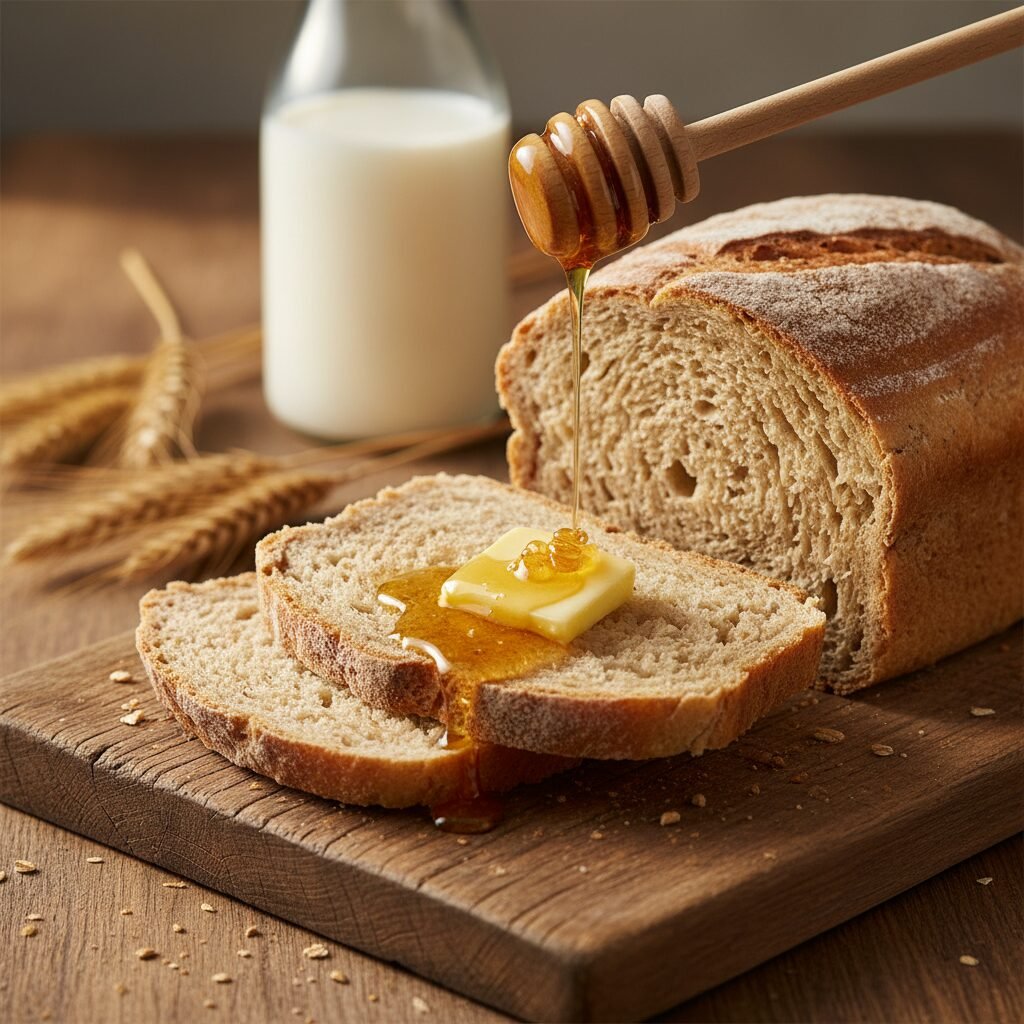
- The Classic: Toasted with salted butter and a drizzle of extra honey.
- Lunchbox Hero: It makes the absolute best PB&J or turkey and cheese sandwiches.
- Breakfast: Use stale slices for an incredible French Toast—the wheat adds a lovely depth of flavor.
- Soup Side: Serve a thick slice alongside a bowl of tomato soup or chili for dipping.
Storage and Reheating Tips
Since this bread has no preservatives, it won’t last as long as store-bought bread on the counter. Store it in an airtight bag or bread box at room temperature for 3-4 days.
Freezing is highly recommended! This bread freezes beautifully. Slice the cooled loaf, wrap it tightly in plastic wrap, then place it in a heavy-duty freezer bag. It will stay fresh for up to 3 months. You can pull out individual slices and pop them straight into the toaster!
Nutrition Facts (Estimated)
| Serving Size | 1 Slice |
| Calories | 165 |
| Fat | 2.5g |
| Saturated Fat | 1.5g |
| Unsaturated Fat | 1g |
| Trans Fat | 0g |
| Cholesterol | 5mg |
| Sodium | 180mg |
| Carbohydrates | 30g |
| Fiber | 2g |
| Sugar | 4g |
| Protein | 5g |
Frequently Asked Questions
Why did my bread crumble when I sliced it?
This usually happens if you sliced the bread while it was still too hot. The starches need time to set as the bread cools. It could also mean you added too much flour during the kneading process, making the hydration too low.
Can I make this with 100% whole wheat flour?
You can, but be warned that the texture will be significantly denser and heavier. If you want to use 100% whole wheat, I recommend adding vital wheat gluten (about 1 tablespoon per cup of flour) to help with the rise and texture.
Can I use instant yeast instead of active dry?
Yes! If using instant yeast, you can skip the “proofing” step (mixing yeast with water/sugar) and just add the yeast directly to the dry ingredients. However, the rise times might be slightly faster.
My dough isn’t rising. What happened?
Usually, this means the yeast is dead (expired) or the liquid was too hot and killed it. It could also be that your kitchen is too cold. Try moving the bowl to a warmer spot, like inside the microwave (turned off) with a cup of hot water next to it.
Can I halve the recipe to make just one loaf?
Absolutely. Just divide all ingredients by two. The rising and baking times remain roughly the same, though you should keep an eye on it.
Why does my bread smell like alcohol?
This means the dough over-proofed (rose for too long). The yeast produced too much waste product (alcohol). The bread is still safe to eat but might have a slightly sour or yeasty taste.
Do I need a stand mixer for this?
No, you don’t need one, but it makes life easier! You can absolutely knead by hand. It takes a bit of elbow grease (about 10-12 minutes of kneading), but it is a great workout and very therapeutic.
Can I add seeds or nuts?
Yes! Sunflower seeds, oats, or flax seeds make great additions. Add them in during the last minute of kneading so they get distributed evenly without cutting the gluten strands too early.
Conclusion
Making your own Honey Wheat Bread is one of those simple kitchen accomplishments that feels surprisingly huge. There is a deep satisfaction in turning basic pantry staples into a warm, nourishing loaf that feeds your family. Plus, you know exactly what is going into their bodies—no unpronounceable chemicals, just flour, honey, yeast, and love.
I hope this recipe brings a little extra warmth to your kitchen this week. Don’t be afraid to get your hands messy and enjoy the process. Once you smell that honey-yeast aroma filling your home, you will never want to go back to the plastic-wrapped stuff again. Happy baking!