32 Delicious Cheesecake Recipes To Make Right Now
If there is one dessert that screams ‘love language,’ it is definitely cheesecake. Whether you are hosting a fancy dinner party or just craving a sweet treat after the kids are in bed, this master recipe serves as the perfect canvas for over 30 delicious variations that will have everyone asking for seconds!
30 minutes
1 hour 15 minutes
8 hours (includes cooling)
12 servings
Dessert
Baking
American
Vegetarian
Welcome to the absolute dreamiest corner of the internet, where we believe that cream cheese is its own food group and graham cracker crusts are the foundation of happiness! If you have been endlessly scrolling through Pinterest looking for that one perfect cheesecake recipe that won’t crack, sink, or turn out grainy, you have officially landed in the right place. Today, we aren’t just giving you one recipe; we are handing you the keys to the kingdom with our Ultimate Master Cheesecake Base plus inspiration for 31 other incredible flavor twists to keep your baking schedule full all year long.
Let’s be real for a second—cheesecake can be intimidating. We have all heard the horror stories of water baths gone wrong or tops that look like the Grand Canyon. But here is the secret: it is actually one of the easiest desserts to master once you know the science behind it. This post is dedicated to all the busy moms and home bakers who want bakery-quality results without the culinary school degree. We are talking about that ultra-creamy, dense-yet-fluffy texture that melts in your mouth.
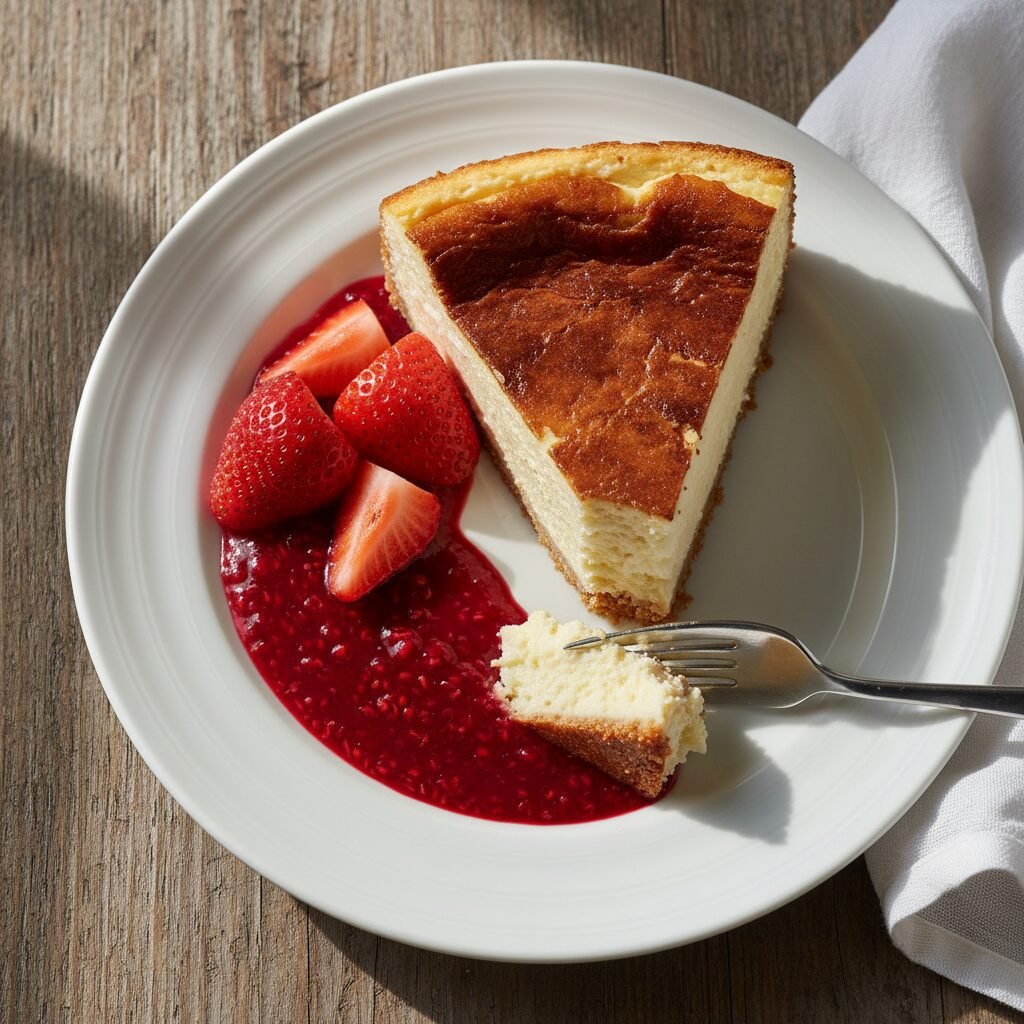
While the recipe card below details the Classic New York Style Cheesecake (which is Recipe #1 and the absolute gold standard), this post is your launchpad for 32 total variations. Think White Chocolate Raspberry, Pumpkin Spice for fall, Lemon Meringue for spring, and even decadent Triple Chocolate. By mastering this one base, you can literally make every single one of them. So, tie on that apron, grab your springform pan, and let’s get baking!
History & Origins
Believe it or not, cheesecake has been around way longer than the classic New York diners we associate it with today. We are talking ancient history! The earliest known cheesecake dates back to Ancient Greece, around 2000 B.C. It was considered a great source of energy, and there is even evidence that it was served to athletes during the first Olympic Games in 776 B.C. Back then, it was a simple mixture of flour, wheat, honey, and cheese—a far cry from the decadent dessert we know now, but the spirit was there.
When the Romans conquered Greece, they stole the recipe (as they did with many things) and added crushed cheese and eggs, calling it libum. As the Roman Empire expanded, the recipe traveled across Europe, evolving with each culture it touched. But the cheesecake we know and love today? That is thanks to an accidental invention in New York in 1872. A dairyman named William Lawrence was trying to recreate a French cheese called Neufchâtel but accidentally made a richer, creamier “unripened cheese” instead. Voila! American cream cheese was born.
Fast forward to the 1900s, and the iconic New York Style Cheesecake was solidified, famously attributed to Arnold Reuben (yes, the sandwich guy). He created the dense, rich, cream-cheese-heavy version that became the standard. Today, whether it is Japanese cotton cheesecake, Italian ricotta cheesecake, or the Philly style, it all stems from centuries of cheese-loving history.
Why This Recipe Works
This recipe works because it respects the delicate nature of the ingredients. The key to that velvety, crack-free texture lies in temperature control and emulsification. By ensuring your cream cheese, eggs, and sour cream are all at true room temperature before you start, you allow them to blend seamlessly without overbeating. Overbeating introduces too much air, which causes the cheesecake to puff up like a soufflé in the oven and then collapse and crack as it cools.
We also utilize a water bath (bain-marie). I know, I know—it sounds fussy! But trust me, it is non-negotiable for that premium texture. The water surrounds the pan and generates gentle steam, keeping the oven air humid and ensuring the cheesecake cooks slowly and evenly. Without it, the edges would overcook and curdle before the center is set. The addition of sour cream and a touch of lemon juice cuts through the heaviness of the cream cheese, providing that signature tang that balances the sugar. This base is sturdy enough to hold toppings but creamy enough to stand alone.
Why You’ll Love This Recipe
- ✓Creates a perfectly smooth, crack-free surface every time
- ✓Rich, dense, and creamy texture typical of NY Style
- ✓Versatile base for 30+ flavor variations
- ✓Uses simple pantry staples you likely have right now
- ✓Includes a foolproof water bath method explanation
- ✓Freezes beautifully for make-ahead meal prep
Equipment You’ll Need
- ✓9-inch Springform Pan
- ✓Large Roasting Pan (for water bath)
- ✓Electric Stand Mixer or Hand Mixer
- ✓Heavy-duty Aluminum Foil
- ✓Rubber Spatula
- ✓Measuring Cups and Spoons
- ✓Parchment Paper
Ingredients
- ✓For the Crust:
- ✓2 cups graham cracker crumbs (about 14-16 full sheets)
- ✓1/2 cup unsalted butter, melted
- ✓1/4 cup granulated sugar
- ✓1/4 teaspoon salt
- ✓For the Filling:
- ✓32 oz (4 blocks) full-fat cream cheese, softened to room temperature
- ✓1 1/4 cups granulated sugar
- ✓1 cup full-fat sour cream, room temperature
- ✓2 teaspoons pure vanilla extract
- ✓2 teaspoons fresh lemon juice
- ✓4 large eggs, room temperature
Instructions
- Prep the Oven and Pan: Preheat your oven to 350°F (175°C). Line the bottom of a 9-inch springform pan with parchment paper and grease the sides. Wrap the outside of the pan with 2-3 layers of heavy-duty aluminum foil to ensure no water seeps in during the water bath.
- Make the Crust: In a medium bowl, mix the graham cracker crumbs, melted butter, sugar, and salt until the mixture resembles wet sand. Press this firmly into the bottom and slightly up the sides of your prepared pan. Use the bottom of a measuring cup to pack it down tight. Bake for 10 minutes, then set aside to cool slightly. Reduce oven temperature to 325°F (160°C).
- Beat the Cheese: In a large bowl using a handheld or stand mixer fitted with the paddle attachment, beat the softened cream cheese and sugar on medium-low speed until completely smooth and creamy (about 2-3 minutes). Scrape down the bowl ensuring no lumps remain.
- Add Flavors: Add the sour cream, vanilla extract, and lemon juice. Beat on low speed just until combined. Do not overmix!
- Add Eggs: Add the eggs one at a time, beating on low speed after each addition just until the yolk disappears. Stop the mixer as soon as the last egg is incorporated. Scrape the bowl one last time.
- Prepare Water Bath: Boil a kettle of water. Place your foil-wrapped springform pan inside a large roasting pan. Pour the cheesecake batter over the crust and smooth the top with a spatula.
- Bake: Carefully place the roasting pan into the oven. Pour the boiling water into the roasting pan until it reaches halfway up the side of the springform pan. Bake at 325°F (160°C) for 60-75 minutes. The edges should be set, but the center should still wobble slightly like Jell-O.
- Cooling Process: Turn off the oven and crack the door open slightly (you can prop it with a wooden spoon). Let the cheesecake cool inside the oven for 1 hour. This slow cooling prevents cracks.
- Chill: Remove from the oven and water bath. Run a thin knife around the edge to release it from the pan. Let it cool completely on a wire rack, then refrigerate for at least 6 hours, preferably overnight, before slicing.
Expert Cooking Tips
- ✓Room Temperature is King: If your cream cheese is cold, you will get lumps. If you beat it too hard to get rid of lumps, you add air, which leads to cracks. Let ingredients sit out for 2 hours.
- ✓Don’t Overmix: Once the eggs are added, keep that mixer on the lowest speed. You want to blend, not whip.
- ✓The Wobble Test: Don’t wait for the center to look firm in the oven. If it looks firm, it is overcooked. It should jiggle slightly in the middle.
- ✓Grease the Sides: Even with a non-stick pan, greasing the sides helps the cake pull away from the pan as it shrinks slightly during cooling, preventing tension cracks.
- ✓Slicing Hack: For those perfect, clean bakery slices, dip your knife in hot water and wipe it dry between every single slice.
Substitutions and Variations
If you are looking to switch things up or have dietary restrictions, this recipe is quite adaptable. For a Gluten-Free version, simply swap the graham crackers for gluten-free digestive biscuits or a nut-based crust (almond flour and butter works wonders). If you don’t have sour cream, full-fat Greek yogurt is an excellent 1:1 substitute that adds a bit more protein. For the sugar, you can use monk fruit sweetener for a lower-carb option, though the texture may be slightly less dense. Do not substitute low-fat cream cheese; the stabilizers in low-fat versions will ruin the texture.
Common Mistakes to Avoid
The biggest mistake people make is opening the oven door too often. Every time you peek, the temperature drops and the humidity escapes, leading to a sunken center. Another common issue is using cold eggs. Cold eggs don’t emulsify well with room-temp cheese, leading to a batter that looks curdled. Lastly, skipping the water bath is a gamble I don’t recommend taking. It is the insurance policy for your hard work!
Serving Suggestions
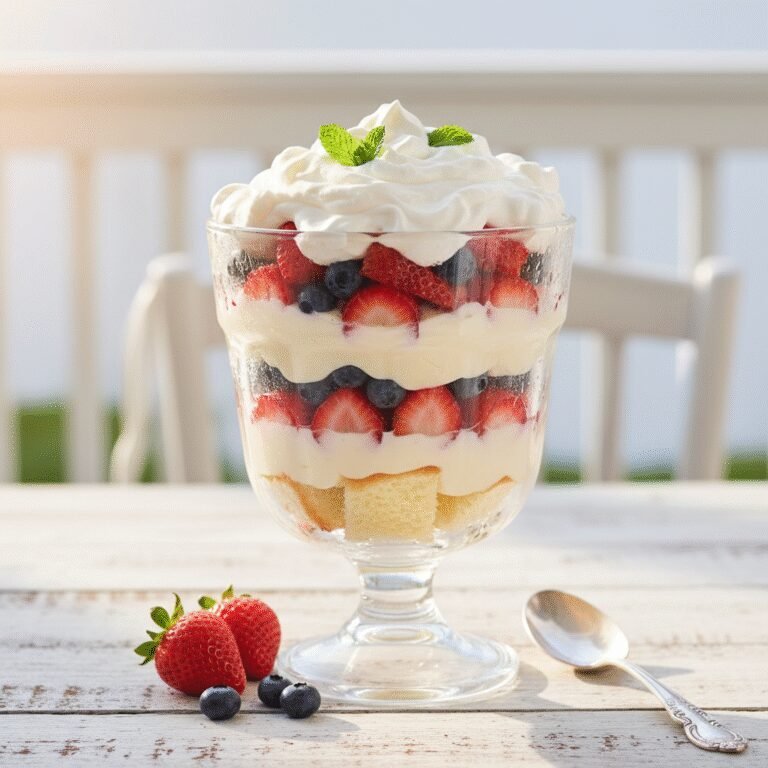
This classic cheesecake is a blank canvas! Serve it plain, or top it with fresh berries and whipped cream. For a decadent twist, drizzle with warm salted caramel or chocolate ganache. If you are making this for a holiday, a cranberry compote looks stunning on top. For the ’32 Recipes’ concept, consider swirling in strawberry puree before baking, mixing crushed Oreos into the batter, or adding a layer of pecan pie filling at the bottom!
Storage and Reheating Tips
Cheesecake is the ultimate make-ahead dessert. It can be stored in the refrigerator, loosely covered with foil or plastic wrap, for up to 5 days. For longer storage, freeze it! Wrap the cooled cheesecake (whole or slices) in plastic wrap, then a layer of foil. It will keep in the freezer for up to 3 months. Thaw overnight in the fridge before serving.
Nutrition Facts (Estimated)
| Serving Size | 1 slice |
| Calories | 450 kcal |
| Fat | 34g |
| Saturated Fat | 19g |
| Unsaturated Fat | 12g |
| Trans Fat | 0g |
| Cholesterol | 145mg |
| Sodium | 320mg |
| Carbohydrates | 36g |
| Fiber | 1g |
| Sugar | 28g |
| Protein | 8g |
Frequently Asked Questions
Why did my cheesecake crack?
Cracks are usually caused by overmixing the batter (adding too much air), overbaking, or cooling it too quickly. The slow cool-down method in the oven helps prevent this.
Can I make this without a water bath?
Technically yes, but the texture will be different. It will be denser, drier, and more likely to crack and brown on top. The water bath is highly recommended for that creamy consistency.
How do I know when it is done?
Gently shake the pan. The outer 2-3 inches should look set and puffy, while the center should wobble slightly like gelatin. It will firm up as it cools.
Can I use low-fat cream cheese?
I strongly advise against it. Low-fat cream cheese has higher water content and different stabilizers that can prevent the cheesecake from setting properly.
How do I make the 31 other variations mentioned?
It is easy! For fruit flavors, swirl 1/2 cup of fruit reduction into the batter before baking. For chocolate, add 8oz melted cooled chocolate to the batter. For candy bars, fold in chopped pieces.
My cheesecake sank in the middle, is it ruined?
Not at all! It will still taste delicious. A sunken middle is usually just a sign of too much air incorporated during mixing. Just fill the crater with whipped cream or fruit topping!
Can I make this in a 10-inch pan?
Yes, but the cheesecake will be thinner and will require less baking time. Start checking it around the 50-minute mark.
Do I need to blind bake the crust?
Yes, pre-baking the crust for 10 minutes ensures it stays crisp and doesn’t get soggy under the wet batter.
Conclusion
There you have it—the only cheesecake recipe you will ever need, plus the know-how to turn it into 32 different masterpieces! Whether you stick to the classic New York style or venture into territory like Key Lime, Salted Caramel, or even Red Velvet, the principles remain the same. Baking is all about love and patience, and nothing rewards patience quite like that first bite of cool, creamy cheesecake. So go ahead, impress your friends, spoil your kids, and treat yourself. You deserve it! Happy baking!